How to Seamlessly Integrate your Waitlist with Discord
To enhance your engagement with potential users and ensure you're instantly informed about new sign-ups, integrate our Discord automations directly from your Waitlist dashboard. This guide provides a step-by-step approach to set up notifications in your preferred Discord channels every time a new user registers. Stay connected and responsive without the hassle of manual checks.
Steps to Activate Real-time Notifications
- Navigate to the "Automations" tab on your Dashboard.
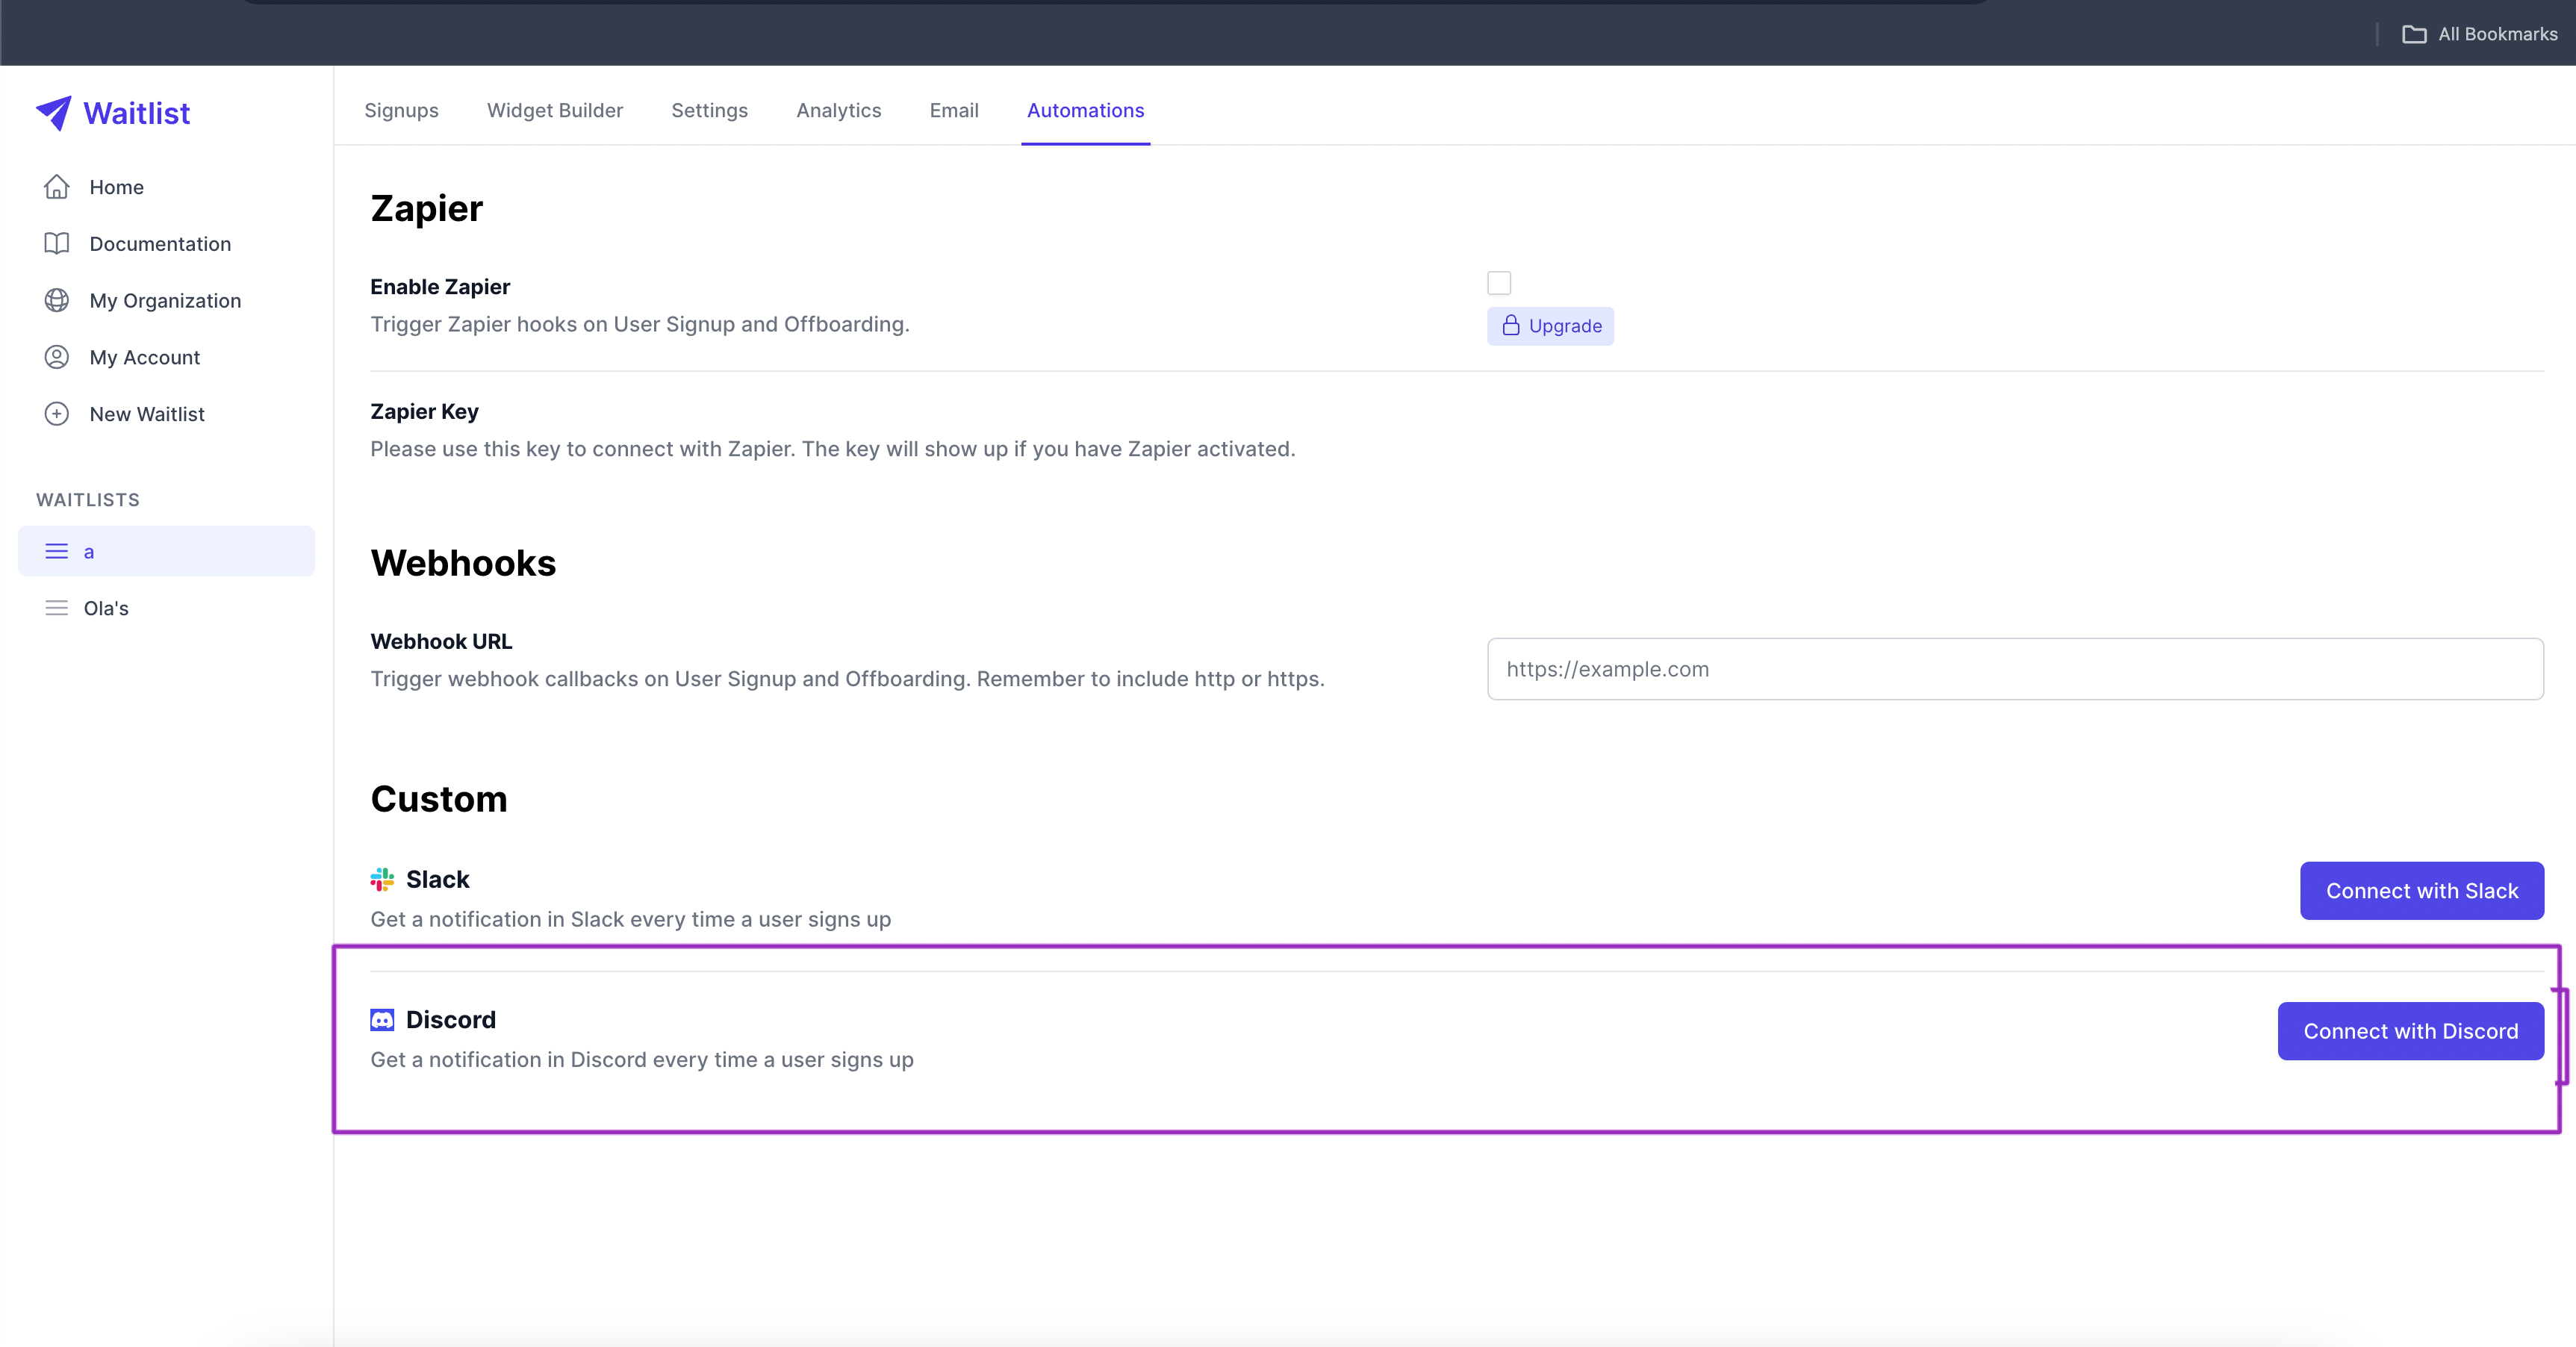
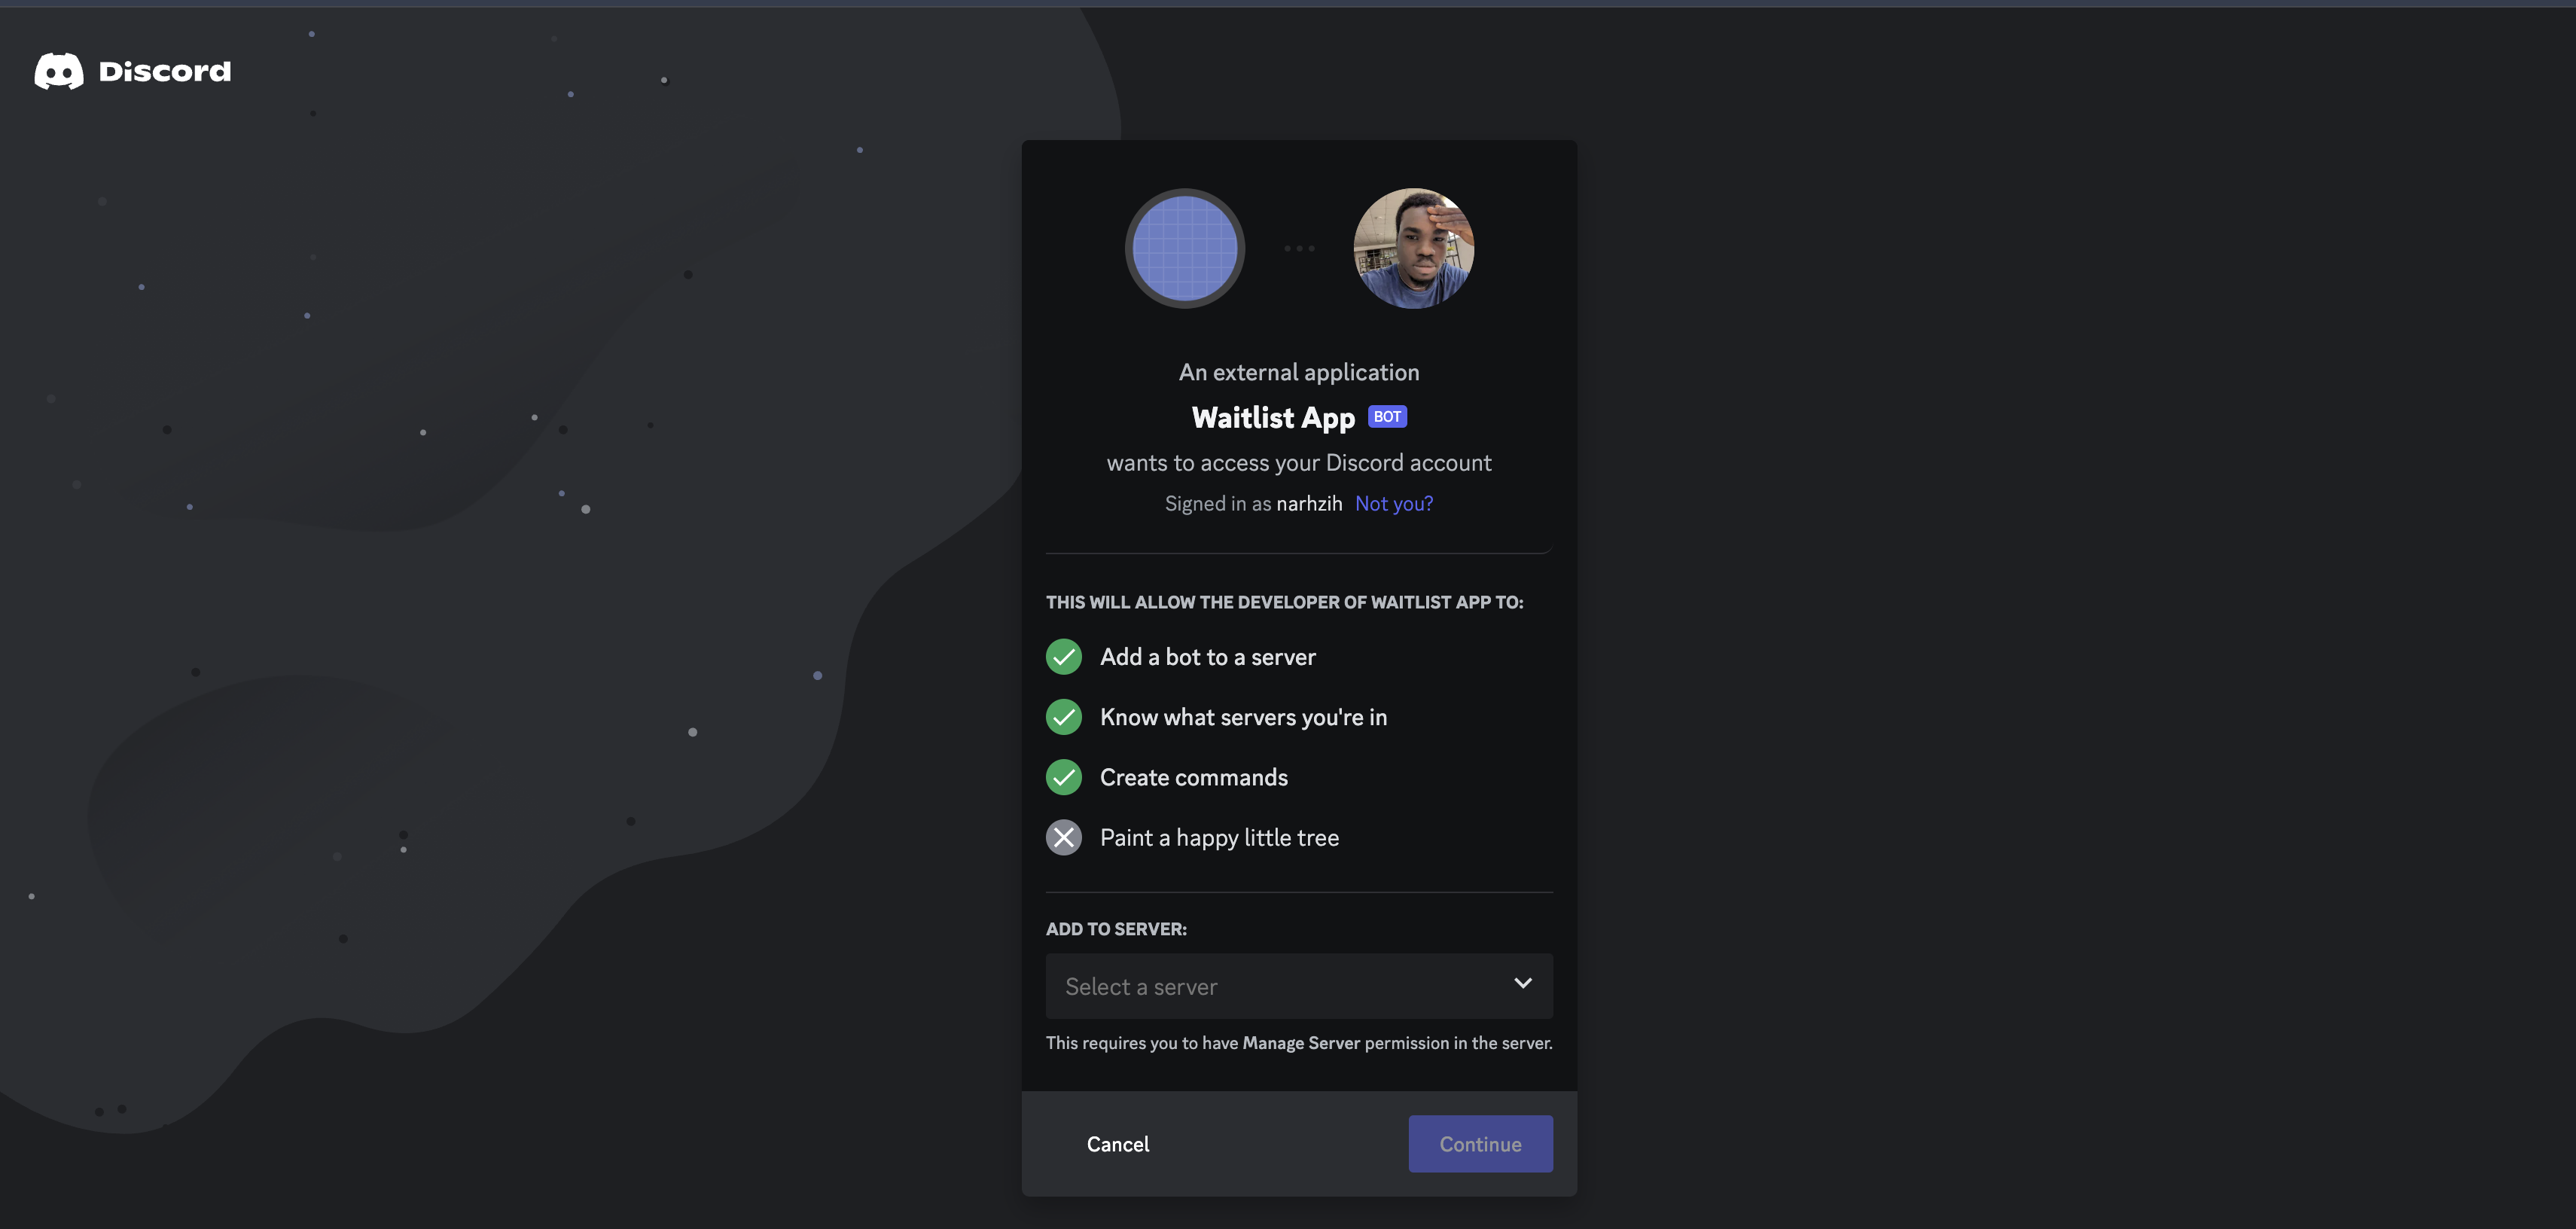
- Click on "Connect with Discord". A new window will open where you can complete the Discord OAuth process and select your Server.
- Once the OAuth process is completed, you'll be redirected to the Waitlist dashboard and it will open a "Connect with Discord" panel. Here, you can select which Discord channel within your Server/Guild you want your notifications to be sent to.
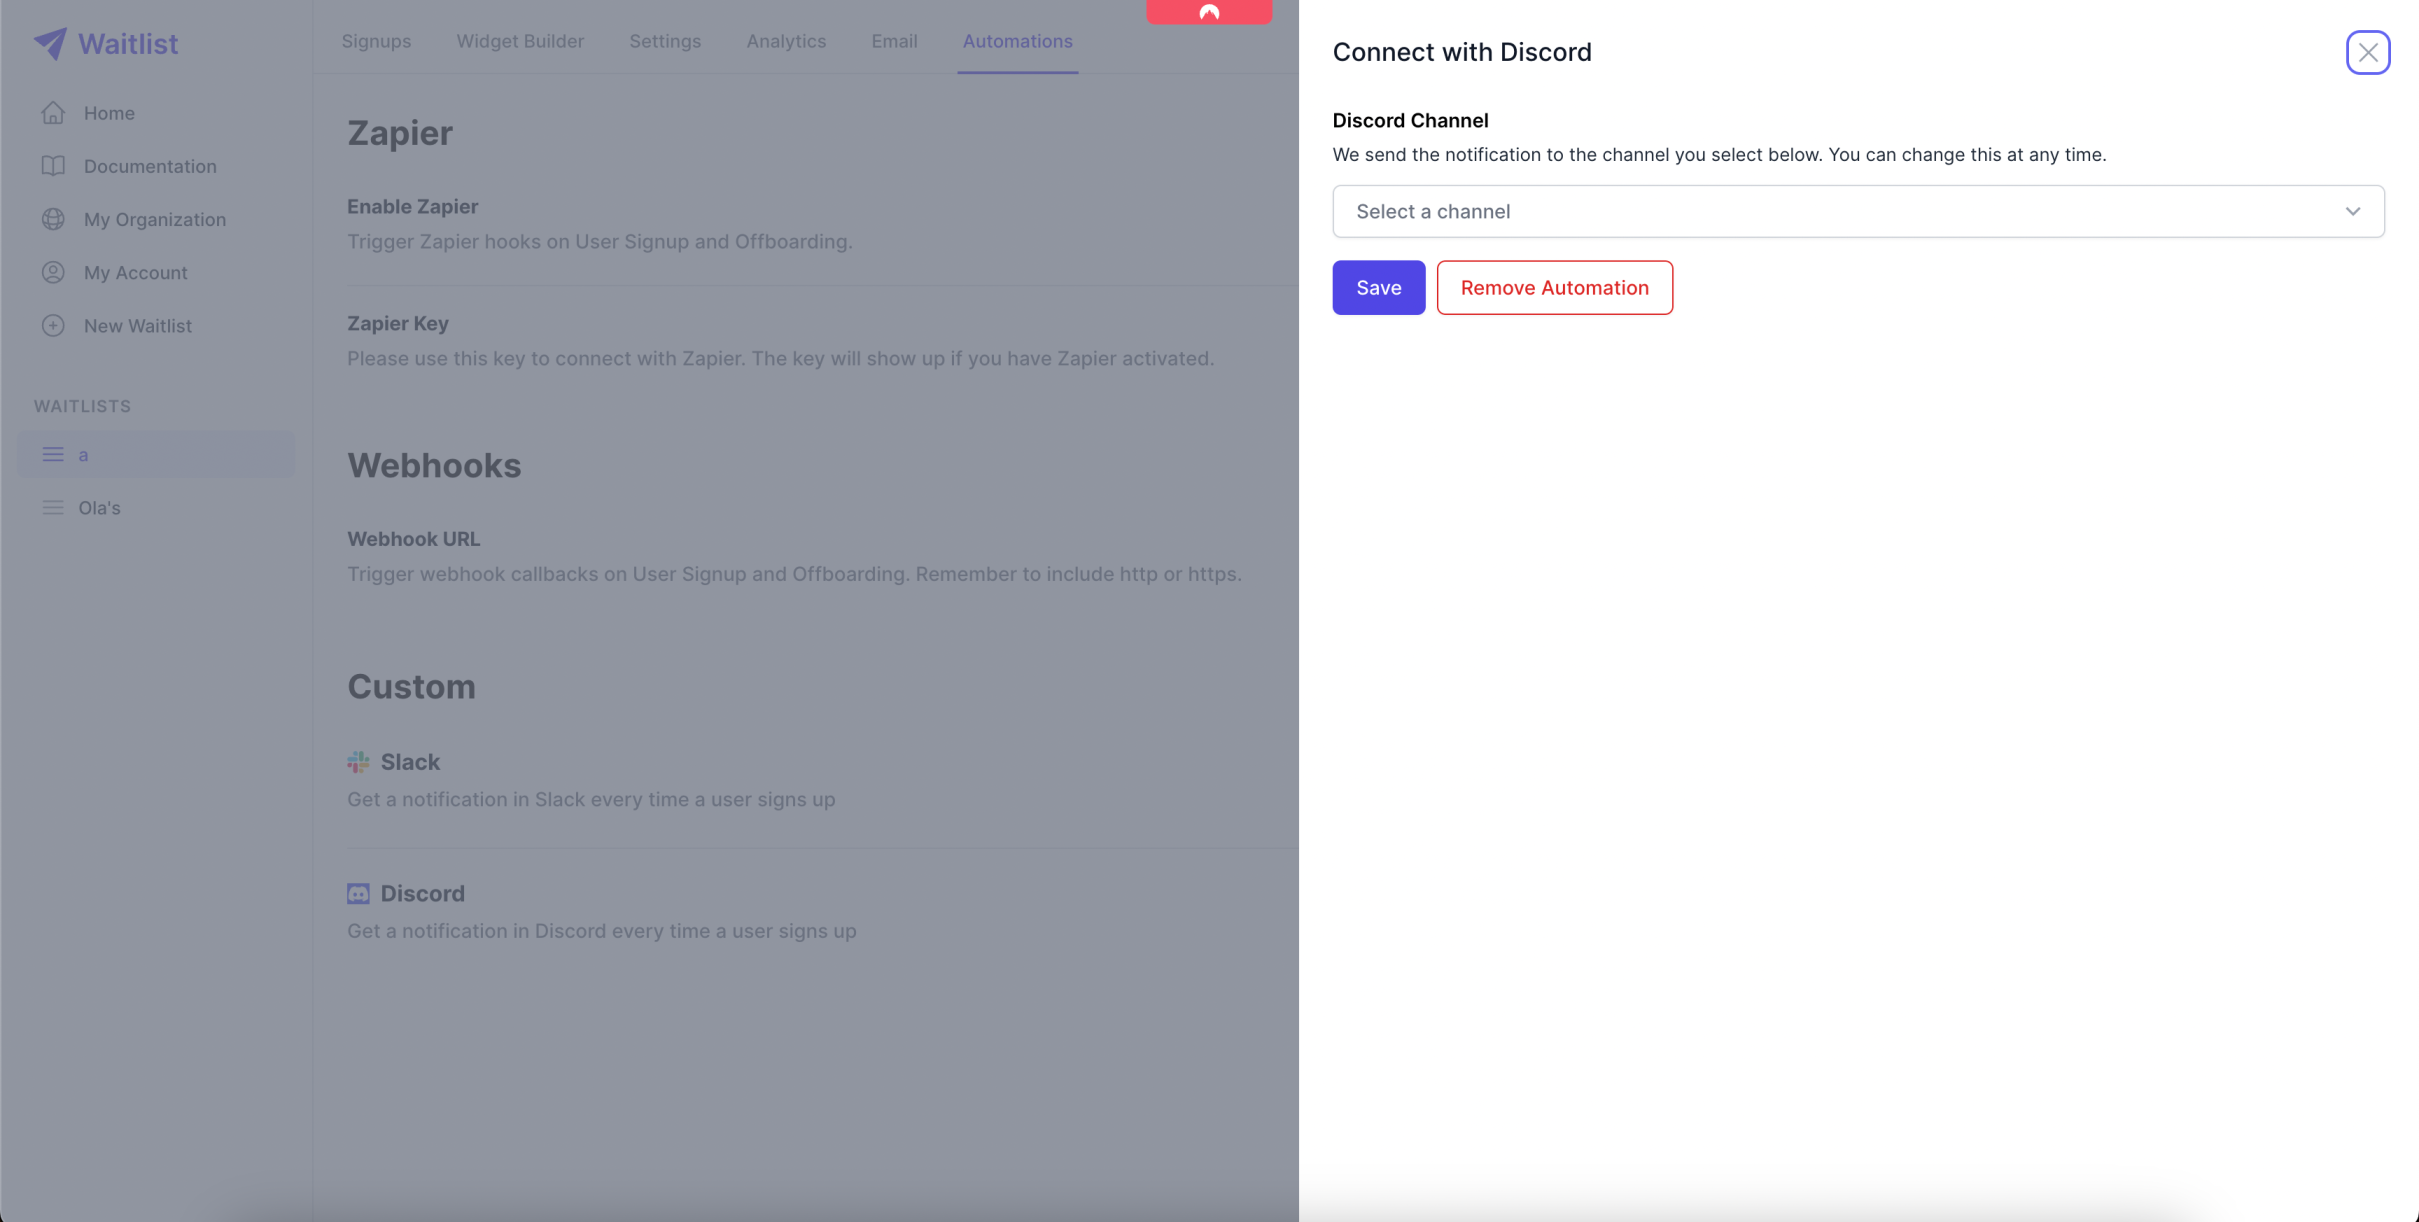
- Select a channel and click "Save".
- Your selected Discord channel will now receive a notification every time a user signs up.
Please note that any request to Discord will timeout if it cannot establish a connection with Discord in 30 seconds, or if it does not receive a response from Discord in 90 seconds.
Information Received
When a new user signs up we send a small JSON object containing all their information that is useful to you. An example of this is:
{
    'amount_referred': 0,
    'answers': [],
    'captcha_passed': False,
    'created_at': '2023-12-30_1234-54',
    'email': '[email protected]',
    'first_name': 'John',
    'is_spam': False,
    'last_name': 'Doe',
    'metadata': None,
    'phone': None,
    'priority': 100,
    'referral_link': 'https://getwaitlist.com/waitlist/1000?ref_id=B5QHA8JSO',
    'referral_token': 'B5QHA8JSO',
    'referred_by_signup_token': 'H1LXL8ILOM',
    'referred_by_signup_email': 'example2@example.com',
    'uuid': 'c34717fa-25f0-4204-8ae9-7958be6047e0',
    'verified': False,
    'waitlist_id': 1000
}
Customizing Your Notification Experience
Editing a Discord Channel
To ensure your notifications are always directed to the right place, easily edit the designated Discord channel:
- Navigate to the "Automations" tab on your Dashboard.
- Click on "Edit Automation".
- Select a new Discord channel from the dropdown.
Pause the Automation
If you need a break from notifications or want to halt user sign-up alerts temporarily, you can pause the automation:
- Navigate to the "Automations" tab on your Dashboard.
- Click on "Edit Automation".
- Click "Remove Automation".
- No new notifications will be sent to your Discord channel now. It will be paused until you re-enable it.
Disconnect from Discord
For a complete disconnection from your Discord Server, follow these steps:
- Navigate to the "Automations" tab on your Dashboard.
- Click "Disconnect Discord"
Note: This action disconnects all Discord channels for your entire Organization, not just for that one Waitlist. If you want to disable Discord notifications for one specific Waitlist, refer to the "Pause the automation" section above.
Leveraging Discord Integration for Enhanced Engagement
Incorporating Discord with your Waitlist offers more than just convenience. It's a strategy to keep your team alert and responsive to new user interests. By receiving real-time updates, you can quickly engage with new sign-ups, fostering a sense of community and immediacy that modern users appreciate. Additionally, this integration helps in maintaining an organized and efficient workflow, as team members can allocate resources and attention based on real-time data.
Remember, engaging with your audience promptly can significantly boost your relationship with them, leading to higher satisfaction and potentially better conversion rates. Utilize this seamless integration to keep your team informed, engaged, and ready to welcome new users right as they express interest in your offering.