Integrate a Waitlist into your React Website
The Waitlist Widget involves an inline <script> that has to be sourced and executed. Vanilla React makes it difficult to execute scripts, so we will need a separate library to get the job done. We'll use React Helmet, which allows us to execute scripts inside React renders.
What is React Helmet?
React Helmet is a reusable React component that manages changes to the document head. It is commonly used for managing meta tags, link tags, and scripts in a React application. By using React Helmet, we can dynamically add or modify elements in the head of our HTML document from within our React components.
Usually, embedding scripts directly in a React application can be challenging due to React's rendering lifecycle. React Helmet simplifies this process by providing an easy way to inject scripts and stylesheets into the head of your document.
Integration Guide
Integration Guide (Next Page Router)
-
Install React Helmet: Install React Helmet with
npm install react-helmet. You'll want to do this either globally (-g) or in your project's directory (i.e. navigate to where you keeppackage.jsonand then run the command). -
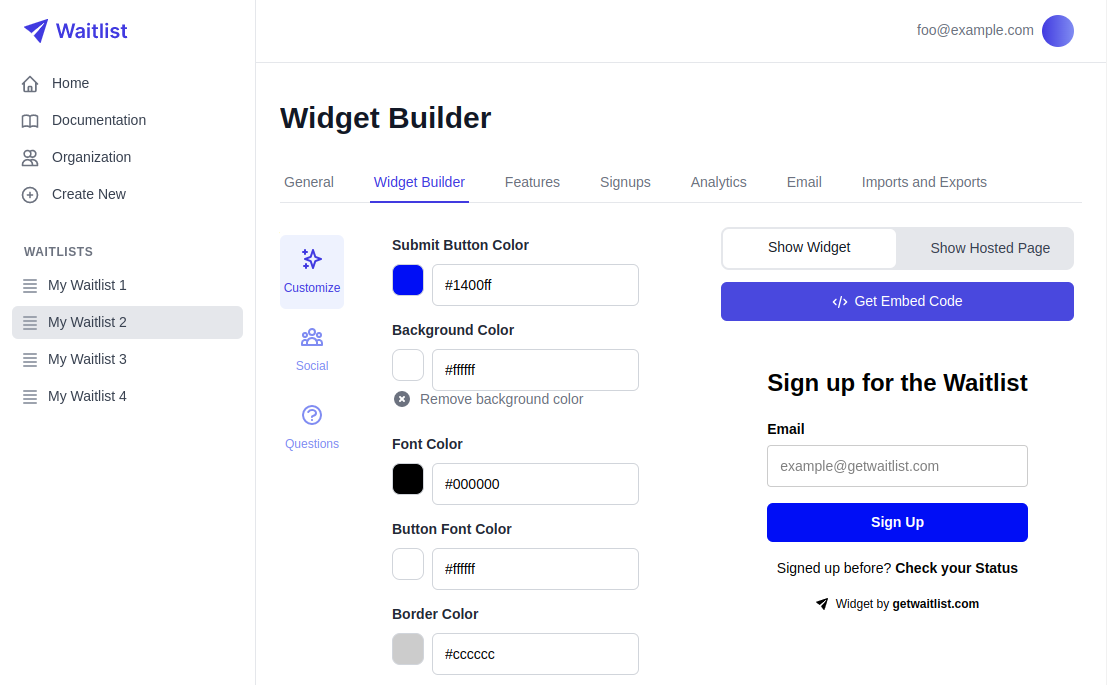
Obtain the Embed Code: Go to your Waitlist Dashboard, navigate to the Waitlist, into the Widget Builder. In the Widget Builder interface, locate and click the "Get Embed Code" button. This will open a window with the code snippet you need to integrate the widget.
-
Copy the Embed Code: In the window that pops up, you will see a small code snippet. Click the copy button to copy the code to your clipboard. This code snippet contains the necessary
<link>and<script>tags required to render the Waitlist Widget.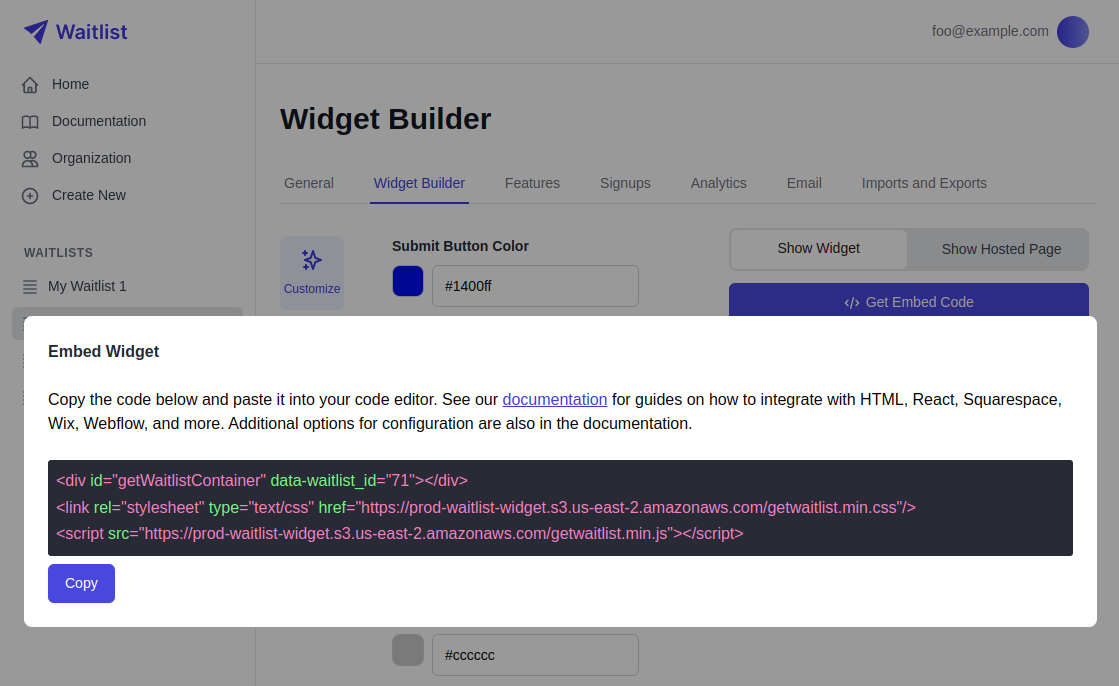
-
Prepare Your Code Editor: Go into your code editor, and navigate to the file where you want to embed your Waitlist.
-
Import React Helmet: At the top, insert
import Helmet from "react-helmet". -
Embed the Code Snippet: Then paste the code snippet in, wherever you want the Waitlist to render. Importantly, you need to paste the three lines together and exactly in the same order.
-
Wrap the Elements with Helmet: Now wrap the last two lines (the
<link>and<src>tags) inside<Helmet>tags. You must wrap only and exactly these elements; divs and other elements are not admissible for Helmet. -
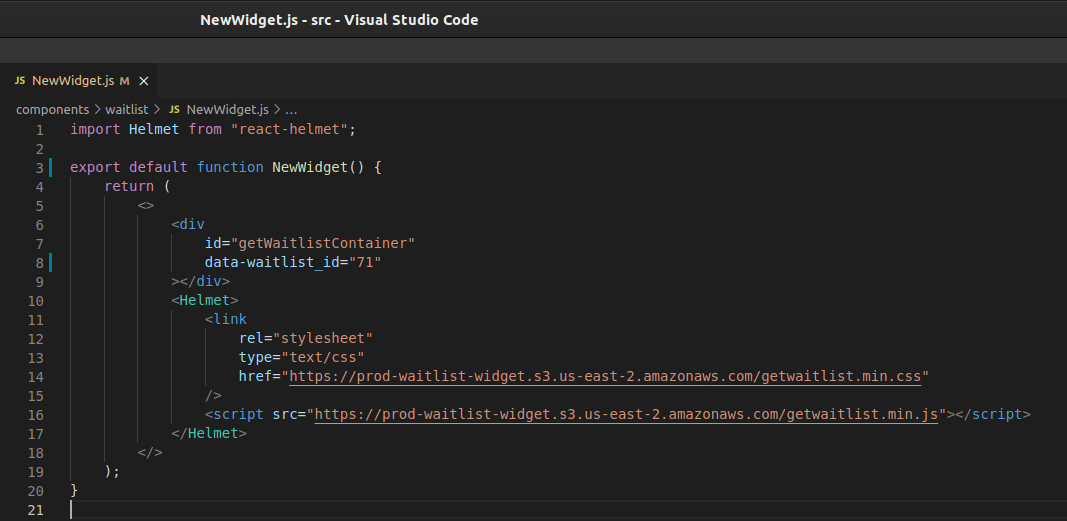
Verify the Integration: Below is a minimal code example of what it should look like:
 After embedding the code snippet, save your file and start your React application.
Navigate to the page where you embedded the widget to verify that it is displaying correctly. If the widget is not displaying, check the browser's developer console for any errors and ensure that the script and link tags are correctly placed.
After embedding the code snippet, save your file and start your React application.
Navigate to the page where you embedded the widget to verify that it is displaying correctly. If the widget is not displaying, check the browser's developer console for any errors and ensure that the script and link tags are correctly placed.
Copy-Pastable Code Example
Copy-pastable Code
import Helmet from "react-helmet";

export default function NewWidget() {
    return (
        <>
            <div
                id="getWaitlistContainer"
                data-waitlist_id="71"
            ></div>
            <Helmet>
                <link
                rel="stylesheet"
                type="text/css"
                href="https://prod-waitlist-widget.s3.us-east-2.amazonaws.com/getwaitlist.min.css"
                />
                <script src="https://prod-waitlist-widget.s3.us-east-2.amazonaws.com/getwaitlist.min.js"></script>
            </Helmet>
        </>
    );
}
Integration Guide (Next App Router)
Normally, to load the Waitlist, you need the CSS and Javascript.
For the new Nexjs App router, Helmet doesn't really work as expected so the workaround is to inject the CSS and load the JS using the next Script tag.
Below is how it works in the new Next App Router:
Copy-Pastable Code Example
Copy-pastable Code
import Head from 'next/head';
import Script from 'next/script';

const cssLoader = `
let head = document.getElementsByTagName('HEAD')[0];
let link = document.createElement('link');
link.rel = 'stylesheet';
link.type = 'text/css';
link.href = 'https://prod-waitlist-widget.s3.us-east-2.amazonaws.com/getwaitlist.min.css';
head.appendChild(link);
`

export default function Waitlist() {

return (
<>
<Script type="" dangerouslySetInnerHTML={{__html: cssLoader}}></Script>

<Script src="https://prod-waitlist-widget.s3.us-east-2.amazonaws.com/getwaitlist.min.js"></Script>

<div id="getWaitlistContainer" data-waitlist_id="<WAITLIST_ID>" data-widget_type="WIDGET_1"></div>

<h1>This is the main Website</h1>
</>
)
}
Troubleshooting Common issues
If you encounter issues while integrating the Waitlist Widget, here are some common troubleshooting tips:
- Ensure that React Helmet is correctly installed and imported in your project.
- Verify that the
<link>and<script>tags are correctly wrapped inside<Helmet>tags. - Check the browser's developer console for any errors related to the widget.
- Make sure that the data-waitlist_id attribute is correctly set to the ID provided by the Widget Builder.
- Make sure you're using the correct integration guide (i.e Next App Router VS Next Page Router).
For more waitlist form customization, check out the Widget Embed Options.