Integrate a Waitlist into your Squarespace Website
This guide covers how to add a Waitlist to your Squarespace website. We've made it easy for you to create a custom Waitlist Form, and to copy-paste it into your Squarespace website builder. No coding required!
What is Squarespace?
Squarespace is a user-friendly website builder platform that provides an easy and efficient way to create a website. By making a Squarespace landing page and integrating the getwaitlist.com waitlist widget, it's easy to set up a pre-launch waitlist page for your friends and customers. Squarespace lets you choose from a variety of professionally designed templates and customize them to match your brand and vision.
What are the Pros and Cons of Squarespace?
Squarespace is known for its ease of use and beautifully designed templates, making it a great choice for beginners and those seeking visually appealing sites without requiring extensive design skills. Squarespace stands out for its user-friendly design and stylish templates, ideal for beginners, but lacks the customization depth of Webflow, which caters to design professionals. Wix offers a more intuitive interface than Squarespace, suitable for those valuing simplicity over advanced design features. Framer and Typedream, though newer, provide unique qualities like motion design (Framer) and simplicity (Typedream), but might not match the comprehensive offerings of Squarespace. However, all these options -- including Squarespace -- are perfectly fine for making a Waitlist with a Landing Page.
Getting Started with Waitlist and Squarespace
To set up a pre-launch waiting list using Squarespace, you should first determine what page you want to host your Waitlist widget (also known as a Waitlist form) on. Usually that's the landing page, but in some cases you may want to place the waiting list on a different page (e.g. if it's for a new, additional product and your landing page promotes a different product). Once you've made a page in Squarespace that's meant to host your Waitlist, then you are ready to proceed.
Integration Guide
-
Go to your Waitlist Dashboard and navigate to the Waitlist.
-
Navigate to the "Settings" tab. Make sure that the "Waitlist URL" field matches the Squarespace page where you want to host your Waitlist form.
-
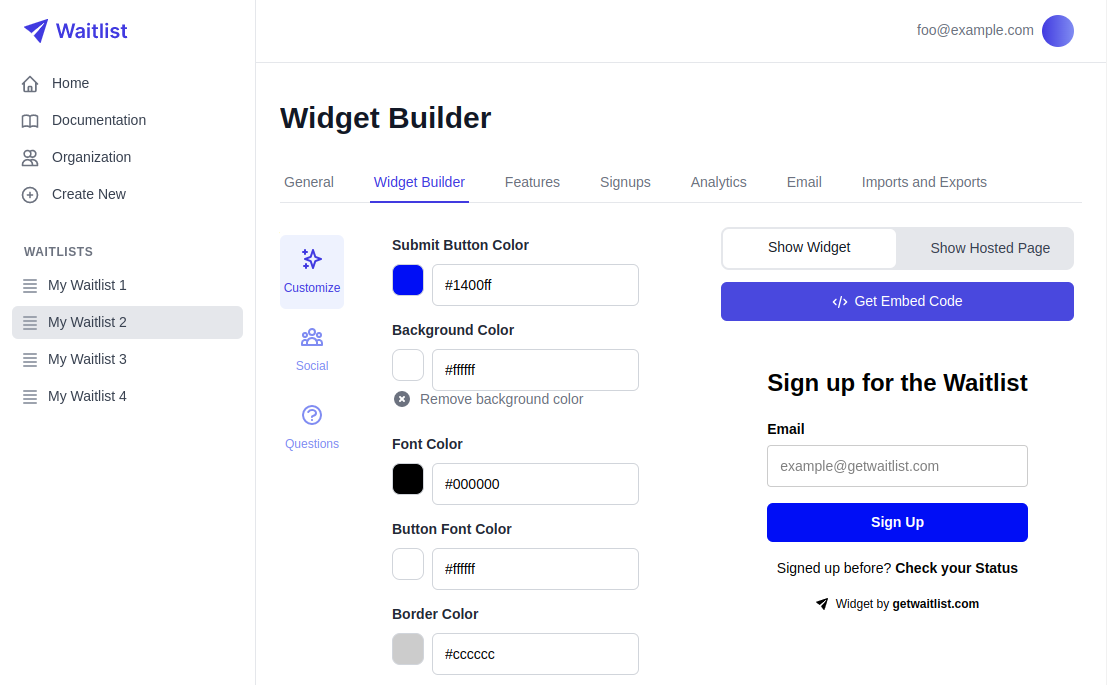
Go into the Widget Builder, and click the "Get Embed Code" button.
-
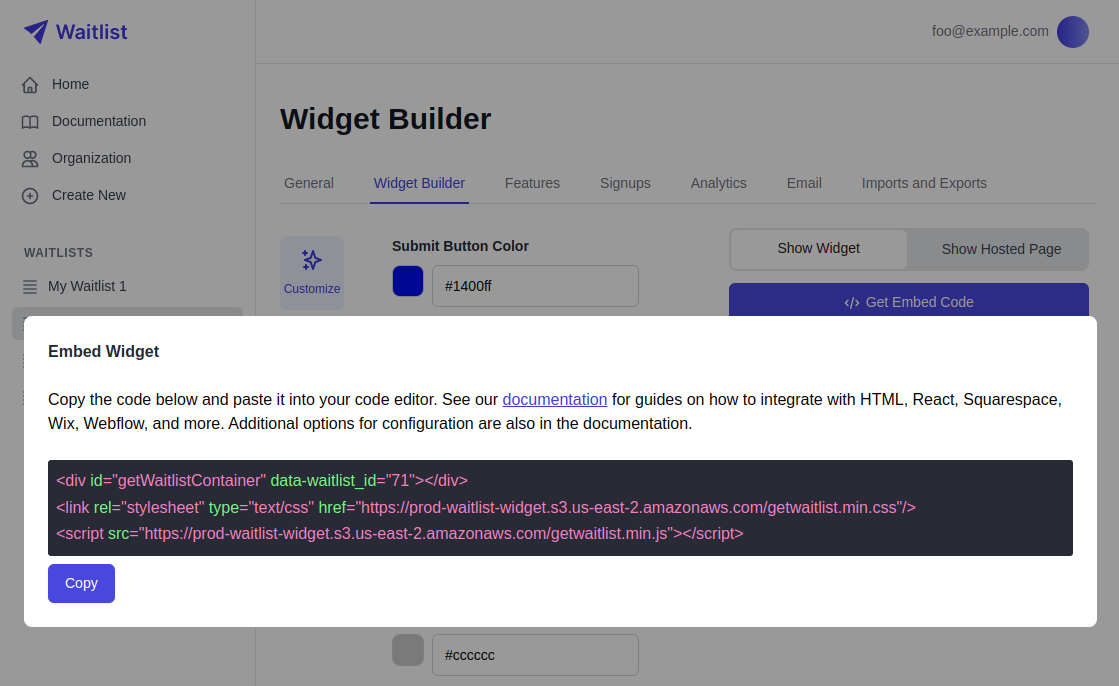
The window that pops up will give you a small code snippet to copy. Click the copy button.
-
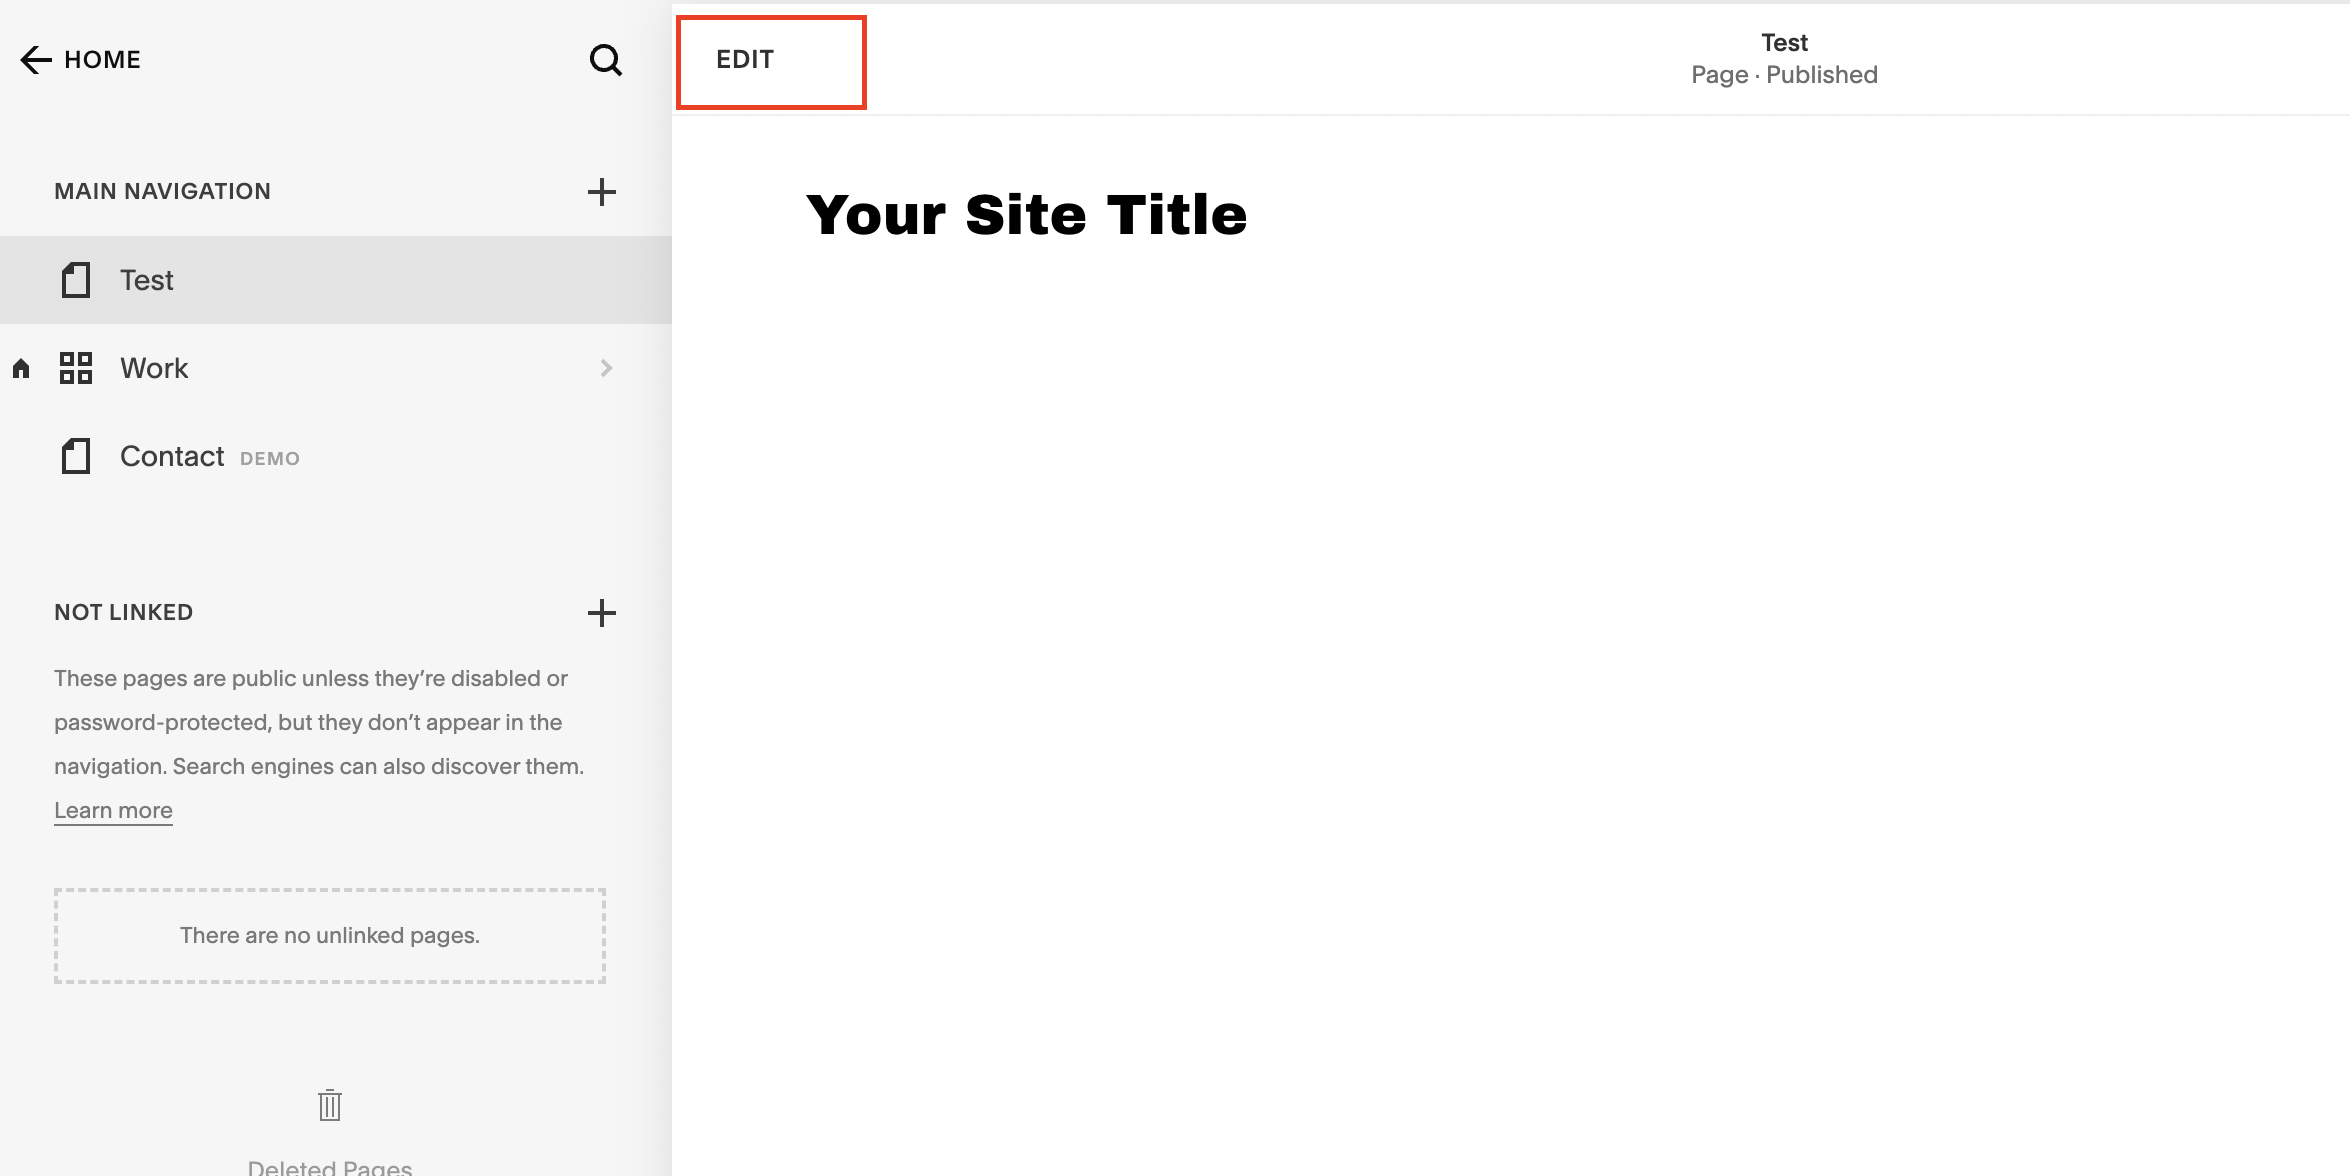
Log in to Squarespace. Navigate to the Squarespace page that you want to edit, and click edit in the top left of the editor.
-
In the Squarespace editor, either click into an existing Section on the page, or click "Add Section" and then "Add Blank Section".
-
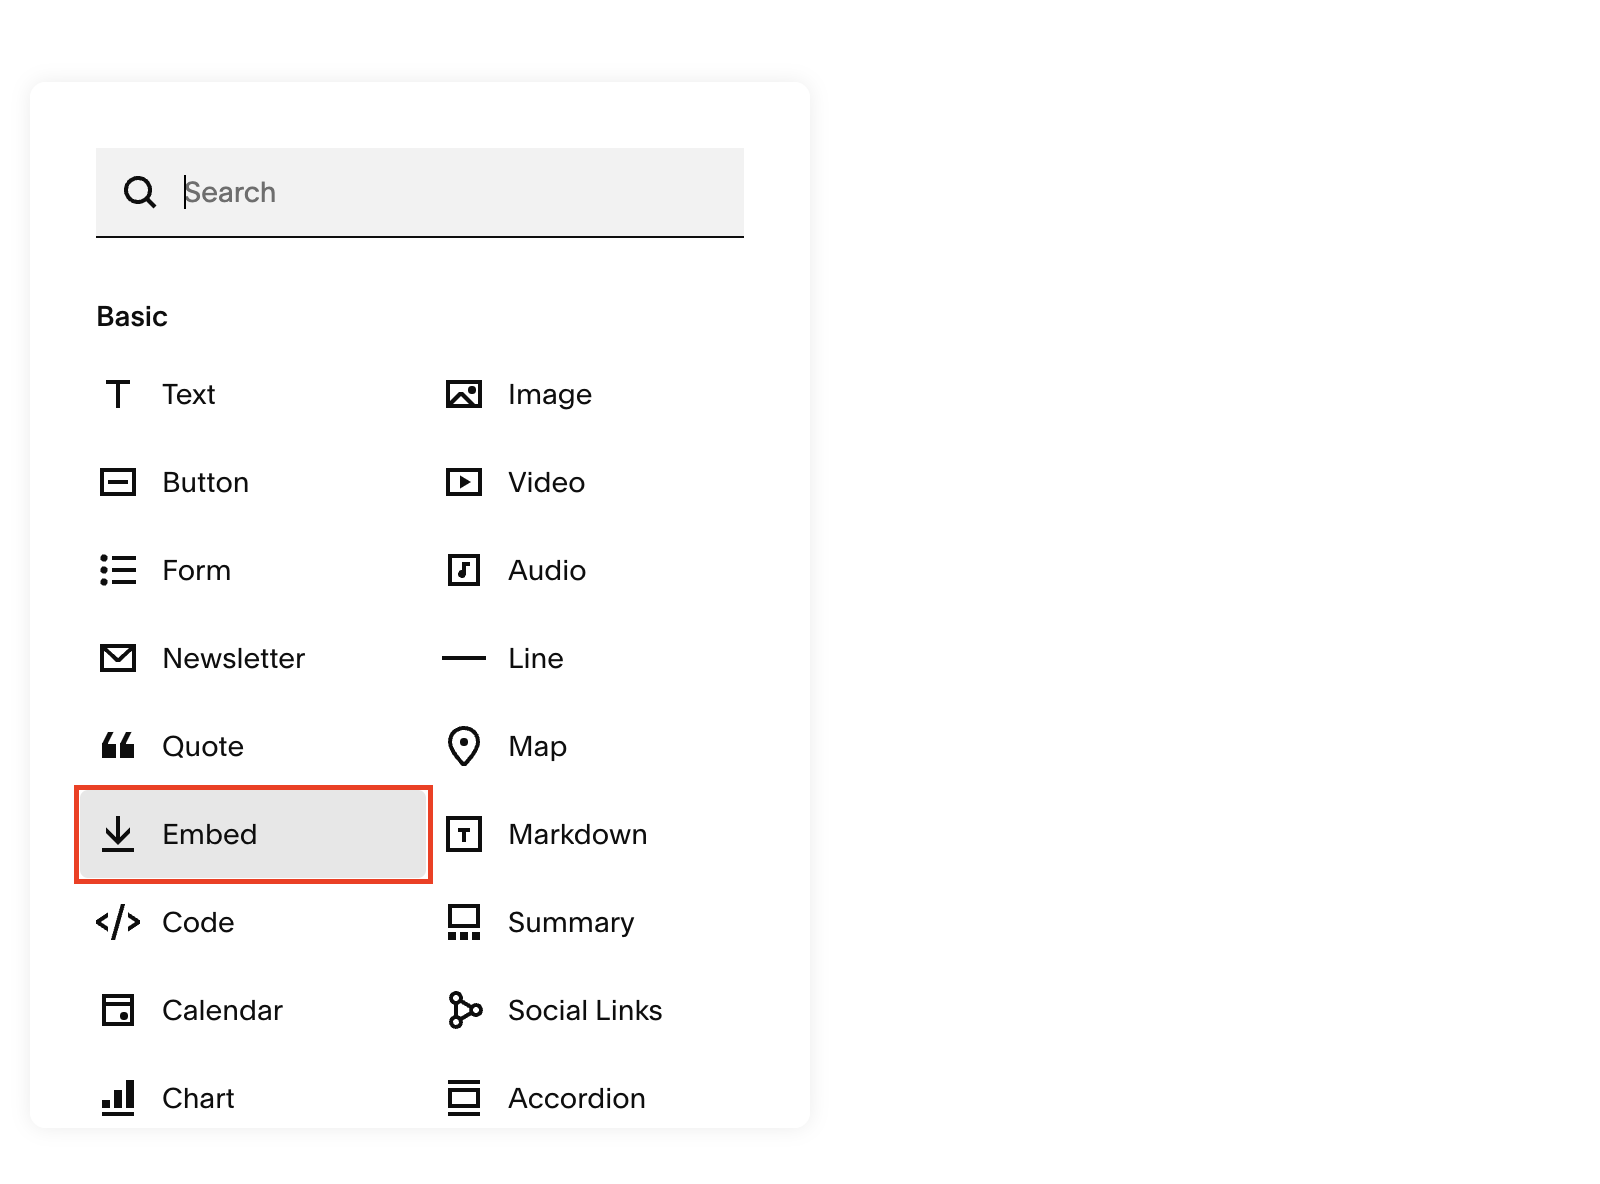
In your Section, add a new block and click the "Embed" option.
-
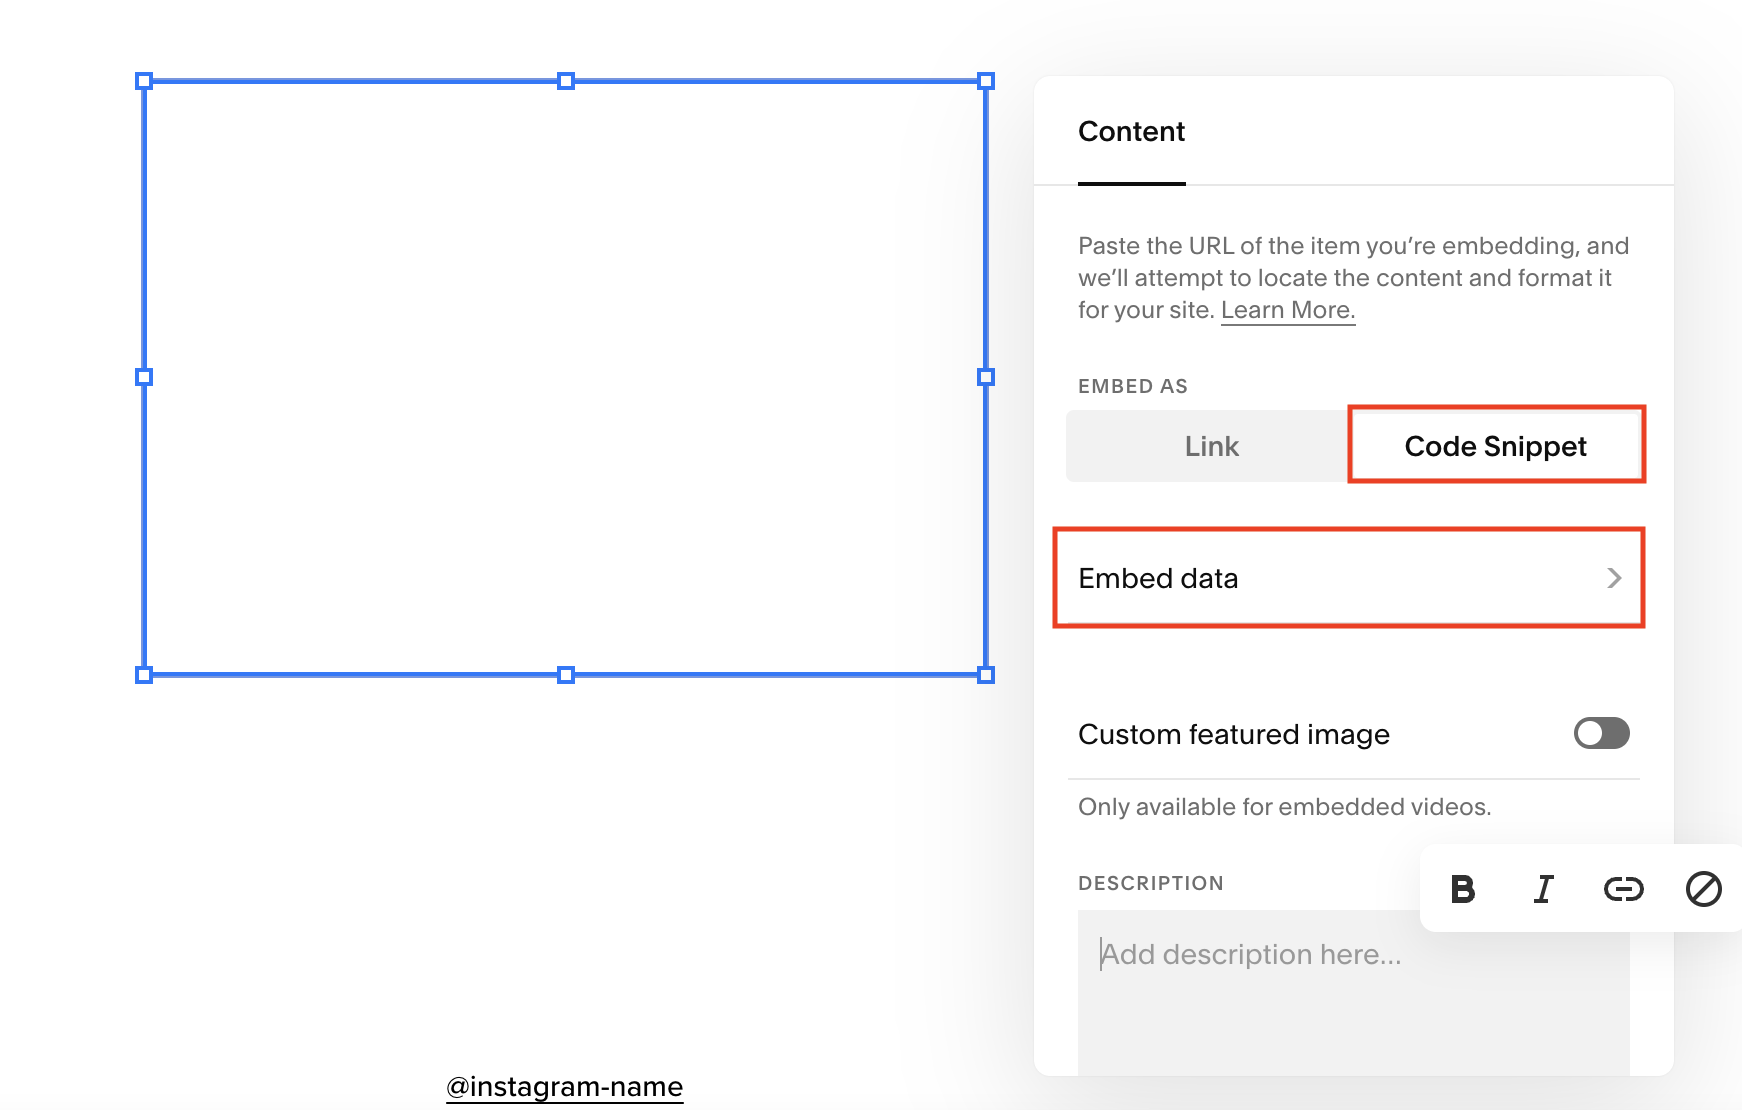
When you edit the Embed block a new window will open up. Click "Code Snippet" and then "Embed data".
-
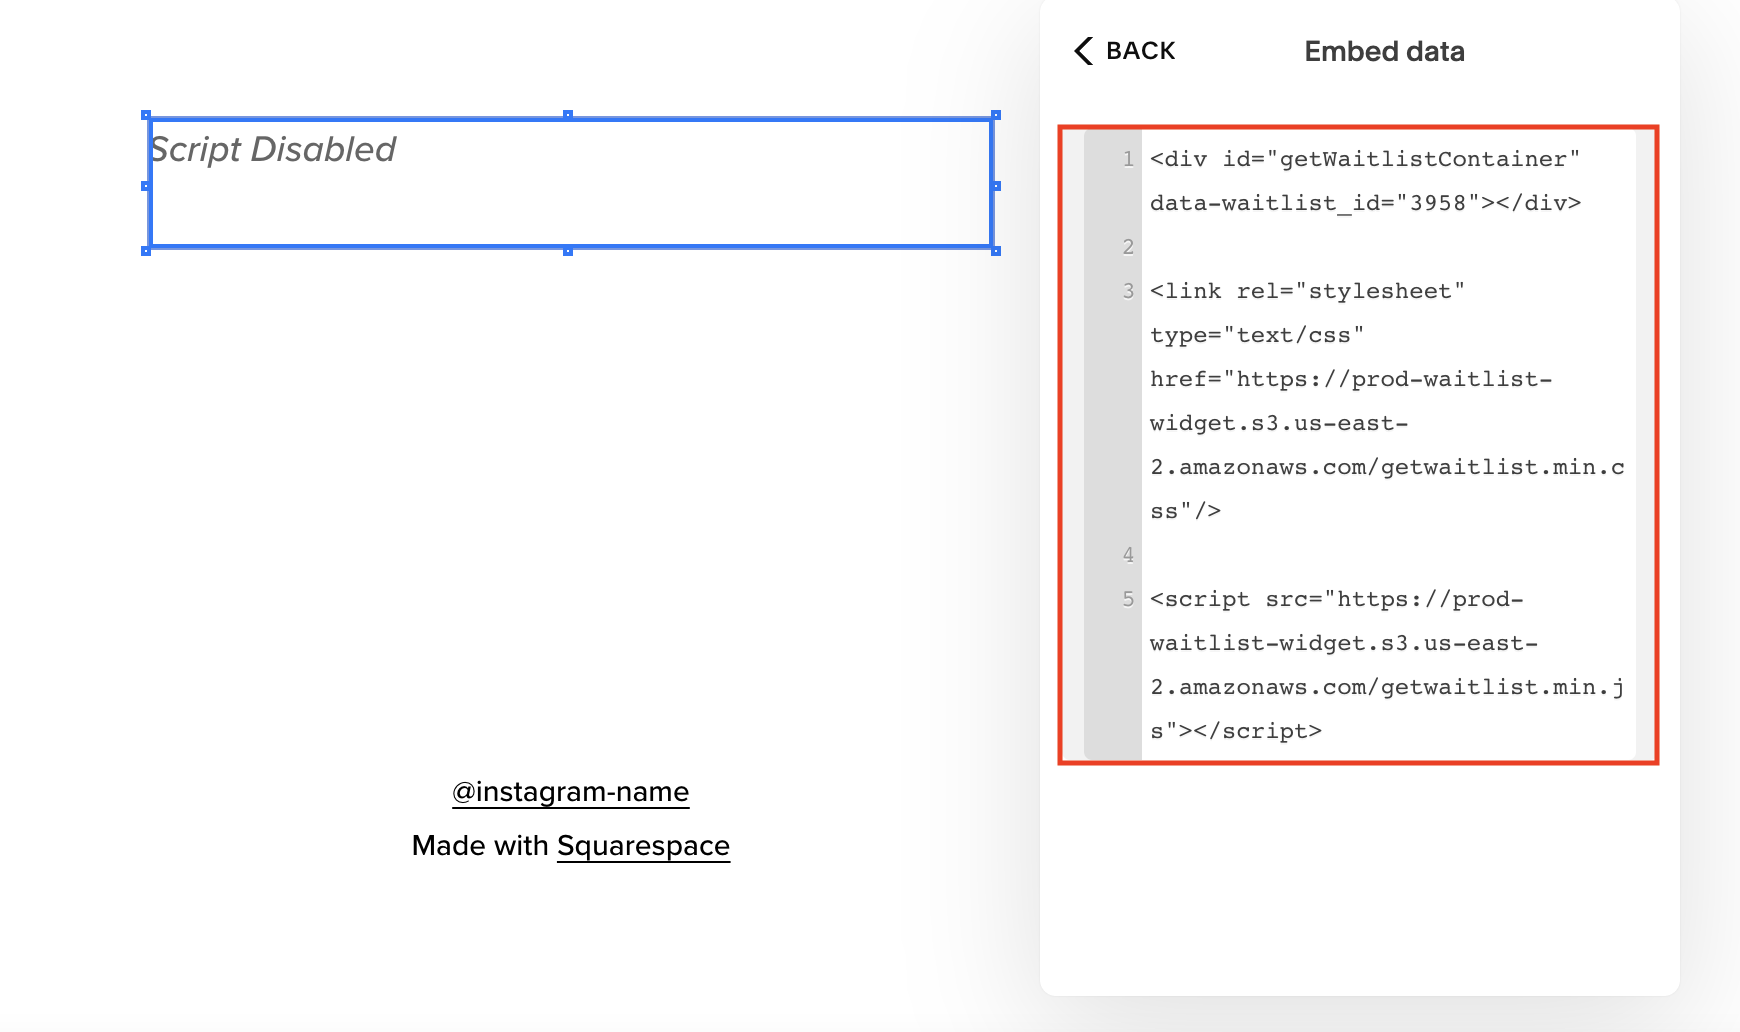
Here, a small code editor will open up. Paste the snippet from getwaitlist.com into your code editor. Importantly, you need to paste the three lines exactly in the same order. Once you've pasted the code, you can simply click out of the box. The editor will only show "Script Disabled", but the published page will show the widget.
-
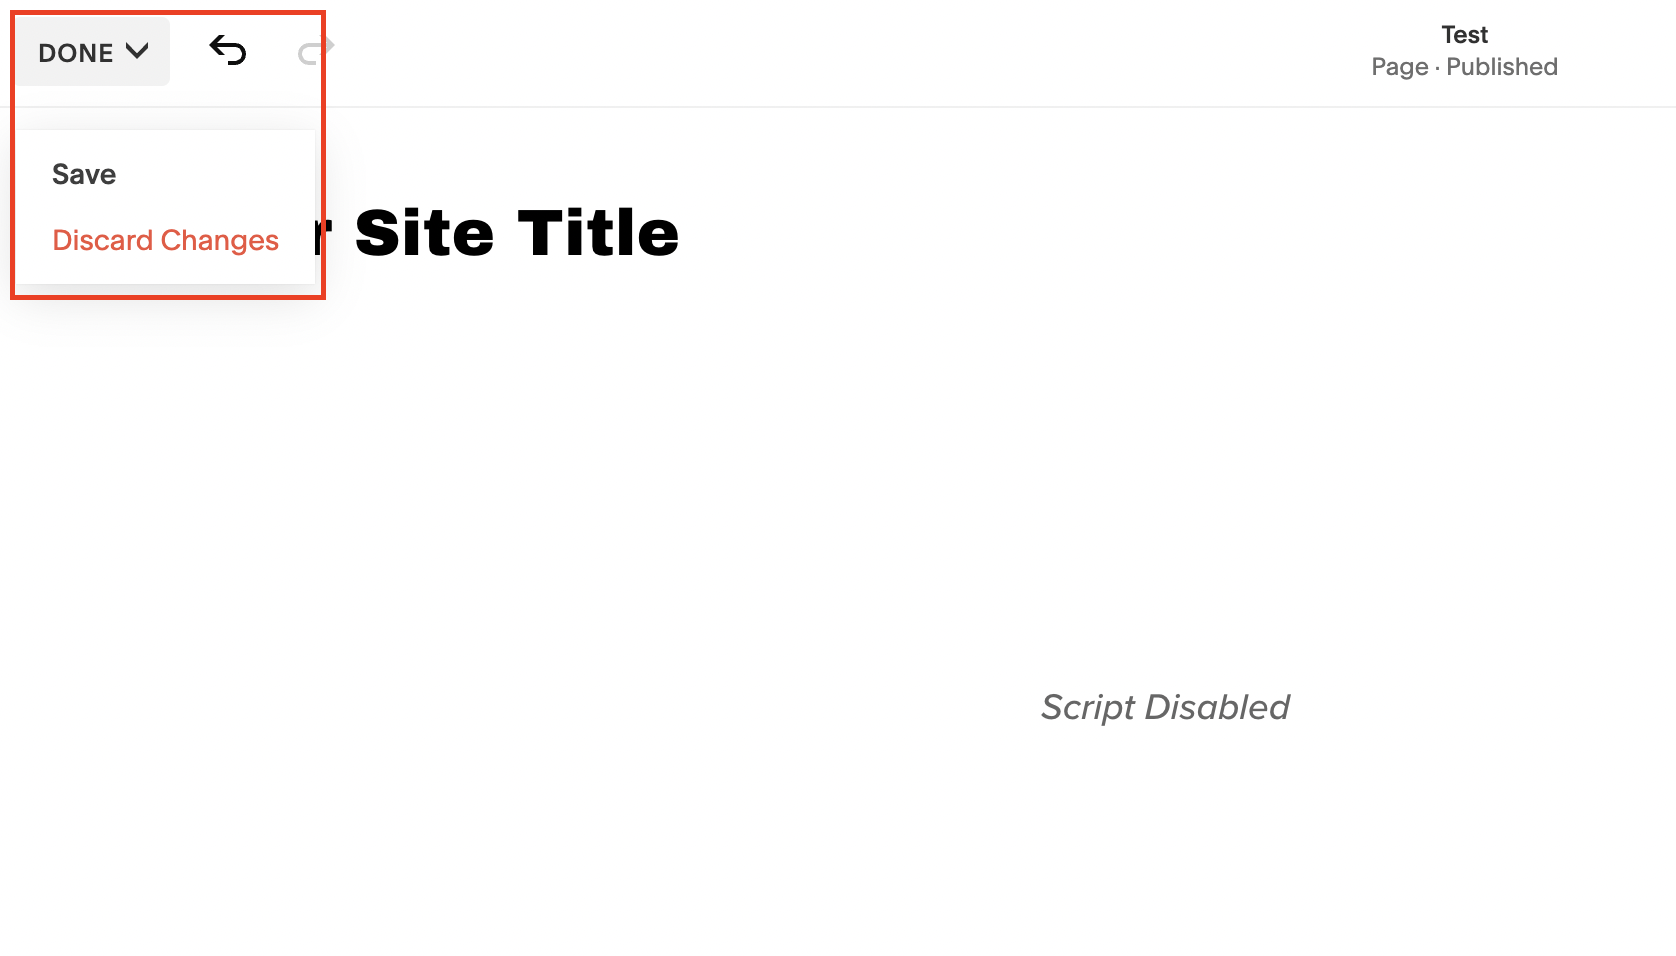
To finish up, hover over "Done" and click "Save".
-
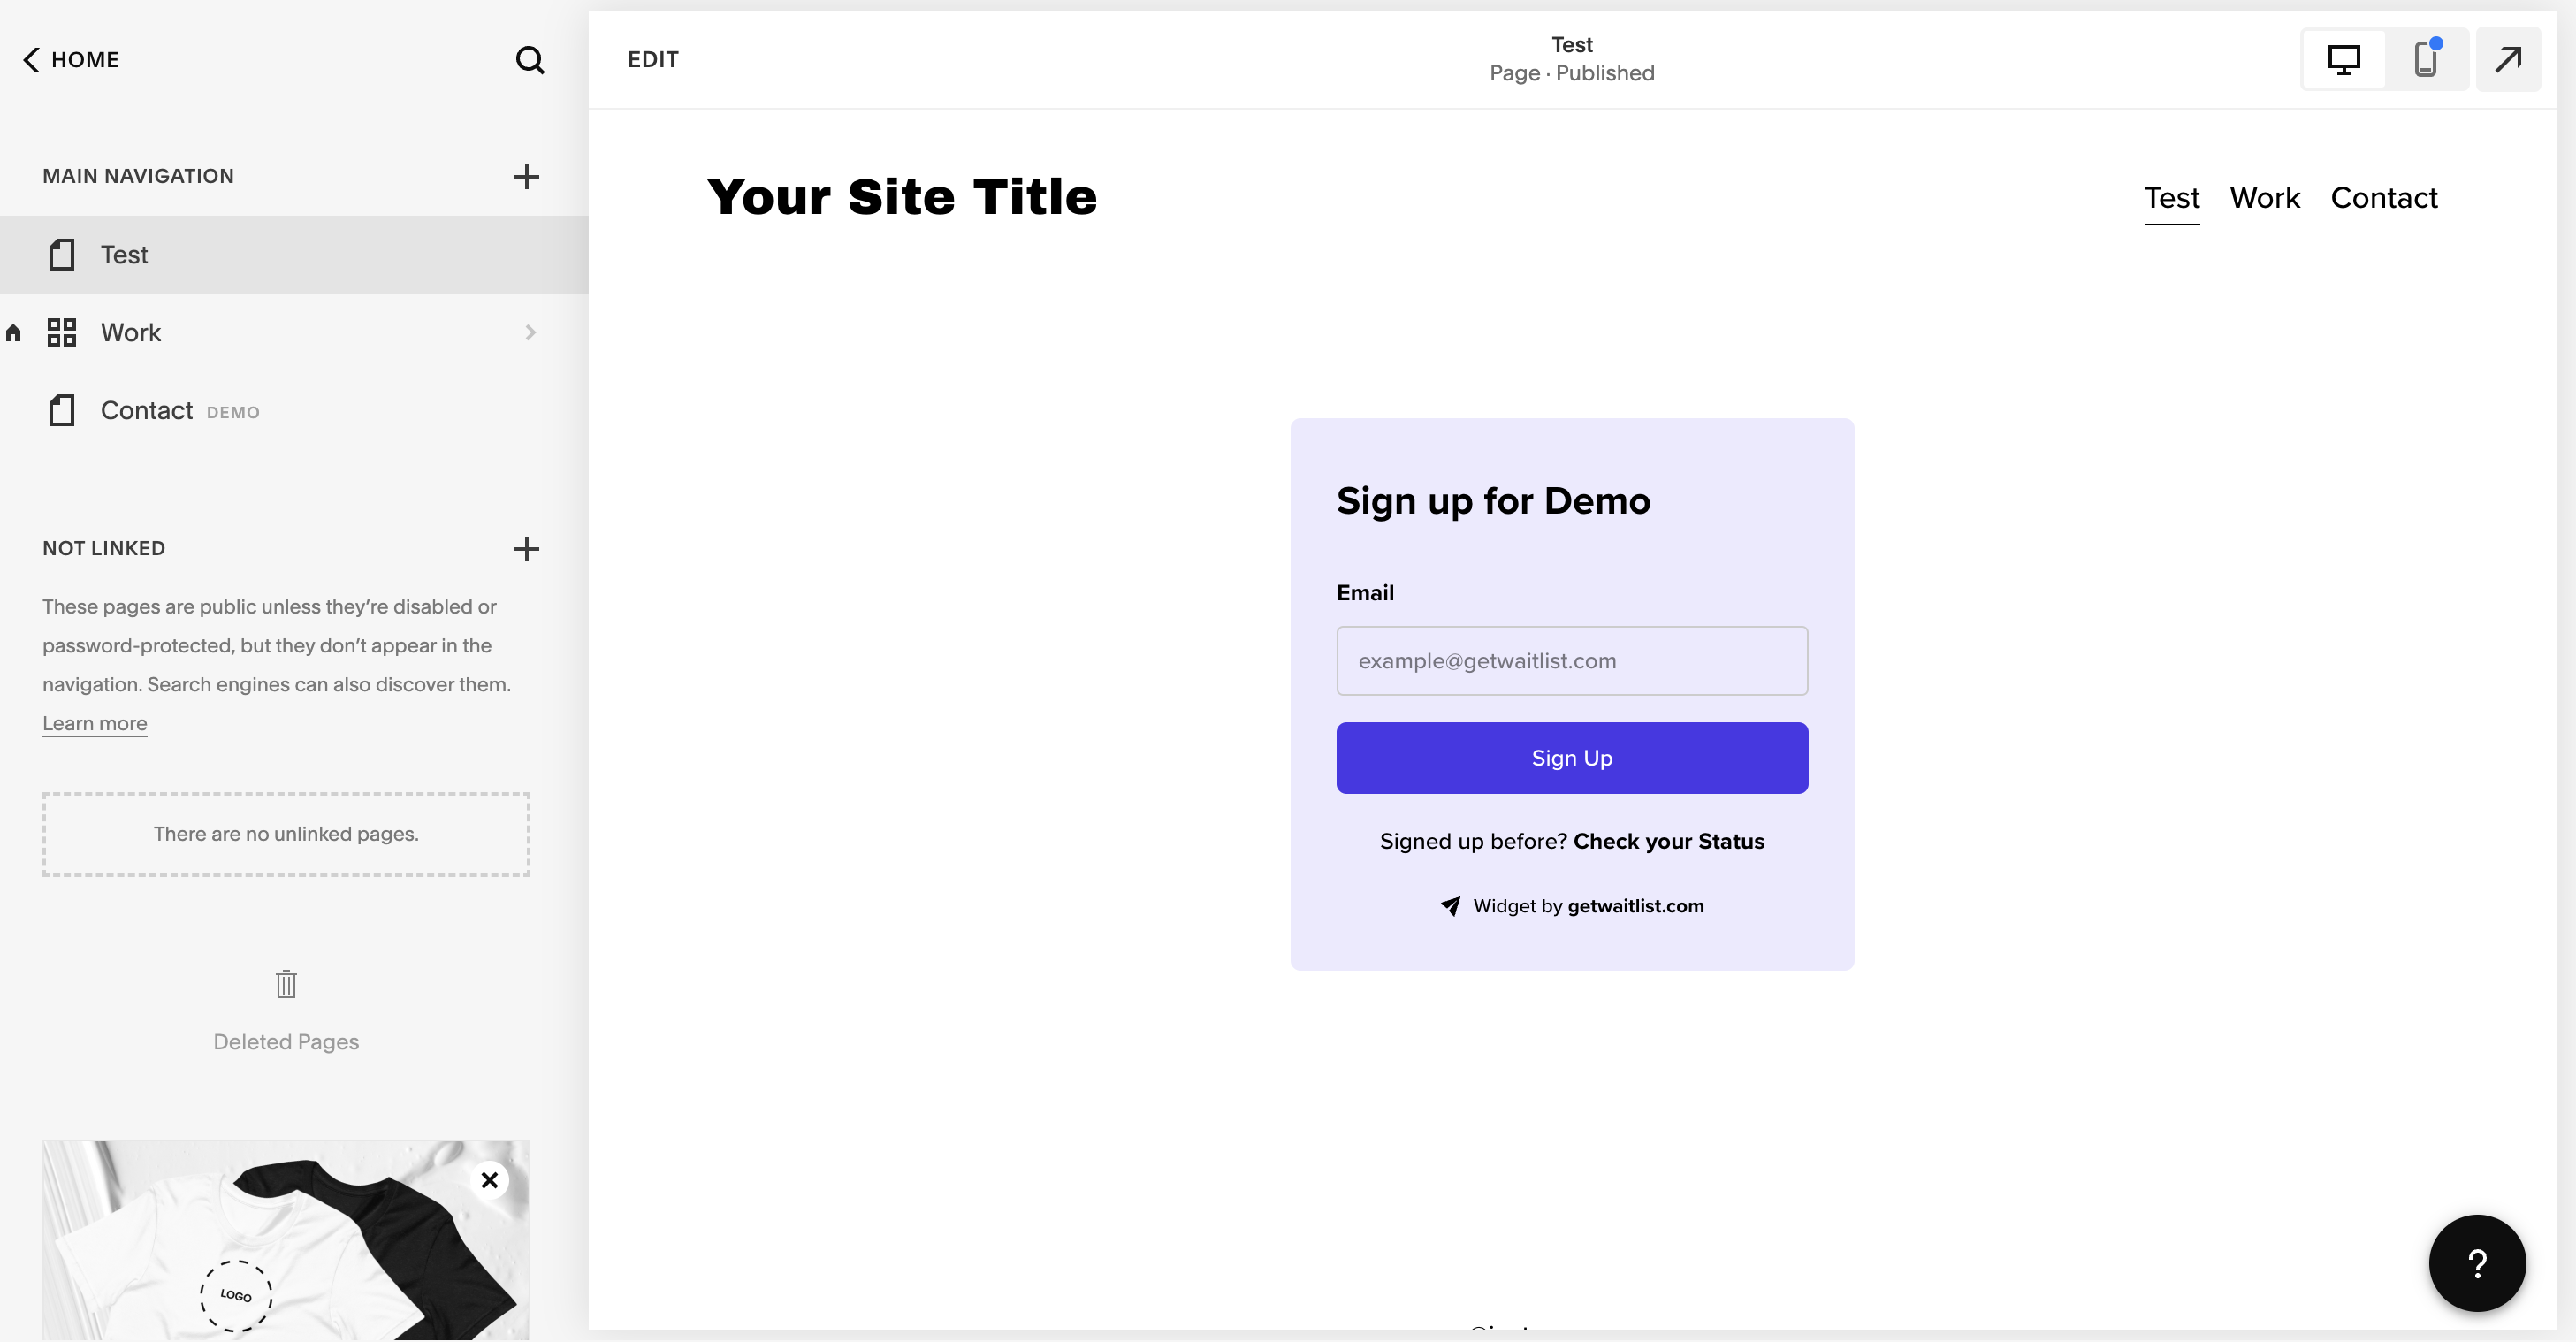
Your widget should now be visible in your Squarespace navigator!
-
Exit the Squarespace editor and go to your live Squarespace website. Make a test signup in your Waitlist Form to ensure that everything works.
Troubleshooting
If you run into any challenges embedding your Waitlist form into your Squarespace website, feel free to email us at [email protected].
Customization
For more waitlist form customization, check out the Widget Embed Options.