Configuring Emails for your Waitlist
Inside your Waitlist Dashboard, the email menu offers a robust feature set for you to supercharge your Waitlist experience. One of the best features at here getwaitlist.com is that your waitlist includes automated email marketing. You can enable or disable automated emails that go to users as they sign up for your waitlist, set emails to come from your domain, and even configure entirely custom-templated emails that you can "blast" to all your users at once, like an email newsletter. Below, we show you how to get the most out of email management for your waitlist:
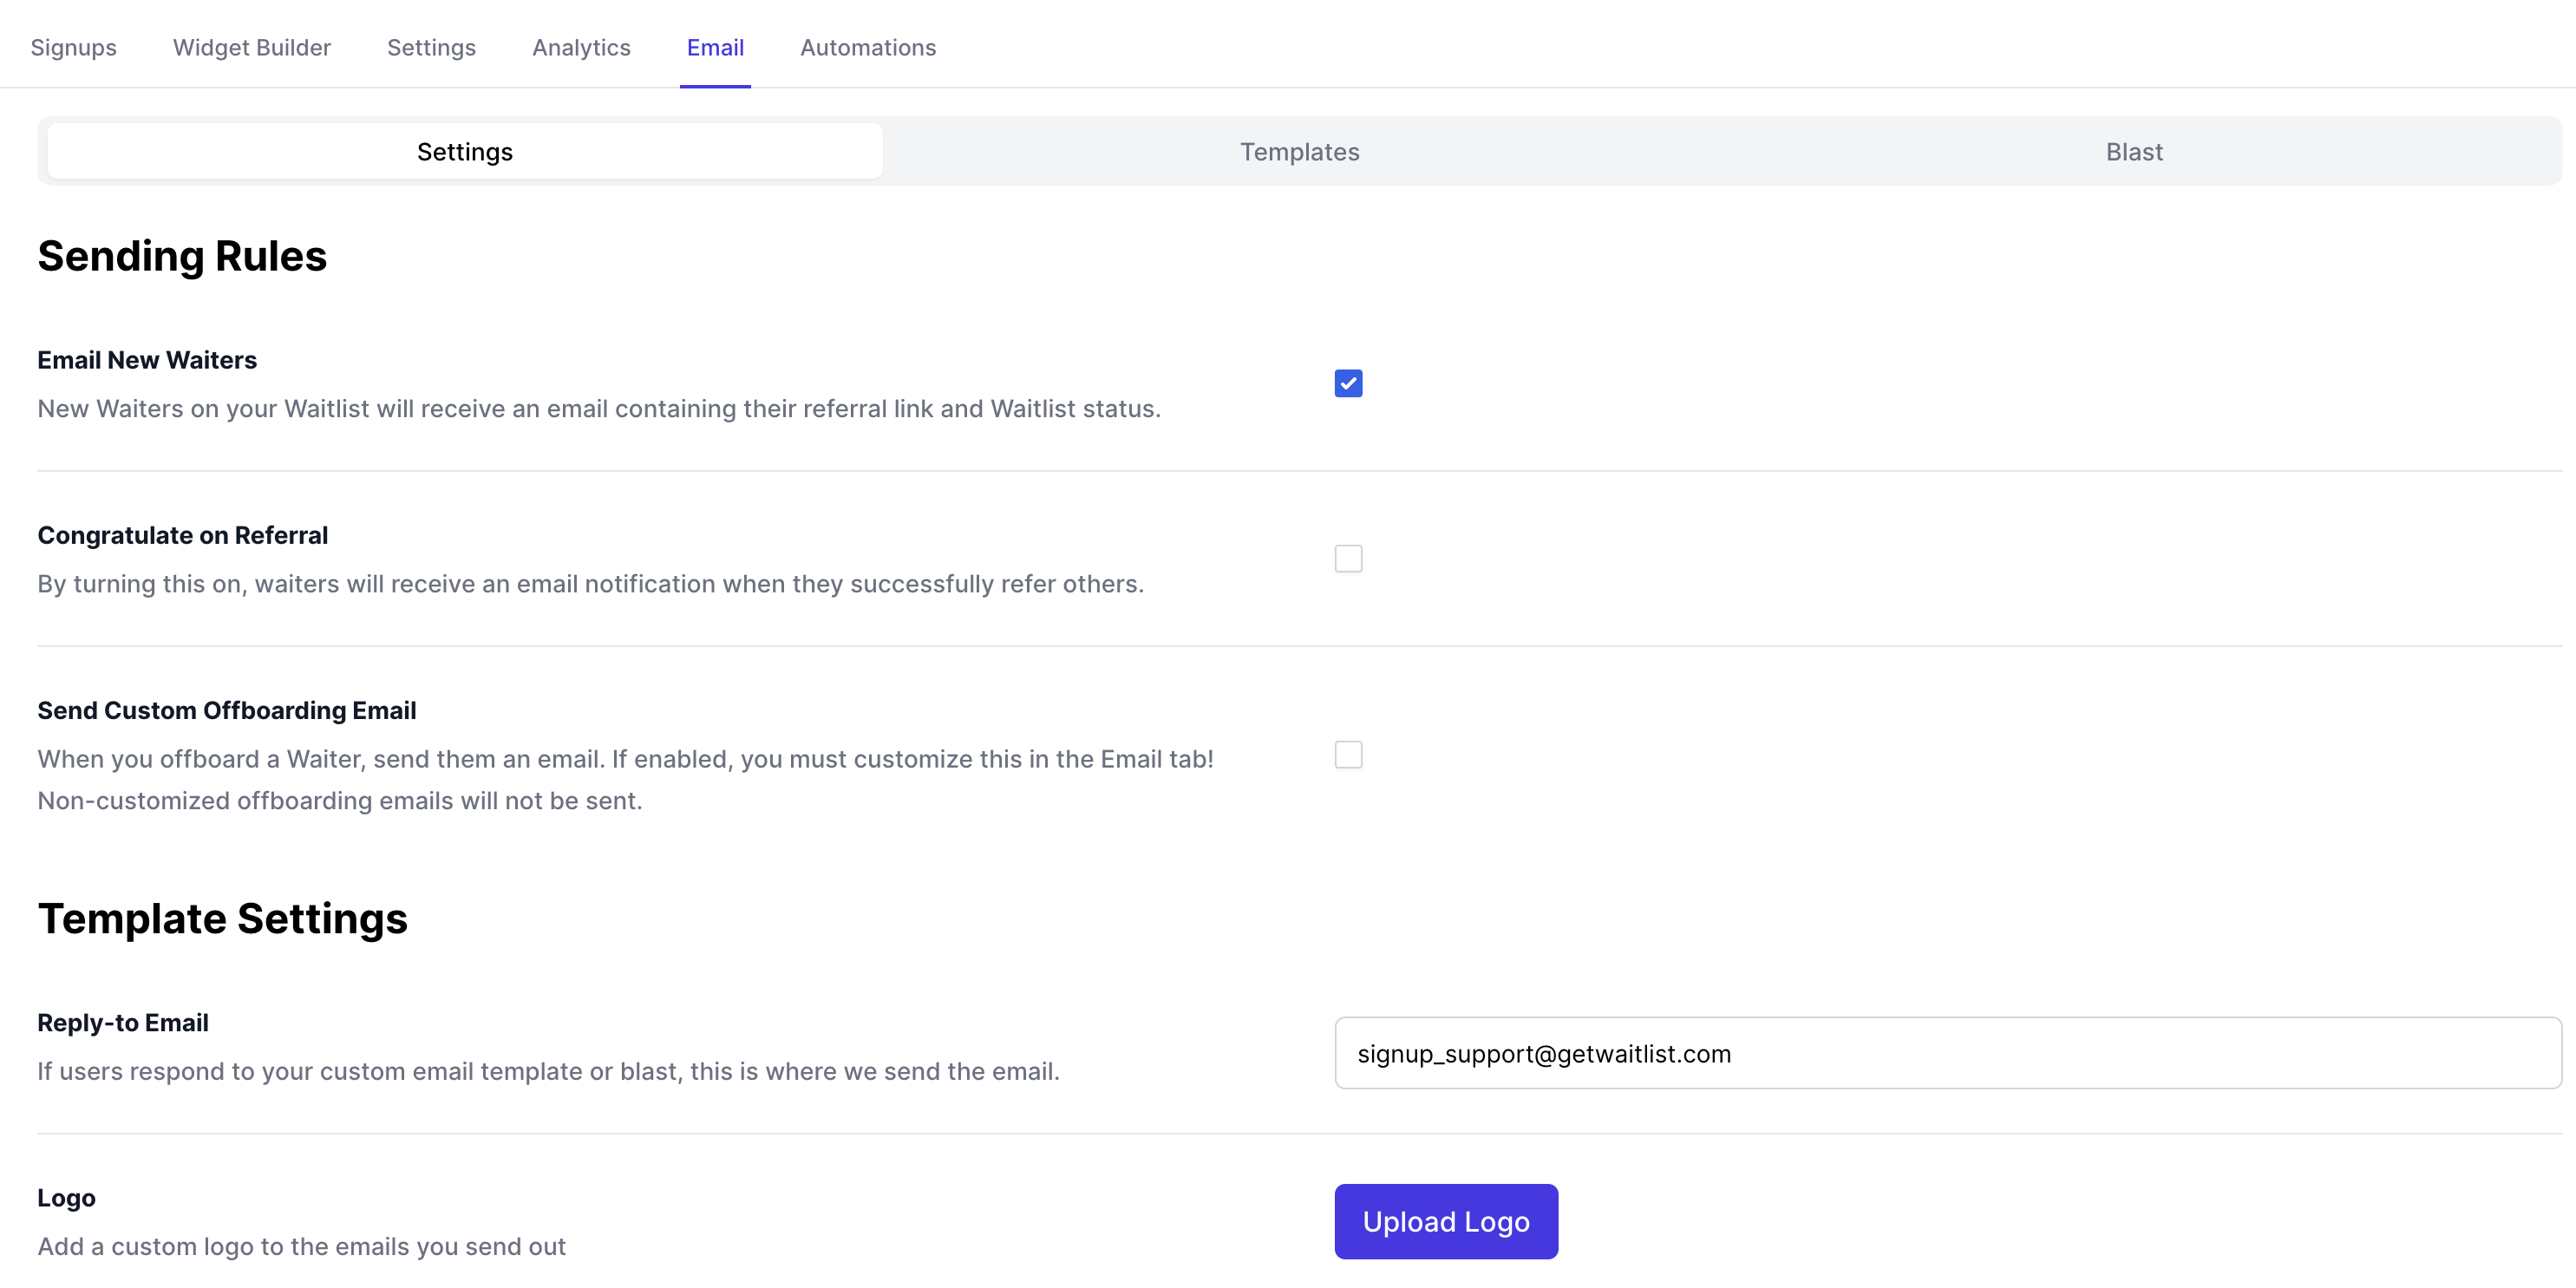
Settings
The settings section within the Emails tab offers you several options for configuring your email communications. Here, you can establish email rules that dictate when and under what conditions emails are sent to your waitlist members. This section also allows for the setting of a custom logo that goes on all your emails, and reply-to headers. Setting the reply-to headers on your email can be really important, because it means that if users have a question and want to respond to the email, they can do so to reach you.
Templates
The Templates section is where you can customize the visual and textual elements of your emails to your own taste or brand.
Several configuration options available in this section are as follows:
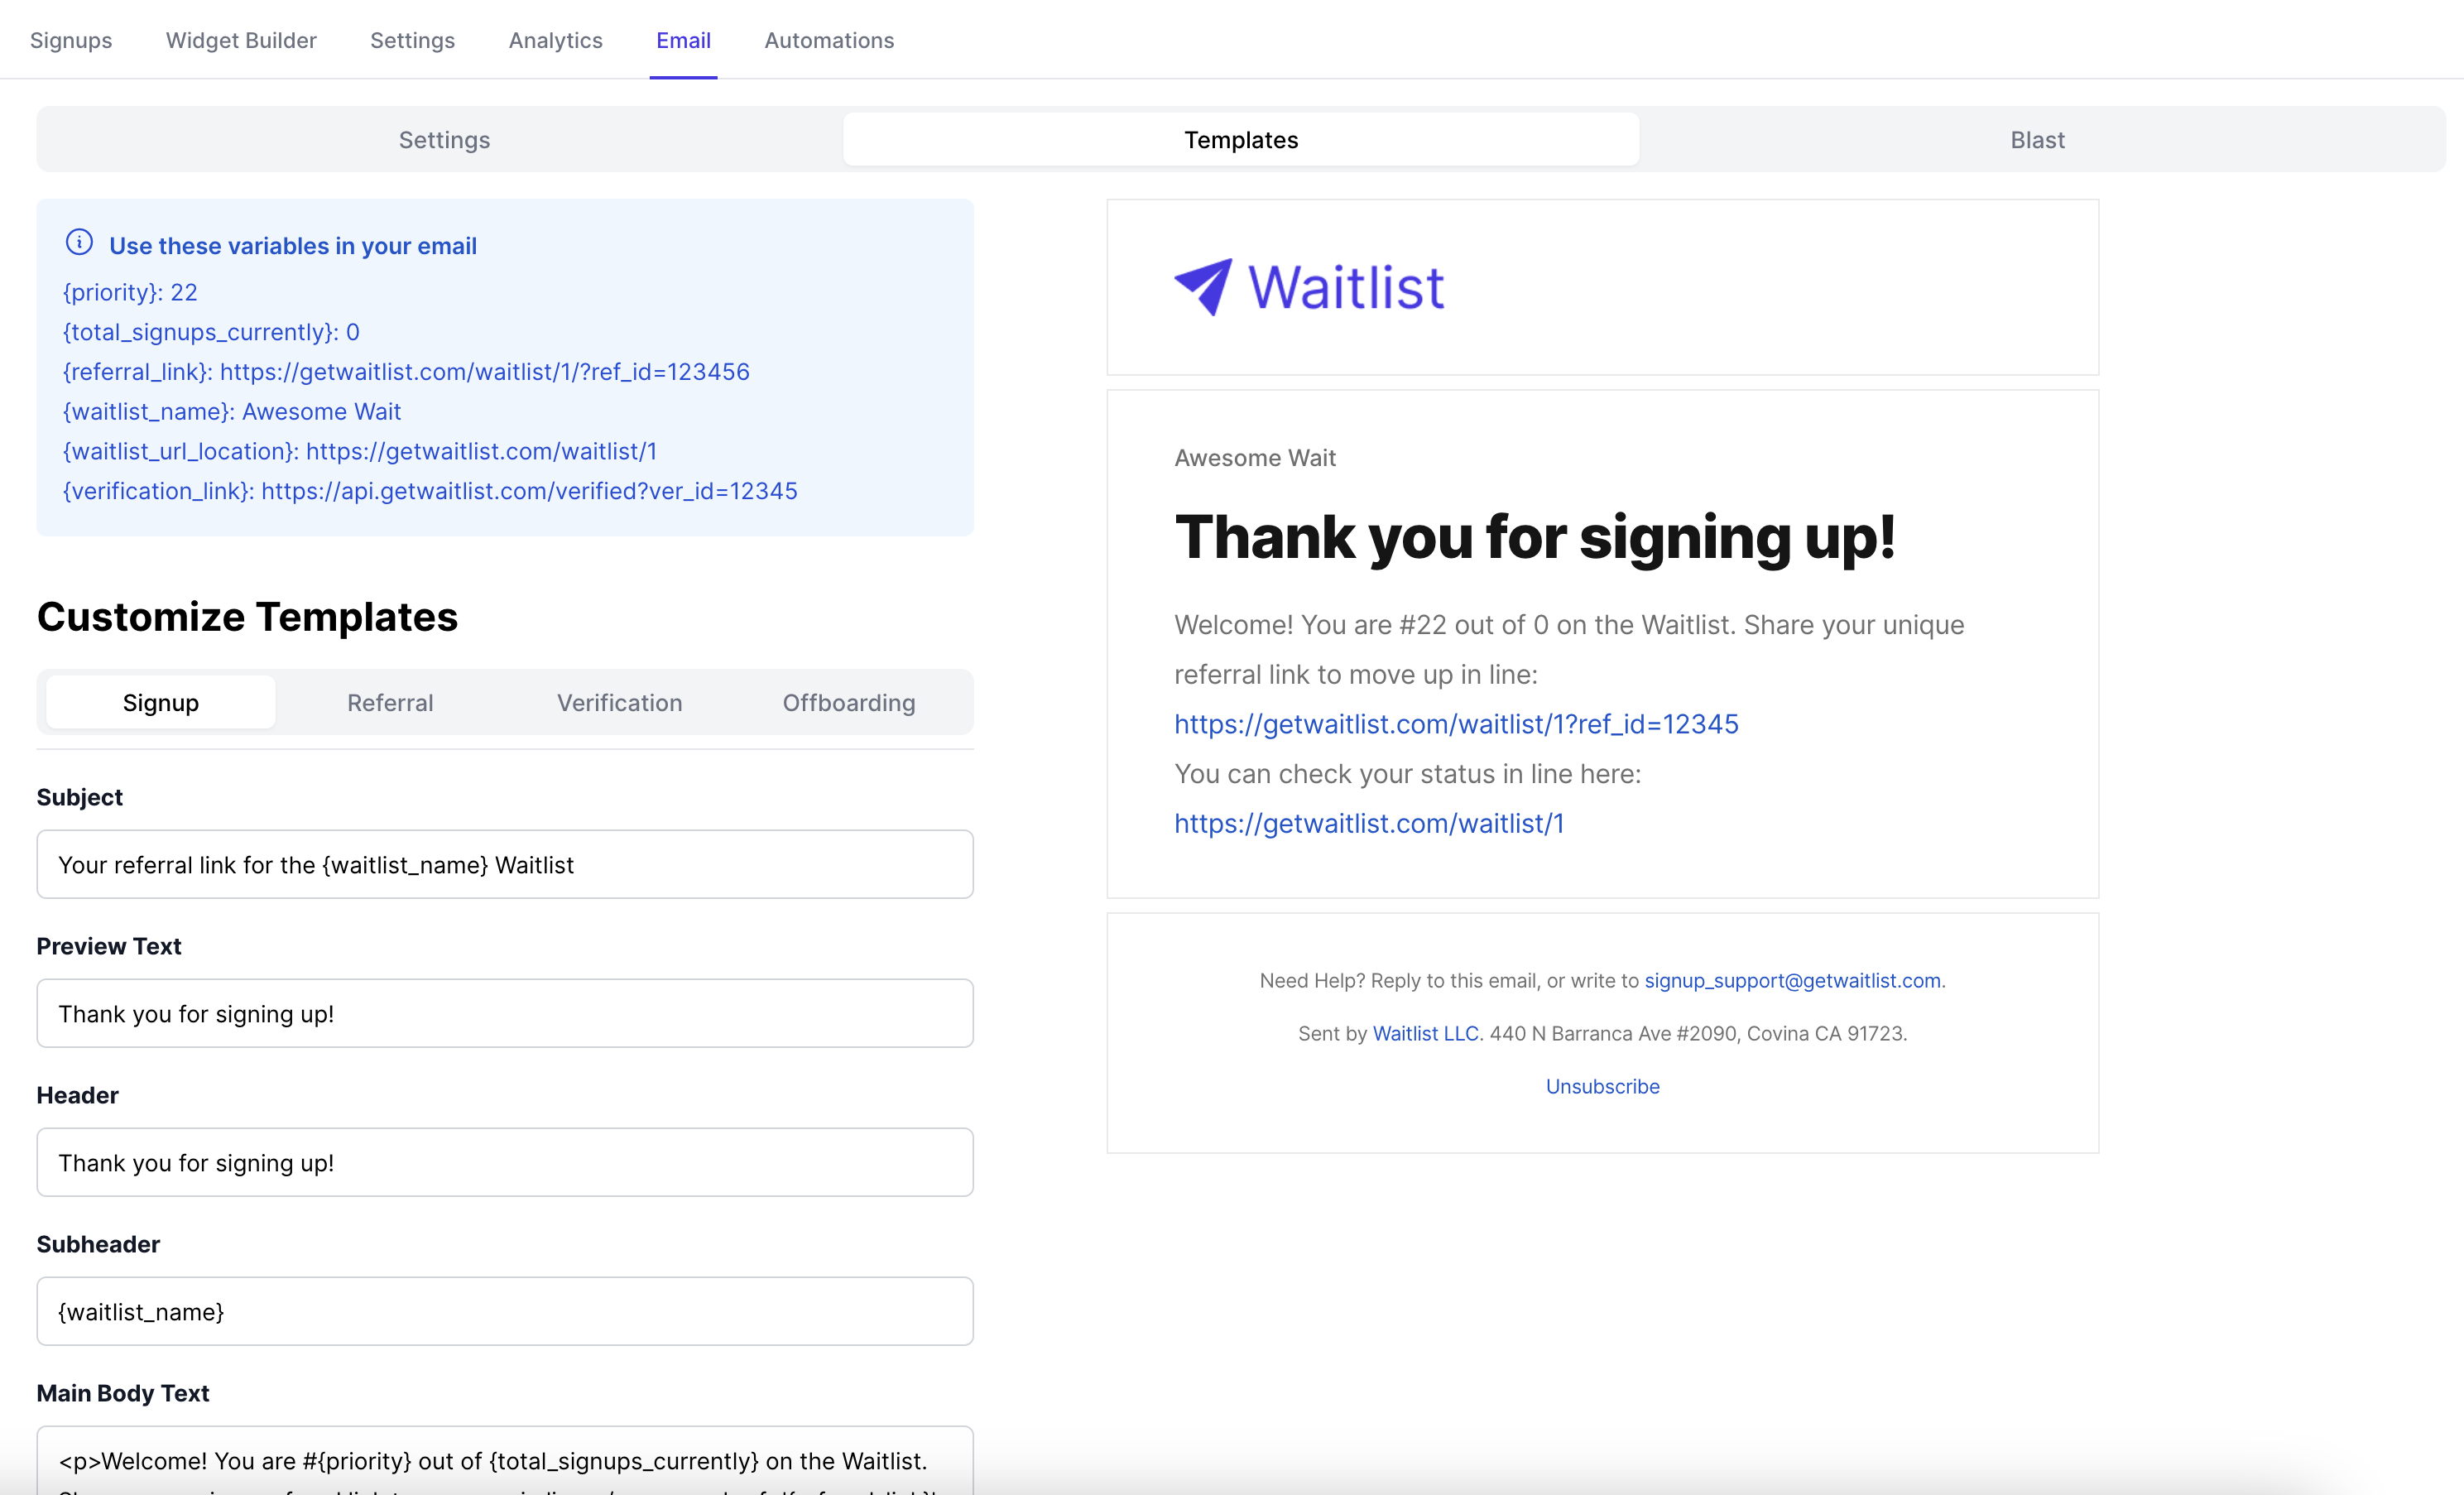
- Signup: Craft a welcoming message that greets new users upon signing up for your waitlist, setting a positive tone for future interactions.
- Referral: Send appreciative messages to users who expand your waitlist through referrals, fostering a community of brand advocates.
- Verification: Implement email verification to enhance security and authenticity within your user base, sending out verification prompts as needed.
- Offboarding: Configure an email that gets sent to users you offboard from your waitlist. Usually, the offboarding message will include a link to some next steps, or a way to access the product that they're on the Waitlist for.
In any of your emails, you may use the template variables that are listed in the blue rectangle on the very top. The variables are specific to the user and the waitlist: for example, you can use the variables to insert the user's position in line in the waitlist, their unique referral link, or the name of your waitlist.
Using Metadata in Email Templates
You can also access custom metadata in your email templates using the {metadata.field_name} syntax. For example:
{metadata.company}- Display the company name stored in metadata{metadata.job_title}- Display the job title stored in metadata{metadata.source}- Display the signup source information
This metadata can be added through:
- CSV uploads (using columns with the
metadata_prefix) - The API (by passing a metadata object when creating a signup)
Using metadata allows you to create highly personalized emails based on information collected during signup. However, please note that, if you add a metadata field to your email, that is not present in a waiters metadata (i.e you add a metadata field that isn't common to all waiters), it will be replaced with an empty space in the email of the waiters that doesn't have it.
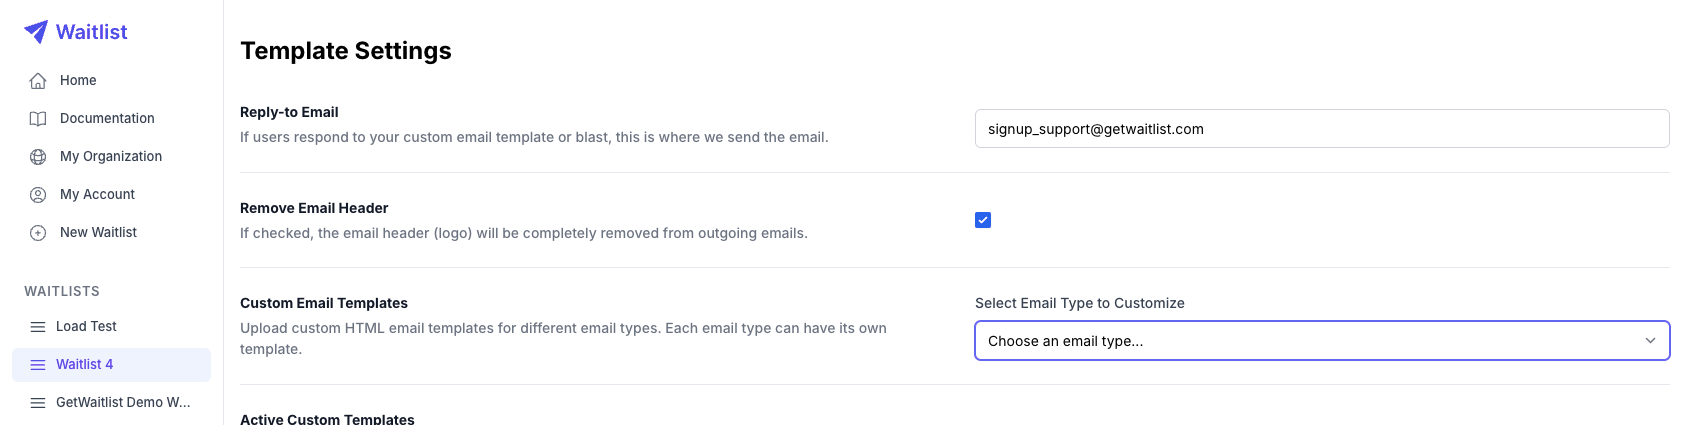
Custom Email Templates
For advanced customization beyond the built-in template editor, you can upload your own HTML email templates. This feature allows you to create completely custom-designed emails that match your brand perfectly while still leveraging Waitlist's dynamic content capabilities.
You can upload custom templates for any of these email types:
- Signup Email: Sent to new waitlist members
- Referral Email: Sent when users successfully refer others
- Verification Email: Sent for email address verification
- Offboard Email: Sent when users are removed from the waitlist
- Email Blast: Used for broadcast campaigns
How to Upload Custom Templates
- Access the Feature: In the Settings tab under "Custom Email Templates", select the email type you want to customize
- Upload HTML File: Click "Upload Template" and select your HTML file (.html files only)
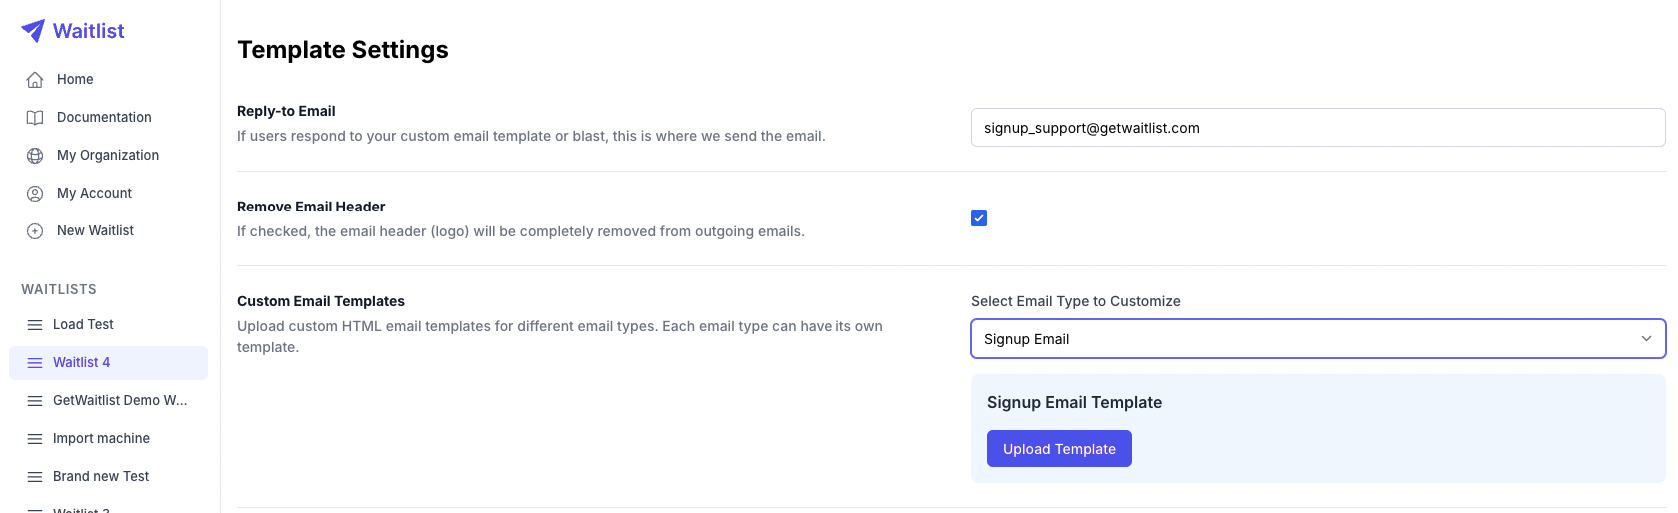
- Template Activation: Once uploaded, your custom template becomes active immediately
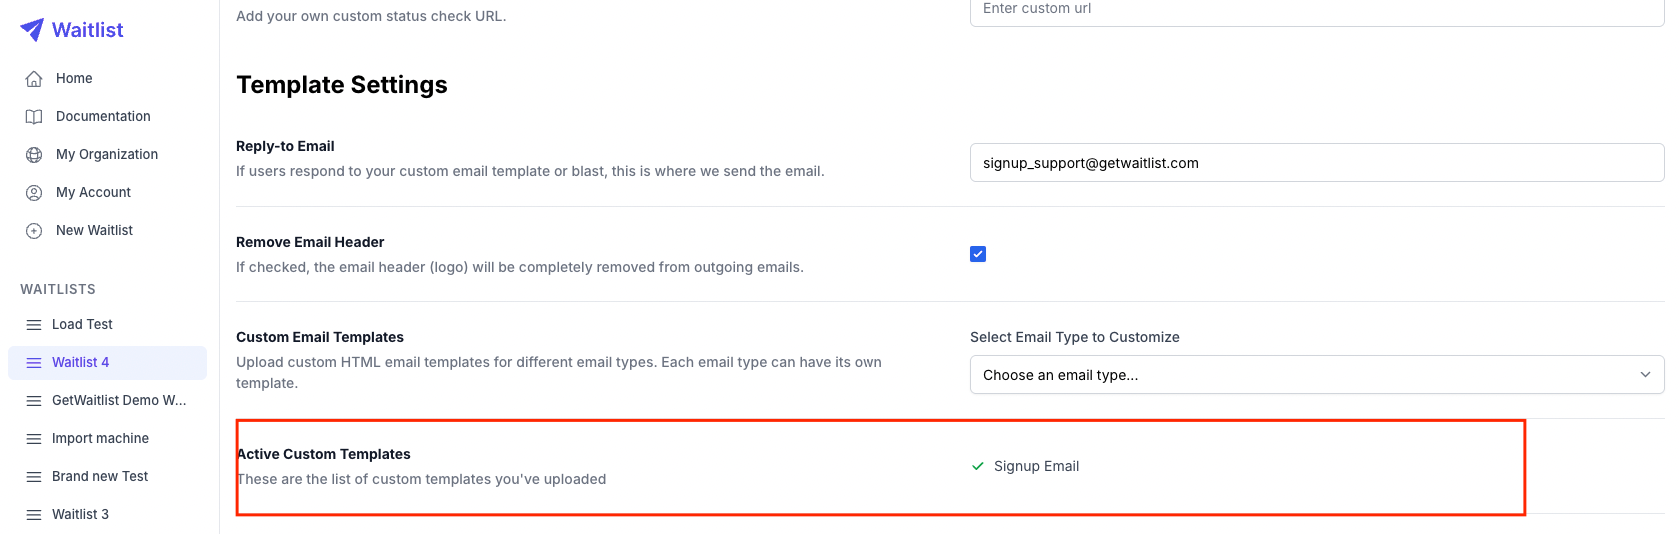
- Fallback Protection: The built-in template editor serves as a fallback if your custom template becomes unavailable
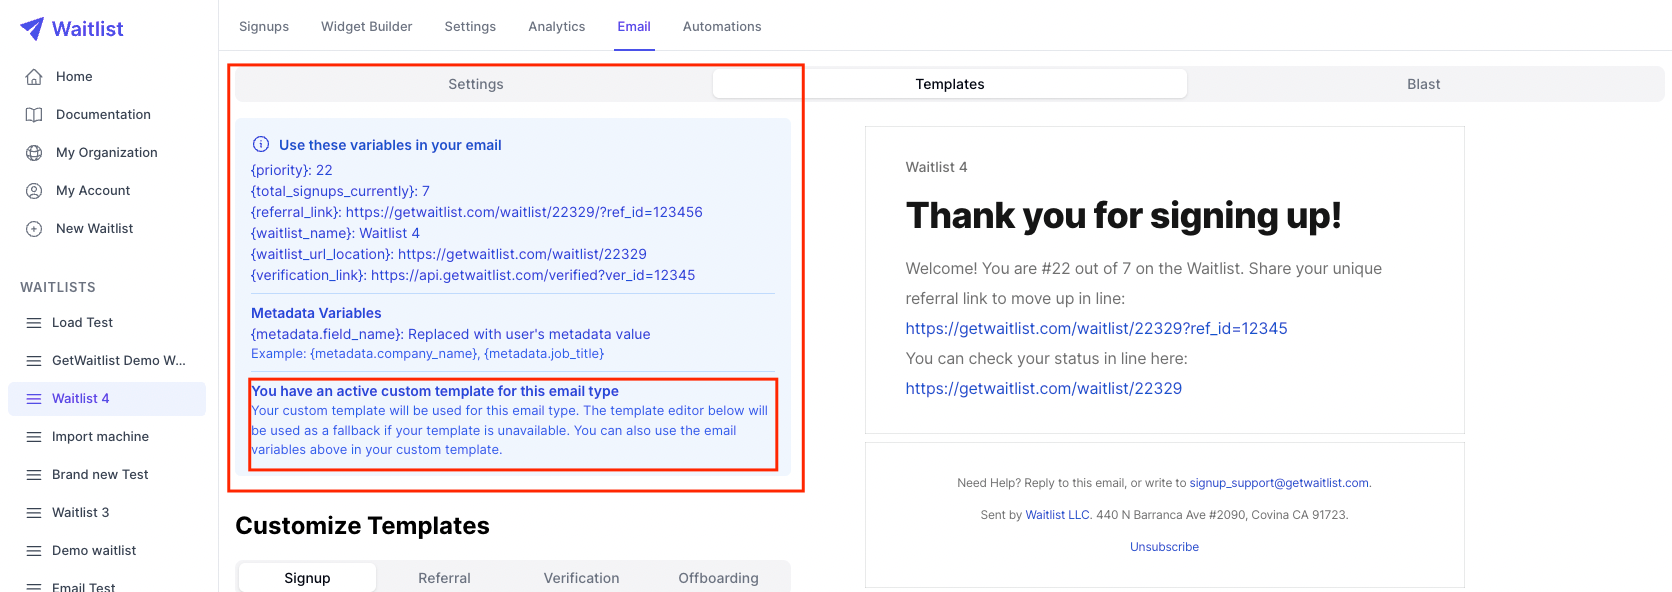
- Dynamic Variables: Your custom HTML templates can use the same dynamic variables as the built-in templates (see the screenshot above).
Best Practices for Custom Templates
- Responsive Design: Ensure your templates work well on both desktop and mobile devices
- Variable Placement: Test your templates with actual variable data to ensure proper formatting
- Brand Consistency: Use your brand colors, fonts, and styling for a cohesive experience
- Email Client Compatibility: Test your templates across different email clients (Gmail, Outlook, etc.)
- Keep a Backup: Save copies of your templates locally before uploading
Custom email templates require a Pro plan and provide the ultimate flexibility in email design while maintaining all the powerful automation features of Waitlist.
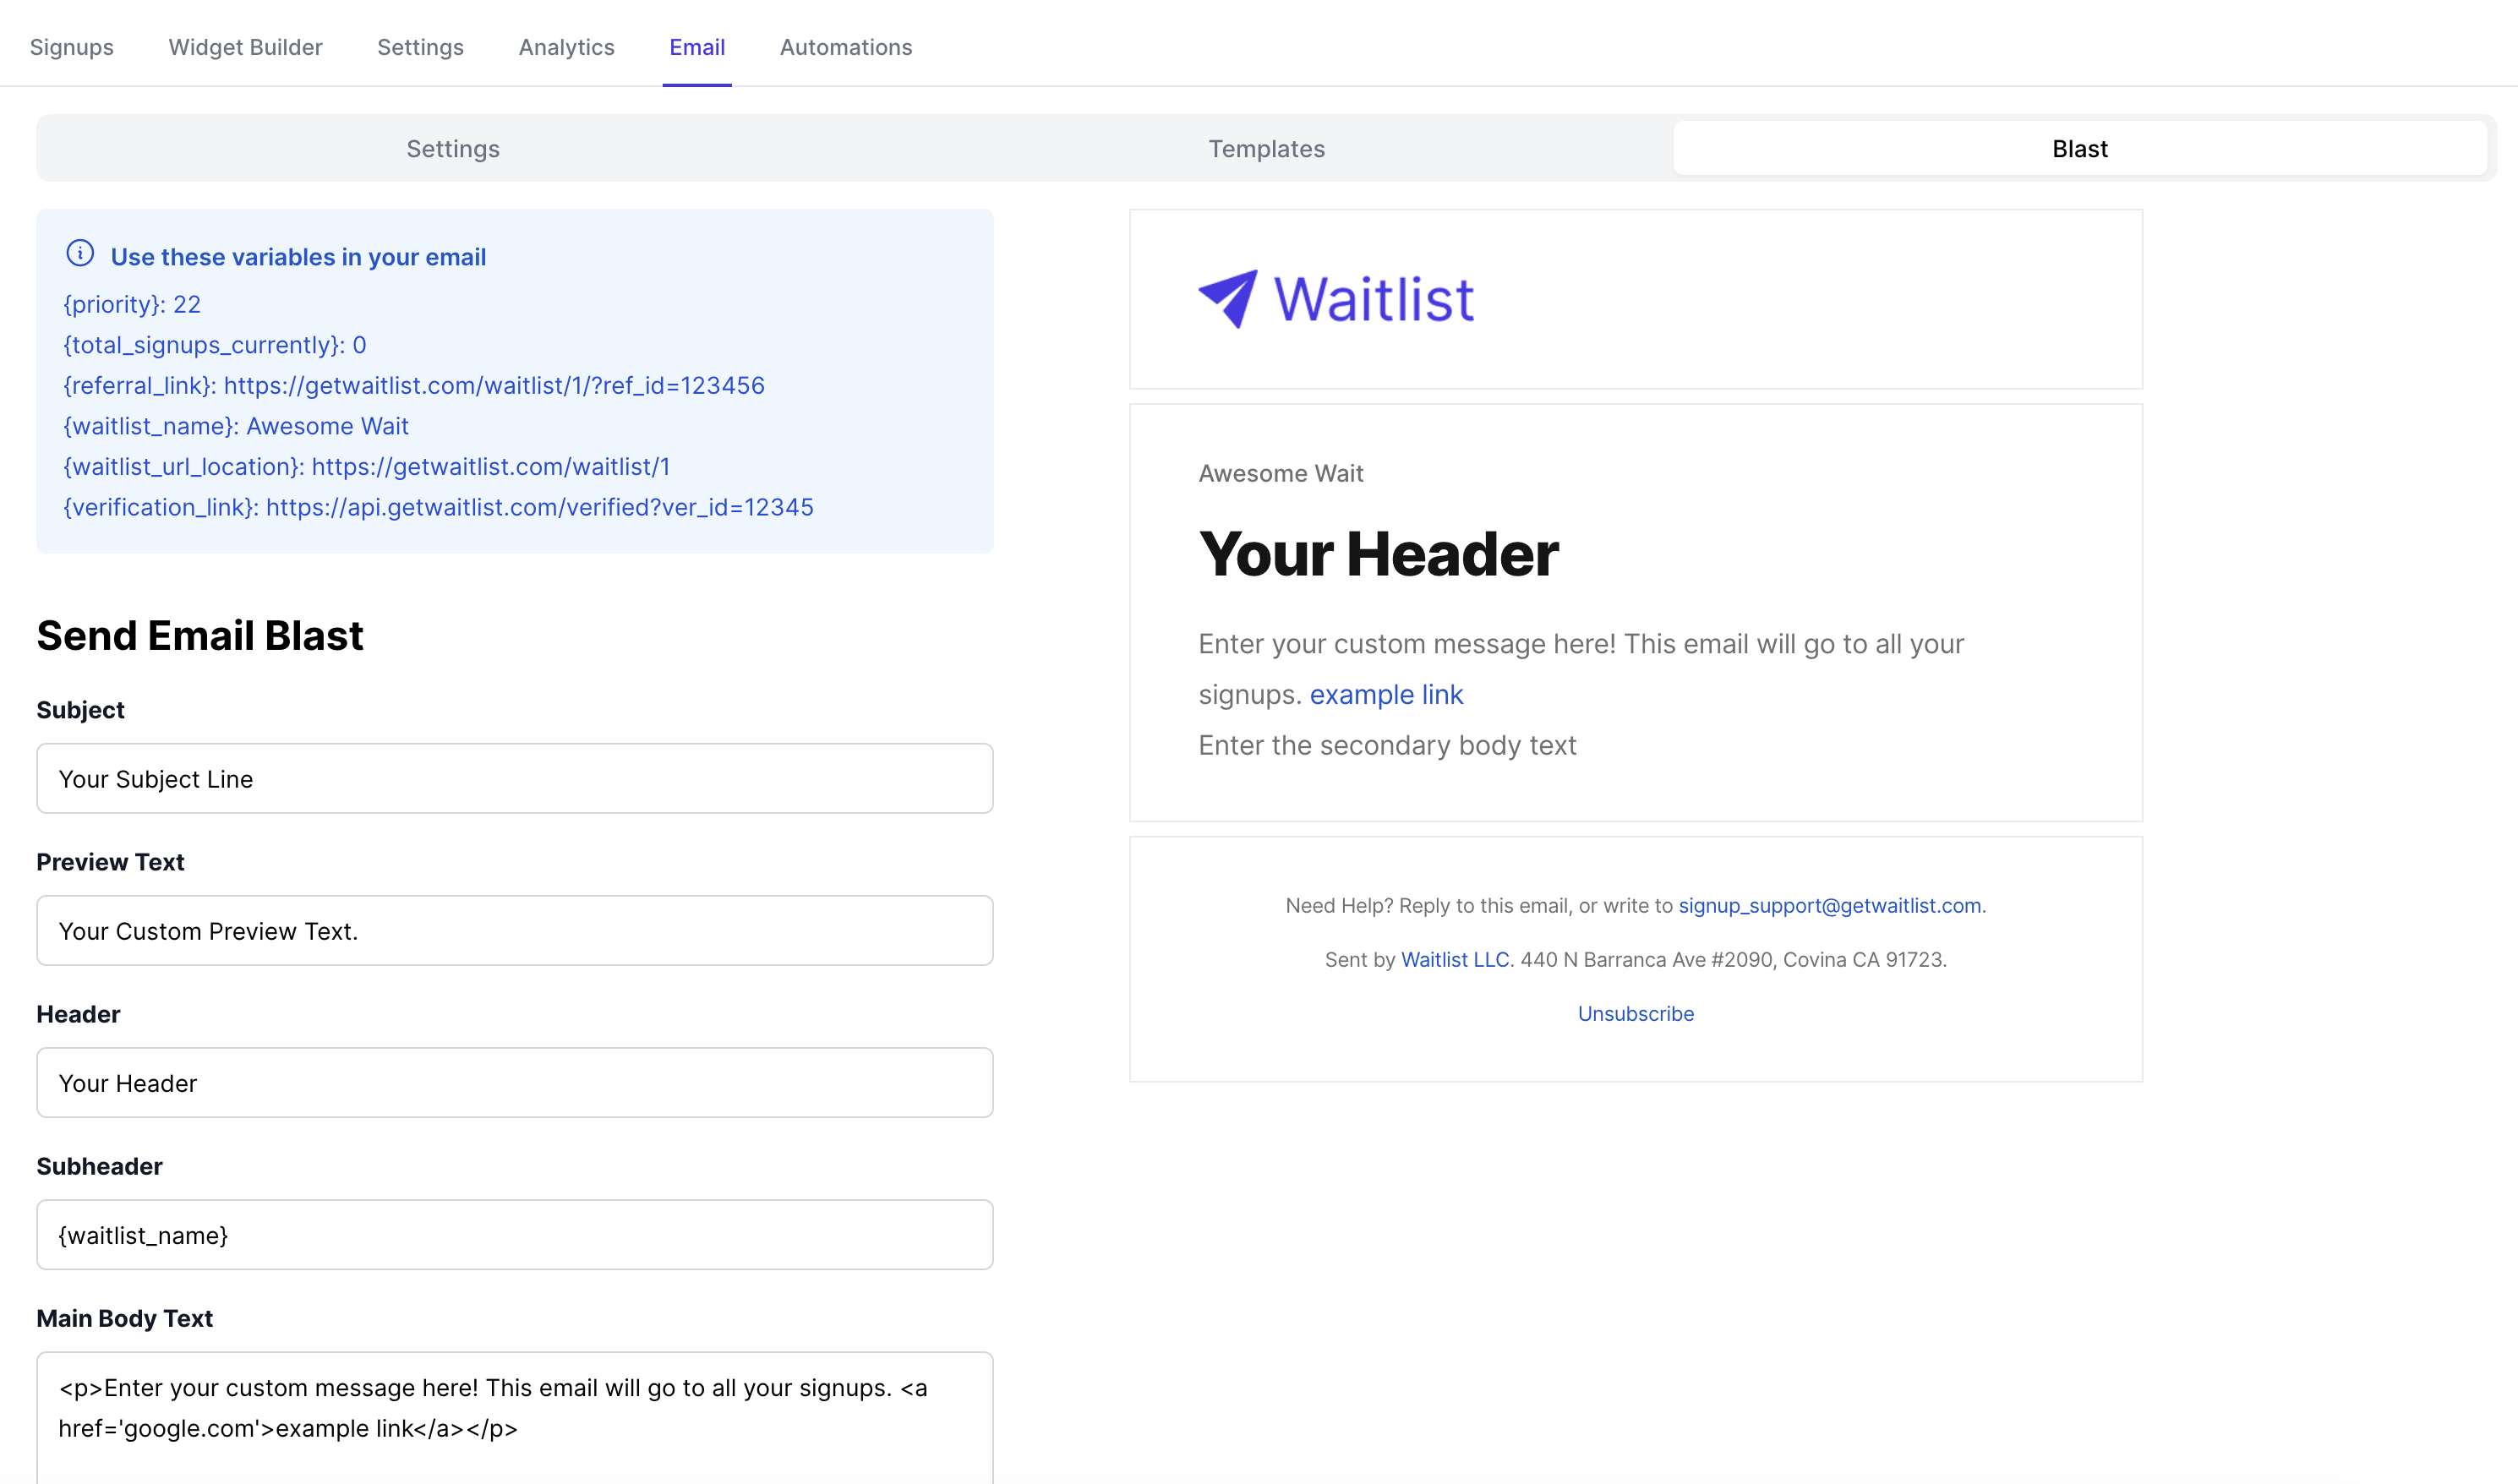
Blast
Beyond targeted and scenario-specific emails, the Blast section offers a powerful tool for broadcasting messages to your entire waitlist. An "Email Blast" is a totally custom email that you can write in our editor that will go out to the users on your Waitlist. Just as with the templated emails, you can use email variables that will populate to fit each receiving user. Furthermore, you can use the checkboxes at the bottom of the interface to segment your email blast, so that it only goes to the right subset of users.
These email blasts allow you to effectively send one-off newsletters and create highly flexible email marketing campaigns. At the right time in the lifecycle of your waitlist -- maybe you're gearing up for launch and need to send an extra message to everyone to drum up more hype -- you can send an email, remind your audience of your upcoming launch, and increase engagement.
The email blast feature is invaluable for announcements and updates.
This is the easy way to reach all the members of your Waitlist and engage them. If you've set your reply-to header, they can even write back to you.
There's no need for other newsletter or additional email tools: this is the easy way.
Please note that configuring email templates and sending email blasts are available only on the Pro plan. These are among our very best features.