How to Set a Custom Email Domain for Sending your Waitlist Emails
Set a custom domain and sender to send emails from. Send welcome, verification, offboarding, and referral emails with your own sender instead of our regular @getwaitlist.com email.
Steps to activate
- Navigate to "My Organization" on the left side of your dashboard.
- Click Domain and then "Add Domain".
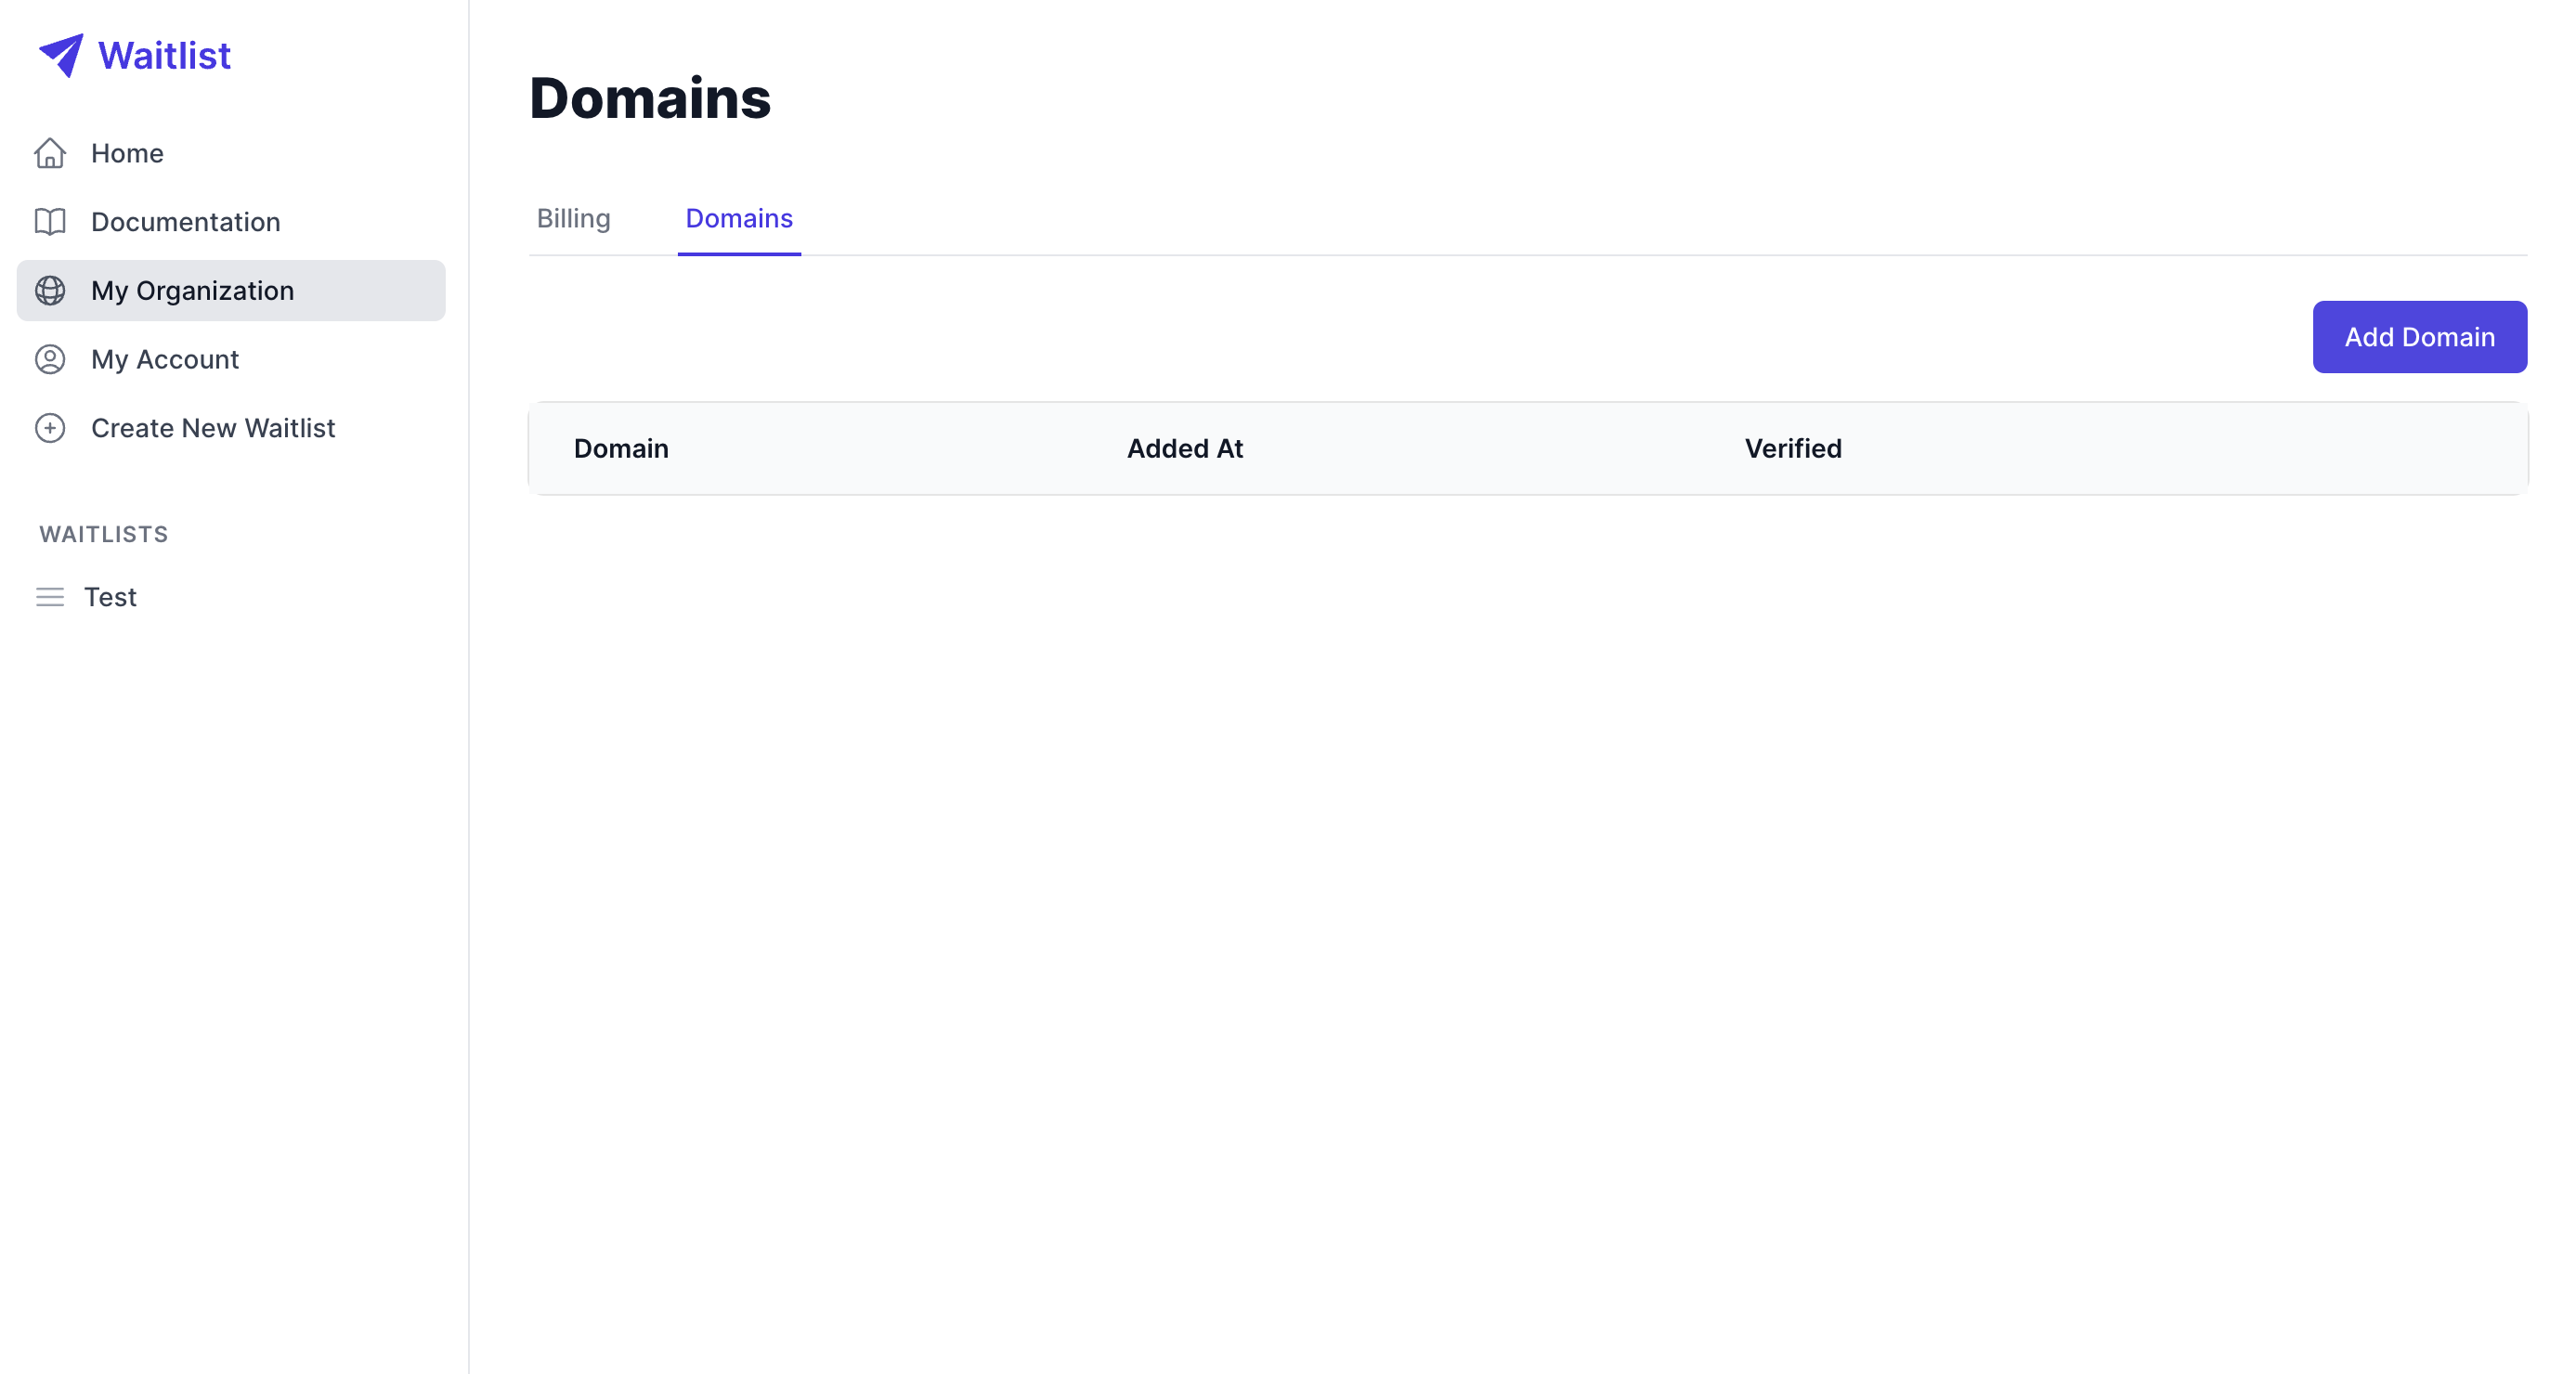
- Add the domain of your sender email. For example, if you want to send emails from [email protected], you add "example.com". If you want to send from [email protected] , you add "mail.example.com". Click Save.
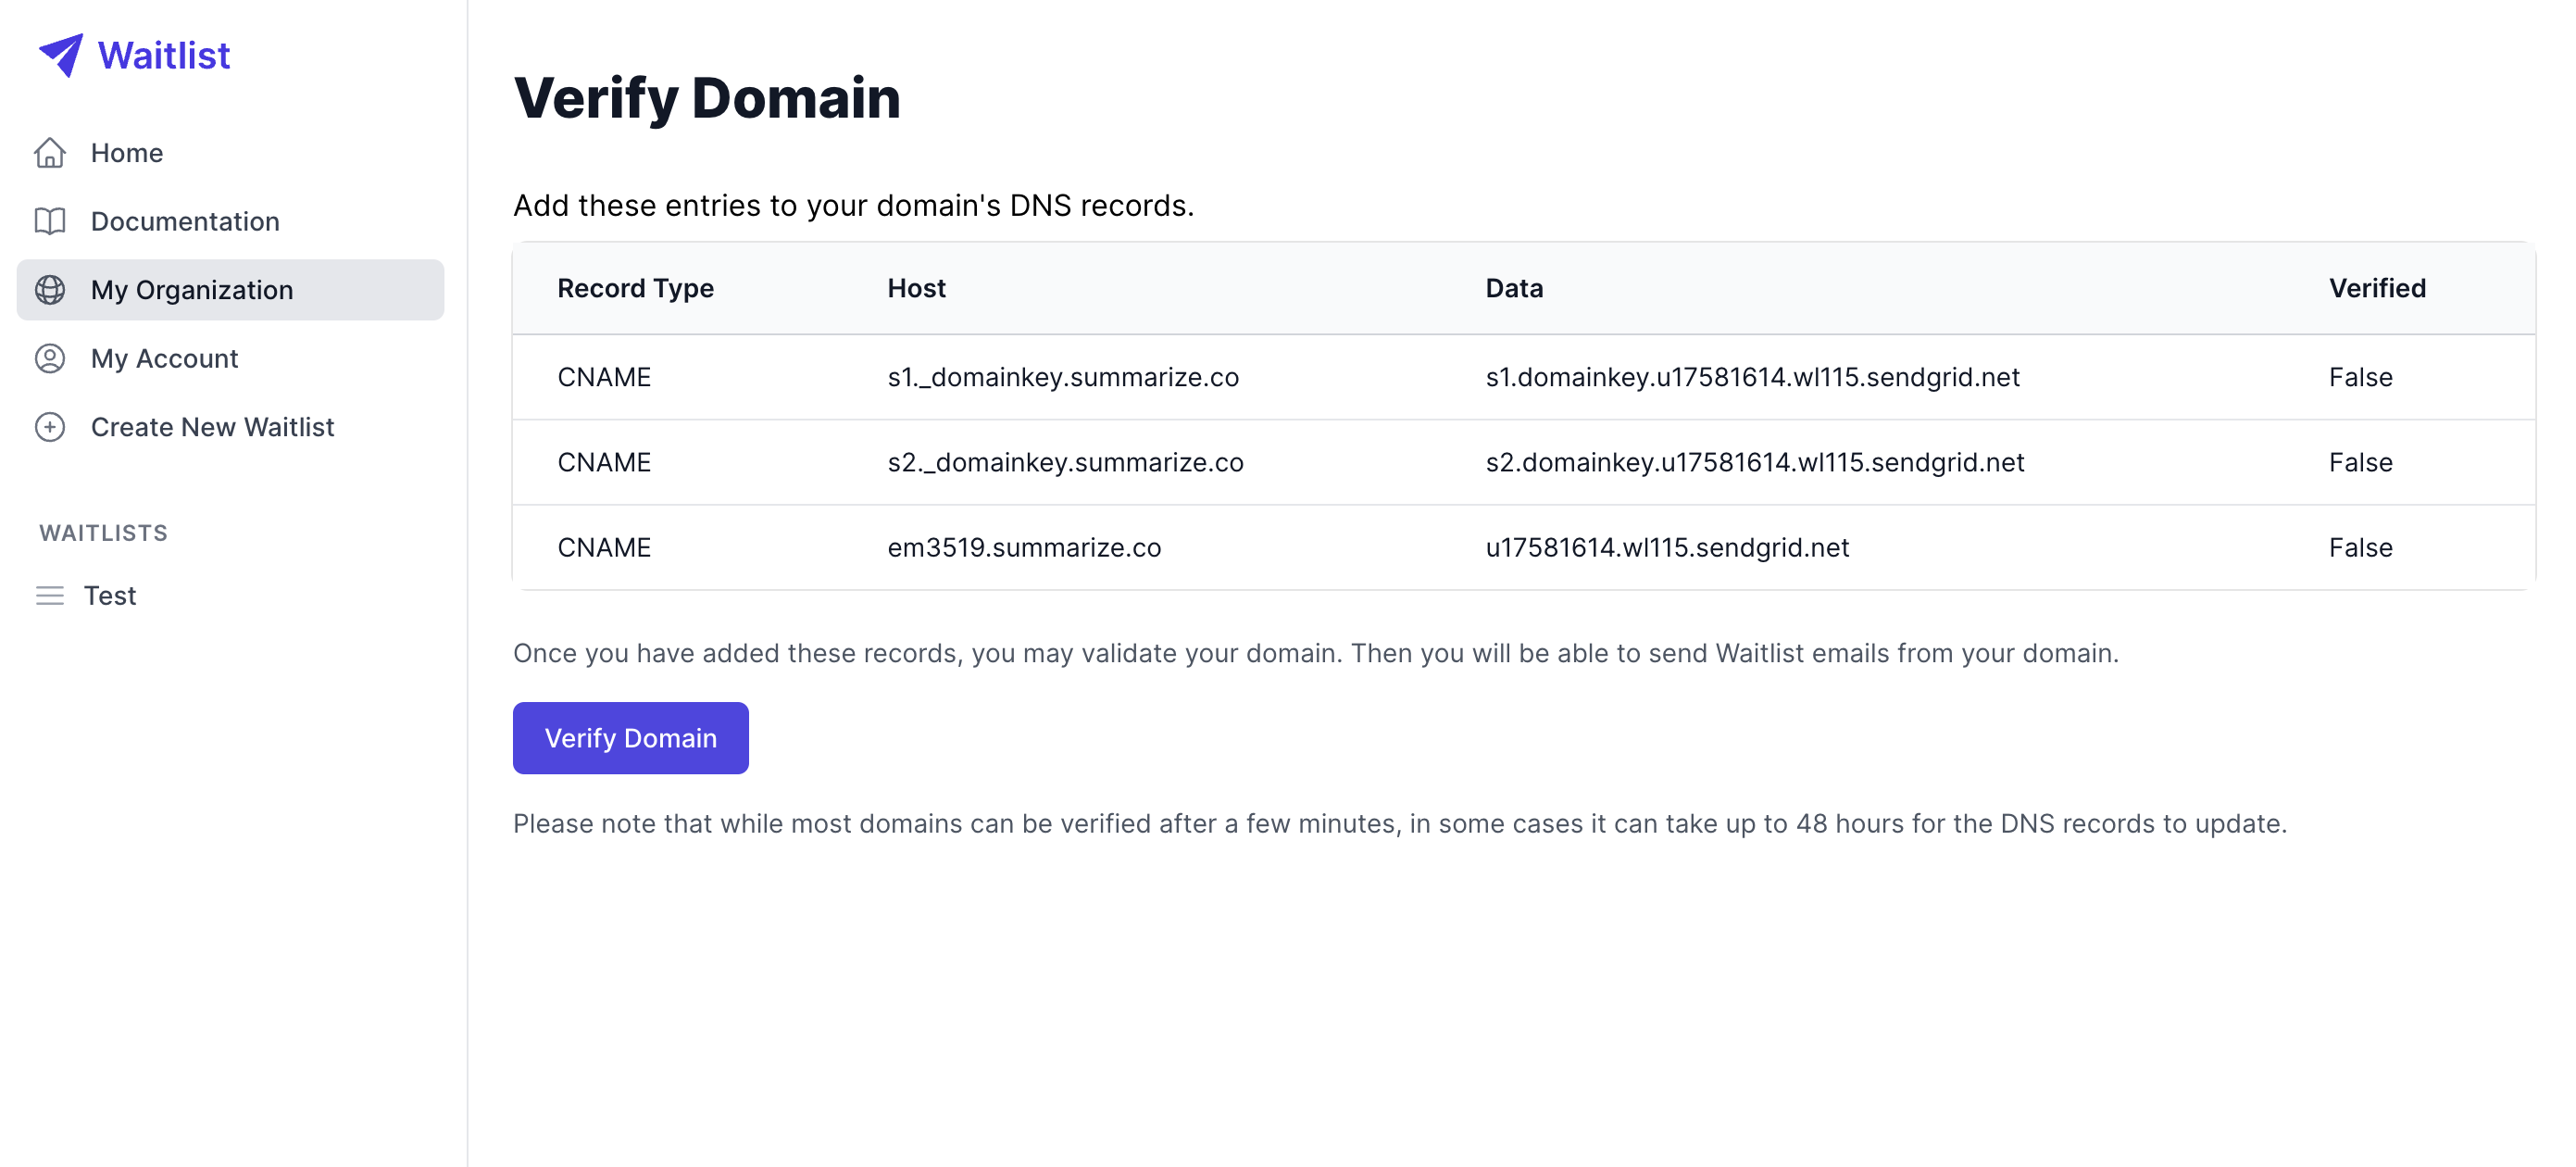
- Once you have that, note down the DNS records (you will have 3 in total), like below:
- Navigate to the DNS records for your website. This can be hosted on a domain registrar like Namecheap, GoDaddy, Dynadot or a third party service like Cloudflare.
- Add your DNS records from the Waitlist dashboard. This can look different depending on the service you are using. We've included an example of Cloudflare and Dynadot below. Some providers will give you two spaces to enter something in, others will need you to change the subdomain on the records.
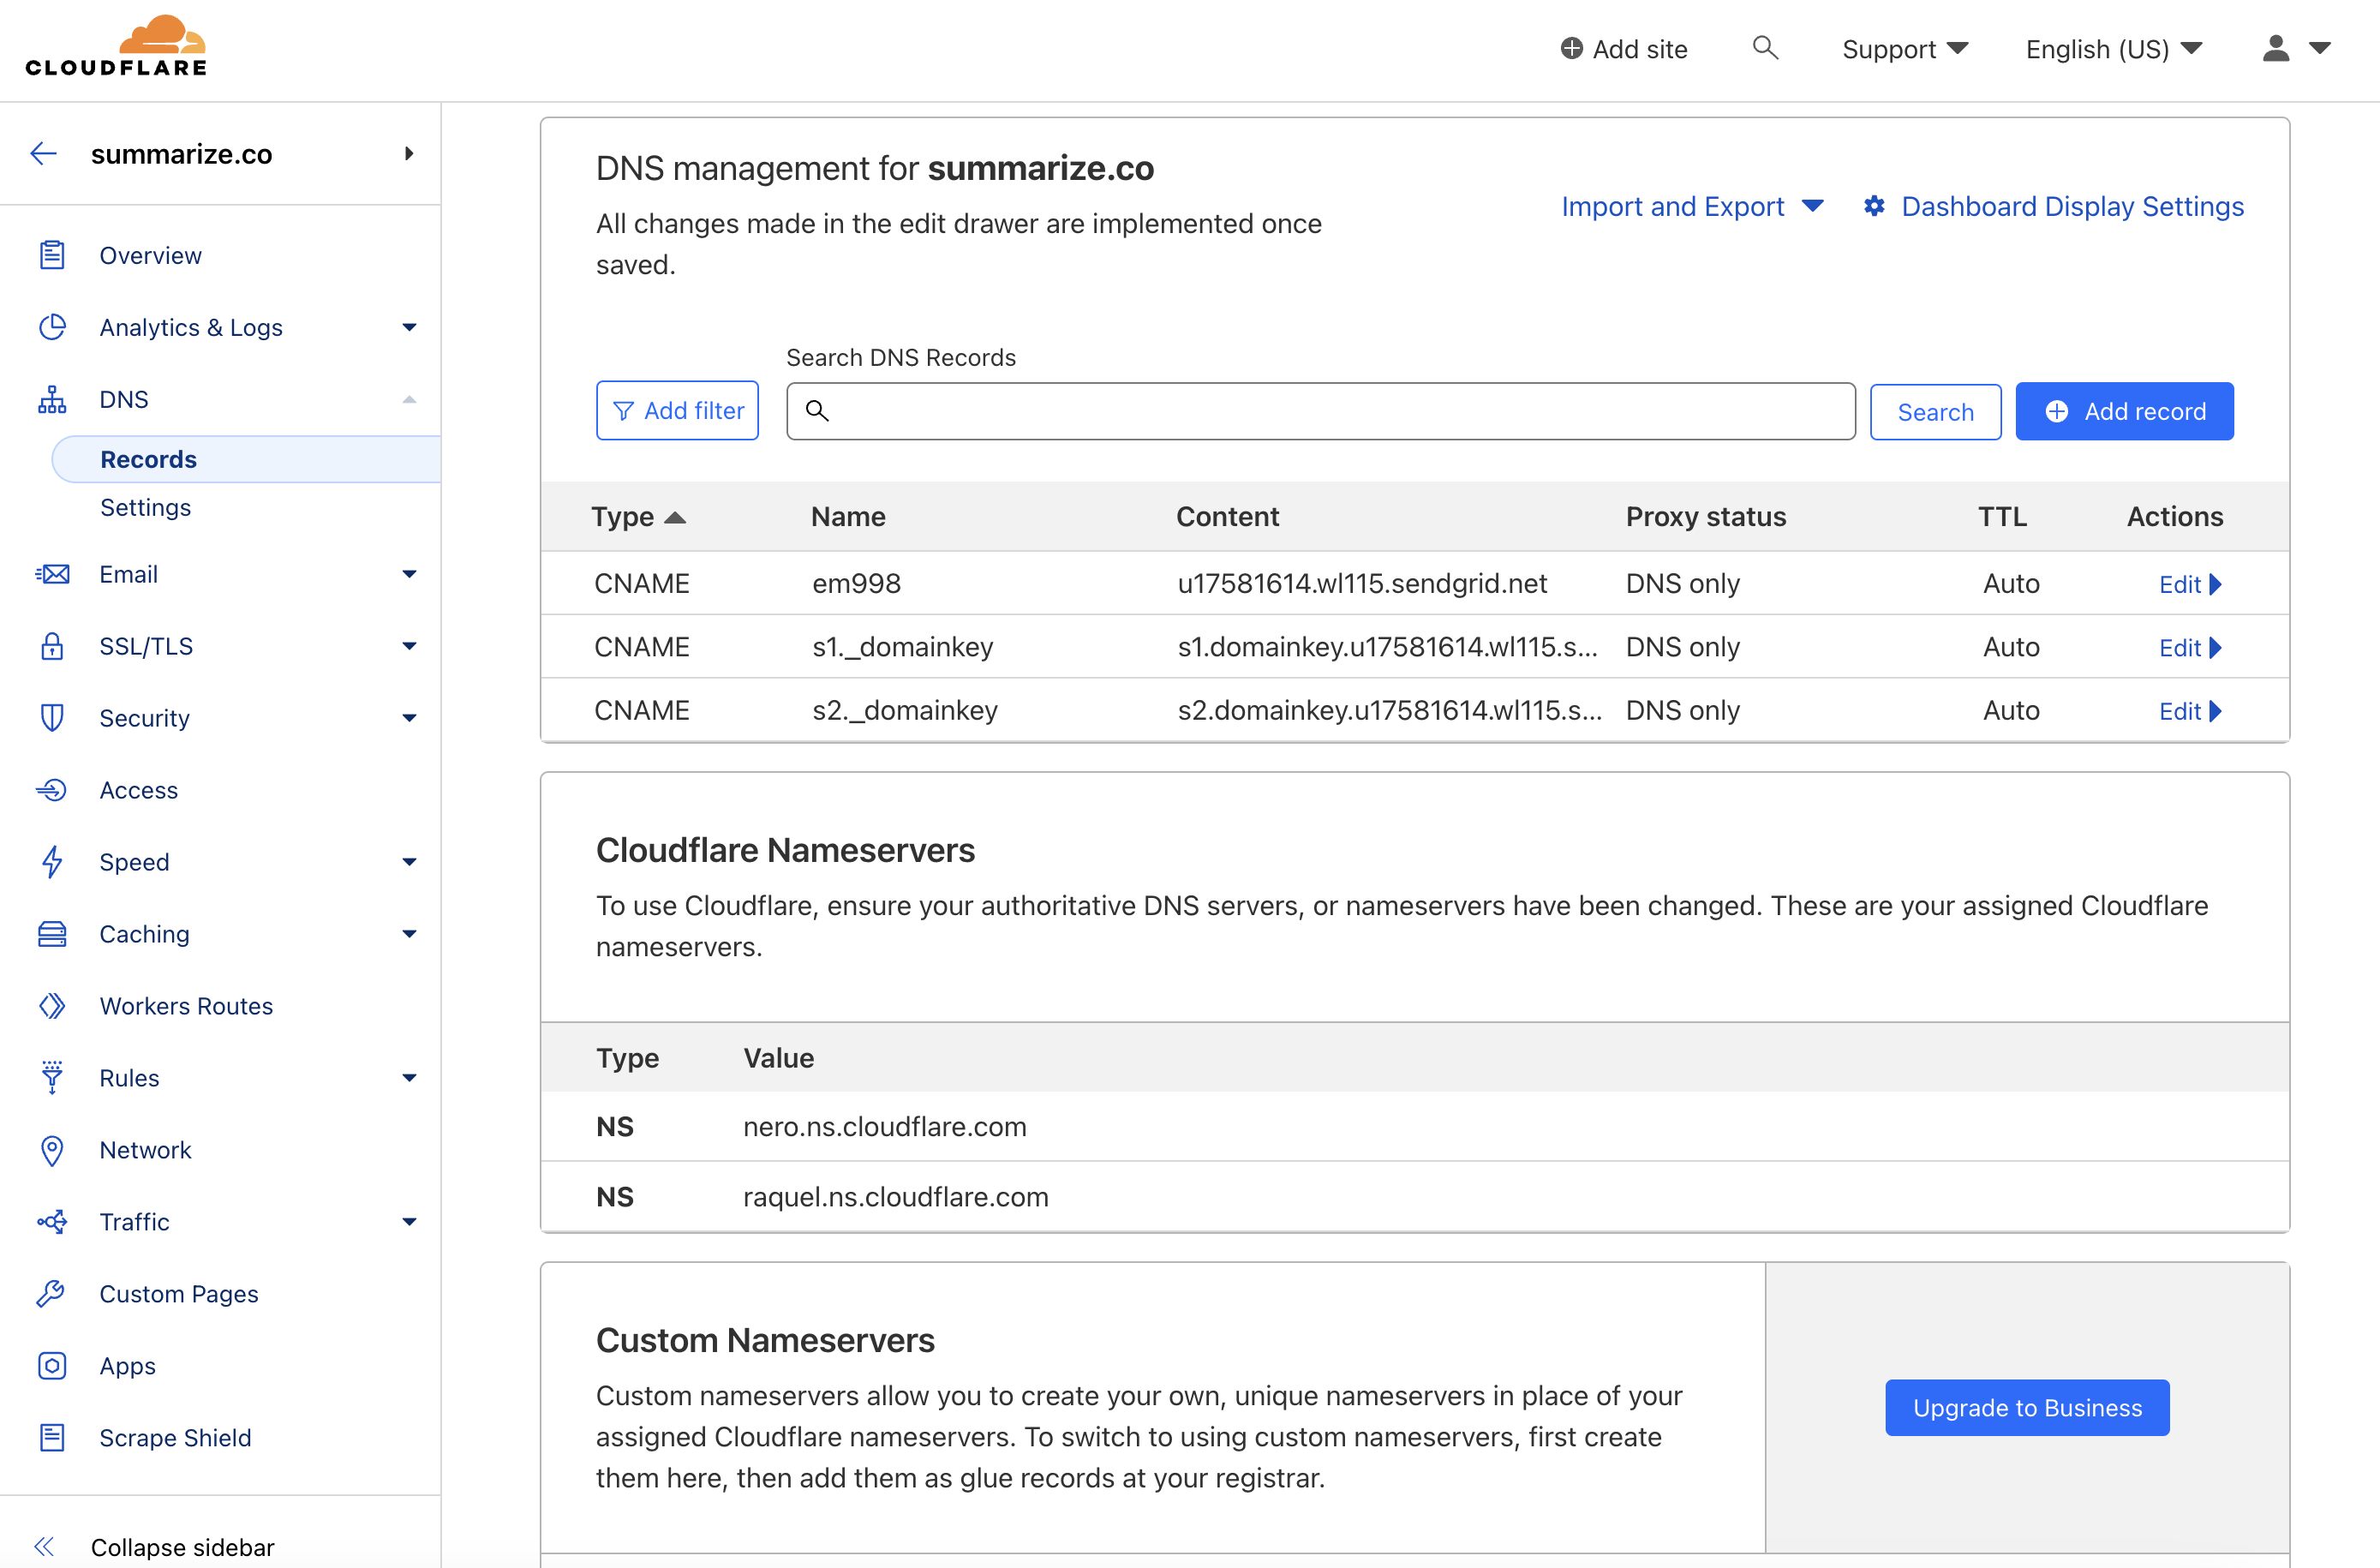
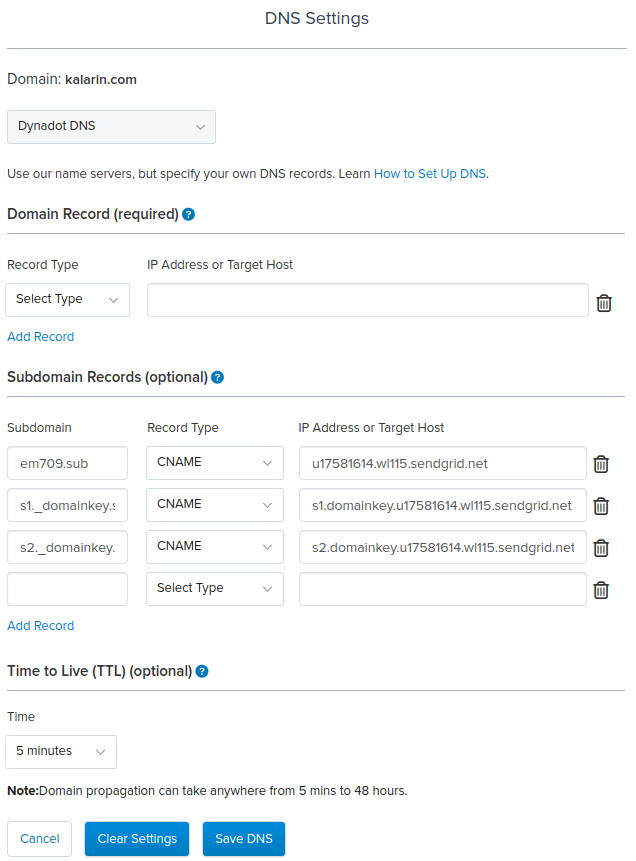
- Once you've added your records, click the "Verify" button at the bottom. If it's not verified yet, it will give you an error. It can take anywhere from a minute to 48 hours for the DNS records to be propagated and also verified on our end
- When the domain is verified this is how it can look like:
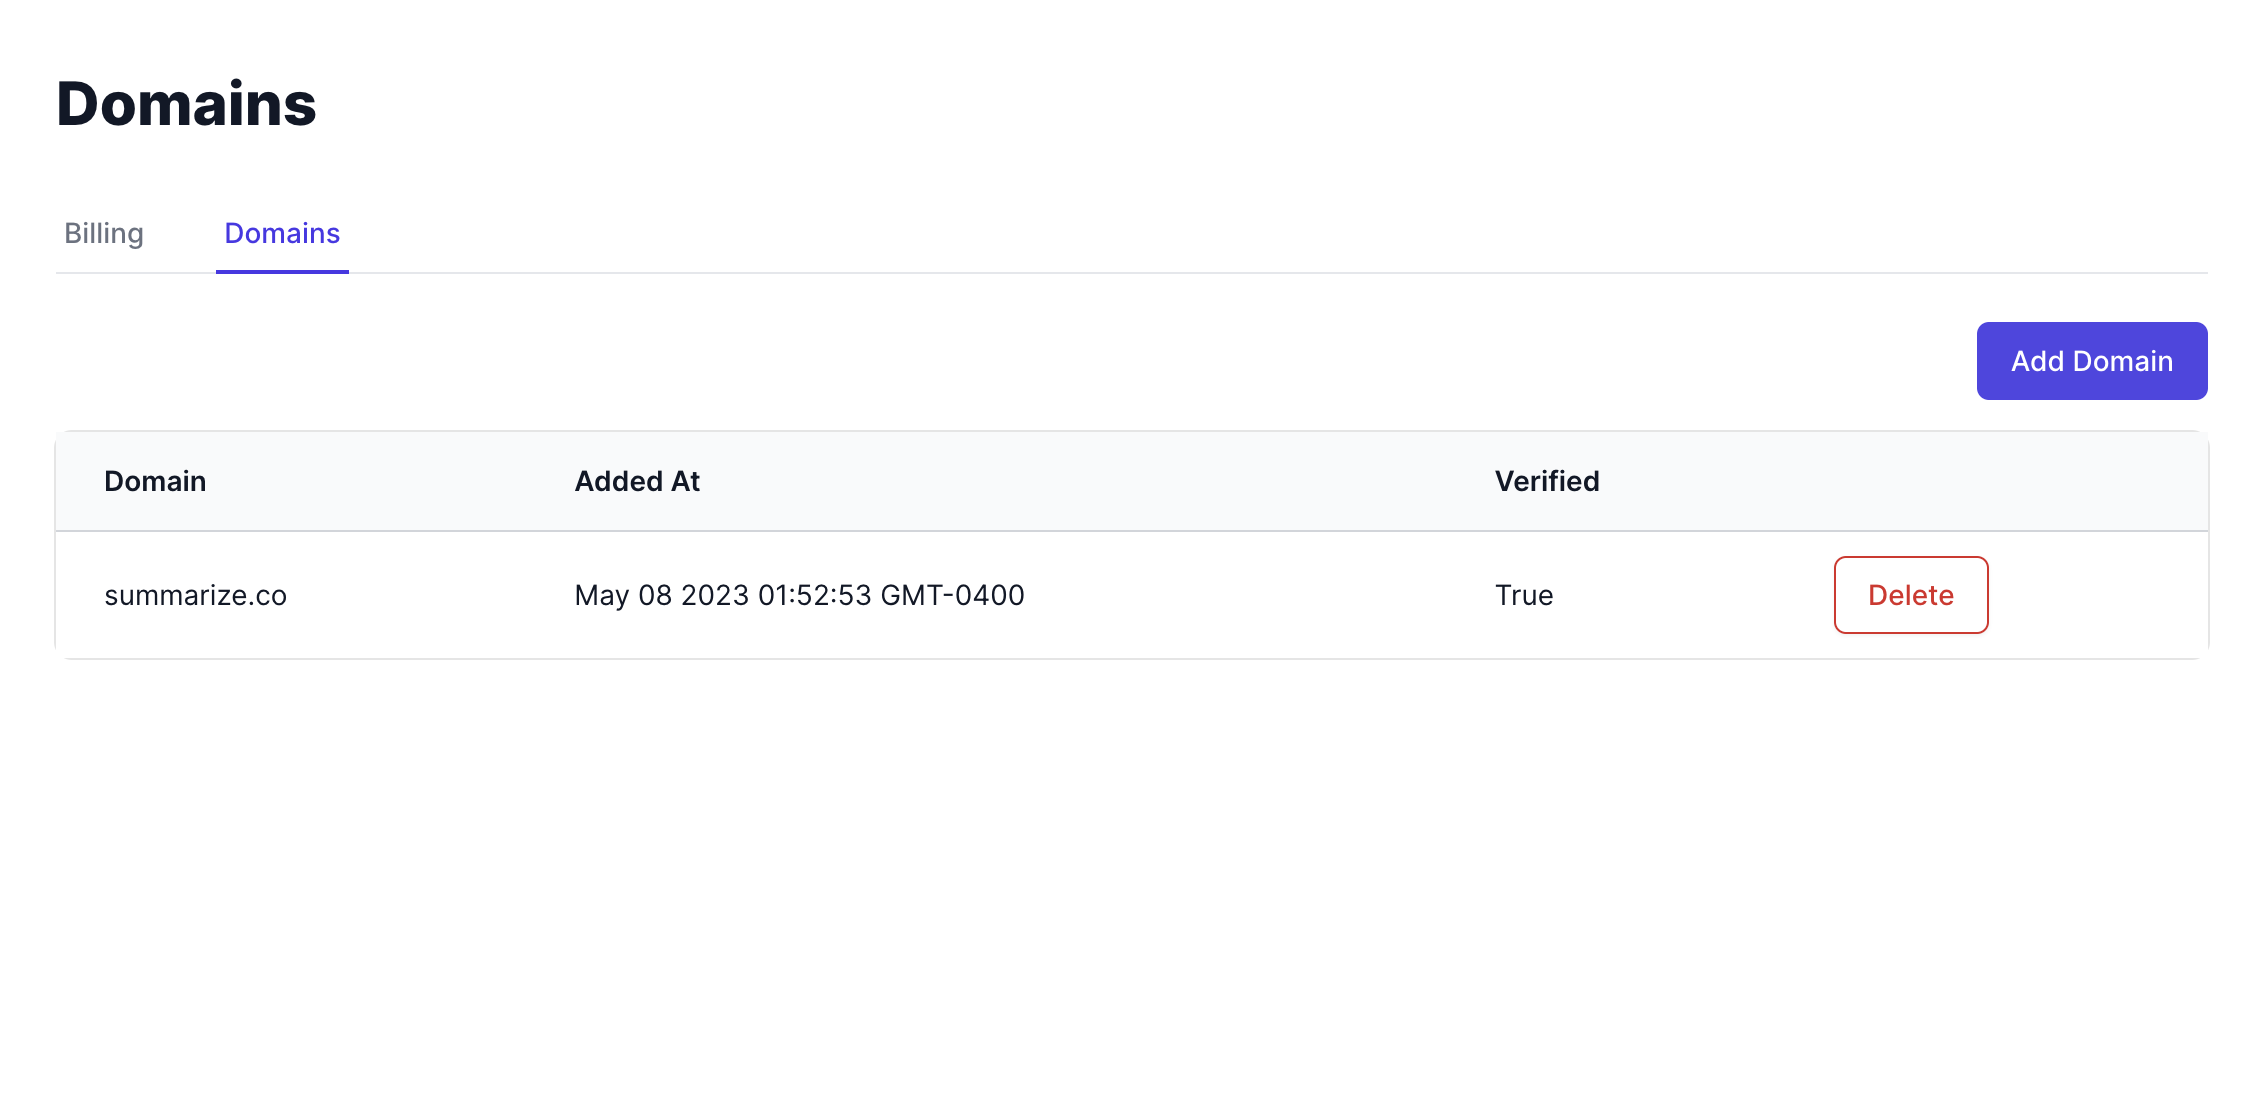
- Once it's verified, you are ready to add the customized sender. Click on the specific Waitlist you want to add it to, navigate to "Email" and add your values. Click Save.
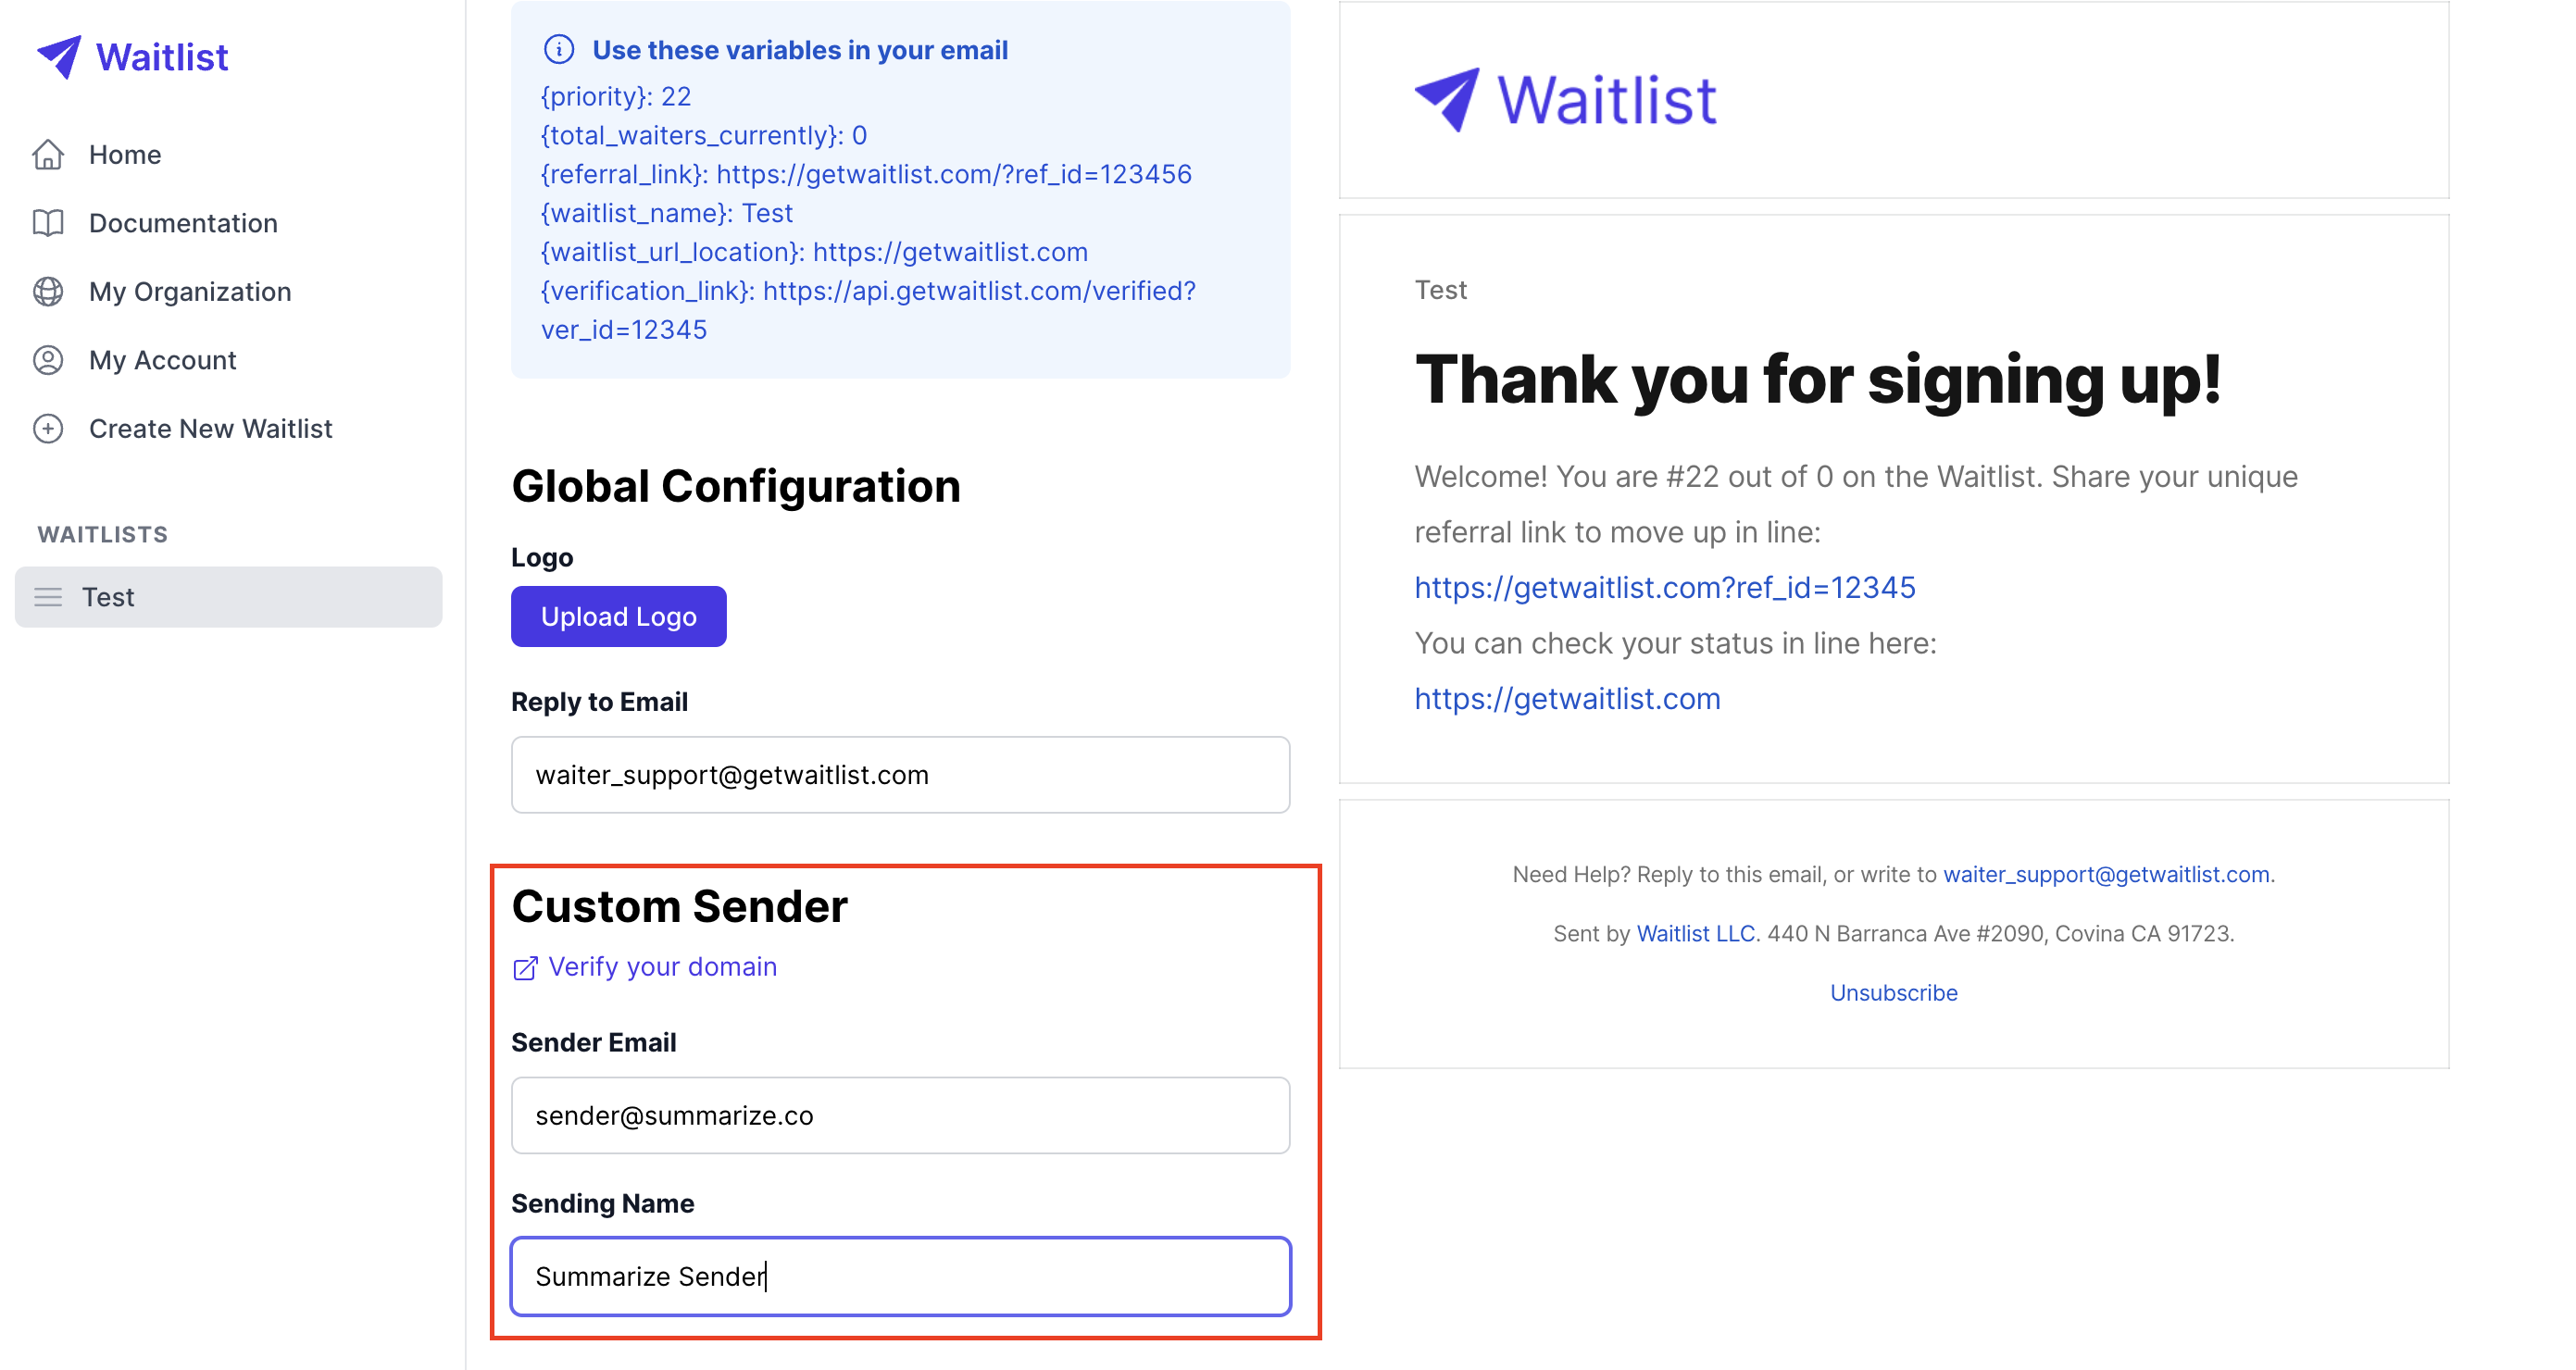
- The sender information is now saved and will be the default when we send emails to signed up users for this waitlist.
- Note: If you want the same sender across multiple waitlists, you need to add the sender value (Step 9) to those waitlists as well.
Troubleshooting Guide
- DNS Records Not Propagating
- Issue: DNS records are not propagating or getting verified.
- Solution:
- Ensure that you have correctly added the DNS records provided while adding your custom domain.
- Check if there are any typos in the DNS records.
- DNS changes can take up to 48 hours to propagate. Wait and try verifying again later.
- Use an online DNS checker tool to see if the records have been updated globally.
- Verification Failed
- Issue: Verification fails even after DNS records are added.
- Solution:
- Double-check the DNS records for accuracy.
- Ensure there are no conflicting records in your DNS settings.
- Make sure the DNS records are added to the correct domain/subdomain.
- Some DNS providers might require additional time for changes to take effect. Wait and try again after some time.
- Emails Not Being Sent
- Issue: Emails are not being sent from the customized sender.
- Solution:
- Verify that the sender information is correctly added and saved for the specific waitlist.
- Ensure that your email domain is not on any email blacklists.
- Email Delivery to Spam/Junk Folder
- Issue: Emails sent from the custom domain are going to the recipient's spam/junk folder.
- Solution:
- Ensure you have proper SPF, DKIM, and DMARC records set up for your domain.
- Avoid using spam-trigger words in your email content.
- Regularly monitor your domain's email reputation using tools like Google Postmaster Tools.
If you continue to experience issues, please reach out to our support team at [email protected] for further assistance.