Integrate a Waitlist into your Webflow Website
On this page, we will show you how to insert a Waitlist into your Webflow website. It's easy to create and customize a Waitlist Widget, and to copy-paste it into the Webflow website creator. No coding necessary!
What is Webflow?
Webflow is a web design and development platform that allows you to design, build, and launch websites visually, without needing to write code. It offers a powerful and flexible design interface that caters to both designers and developers, enabling you to create responsive and interactive websites. Webflow also provides hosting, content management, and e-commerce capabilities, making it a comprehensive solution for web projects.
What are the Pros and Cons of Webflow?
Webflow offers a high degree of customization and advanced design options, surpassing other builders like Carrd,
Squarespace, and Typedream, which is great if you need really detailed design control.
However, this complexity can make Webflow less accessible for beginners compared to the more user-friendly interfaces of
Squarespace and Carrd. While Webflow provides robust features for responsive design and integrated CMS, it comes with a
steeper learning curve and potentially higher cost than simpler platforms like Typedream and Carrd.
Getting Started with Waitlist and Webflow
To make a pre-launch waitlist in Webflow, you should first determine on which page you want to host your Waitlist. Usually, most users want to put the Waitlist Widget on their landing page, but some people may want to place the waiting list on a different page (for example, if it's for a new product and your landing page promotes an already-existing product). When you've made the page in Webflow that you want to have the Waitlist Form on, then you can proceed with the integration guide below.
Integration Guide
-
Go to your Waitlist Dashboard and navigate to the Waitlist.
-
Click on the "Settings" tab. Make sure that the "Waitlist URL" field matches the Webflow page on which you want to embed your Waitlist Widget.
-
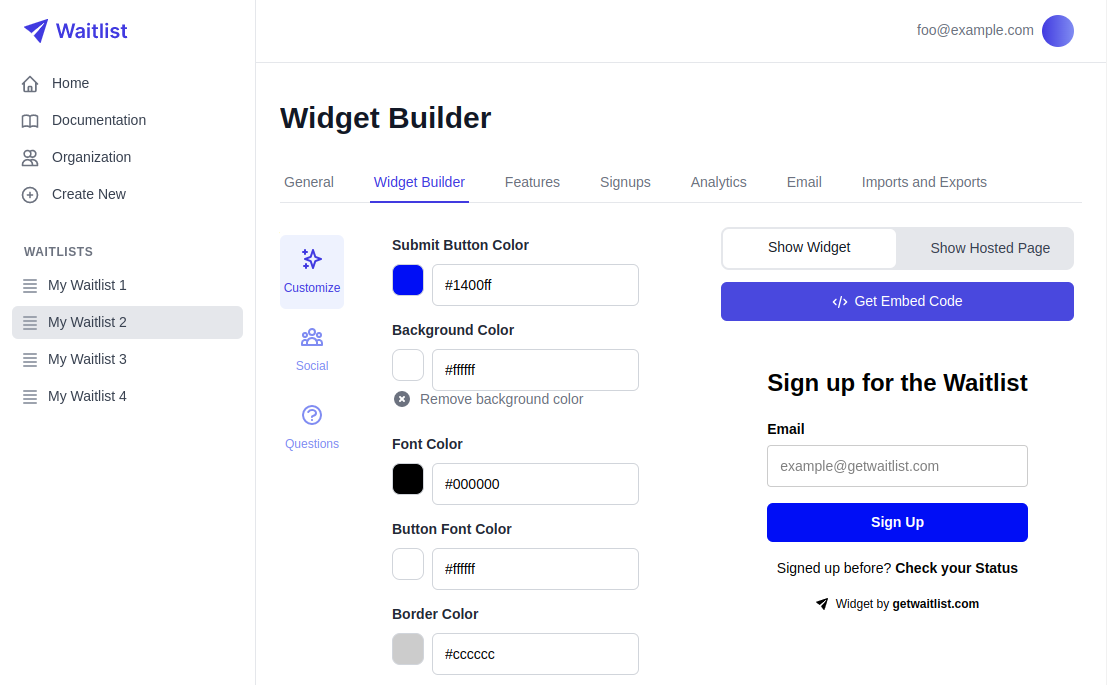
Go into the Widget Builder, and click the "Get Embed Code" button.
-
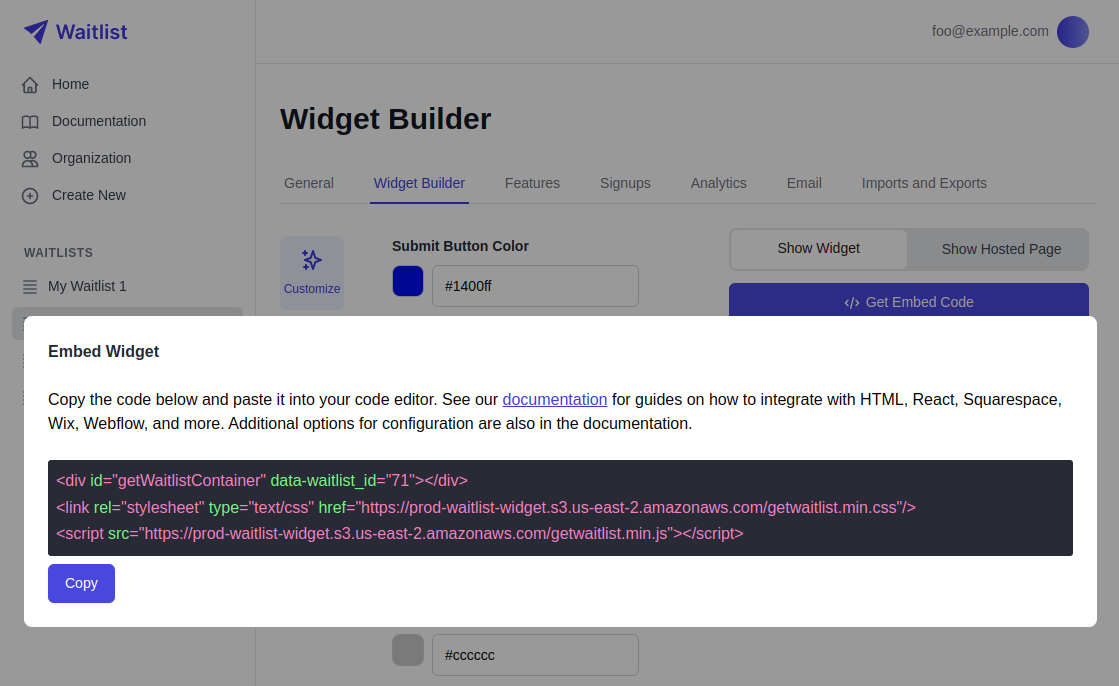
The window that pops up will give you a small code snippet to copy. Click the copy button.
-
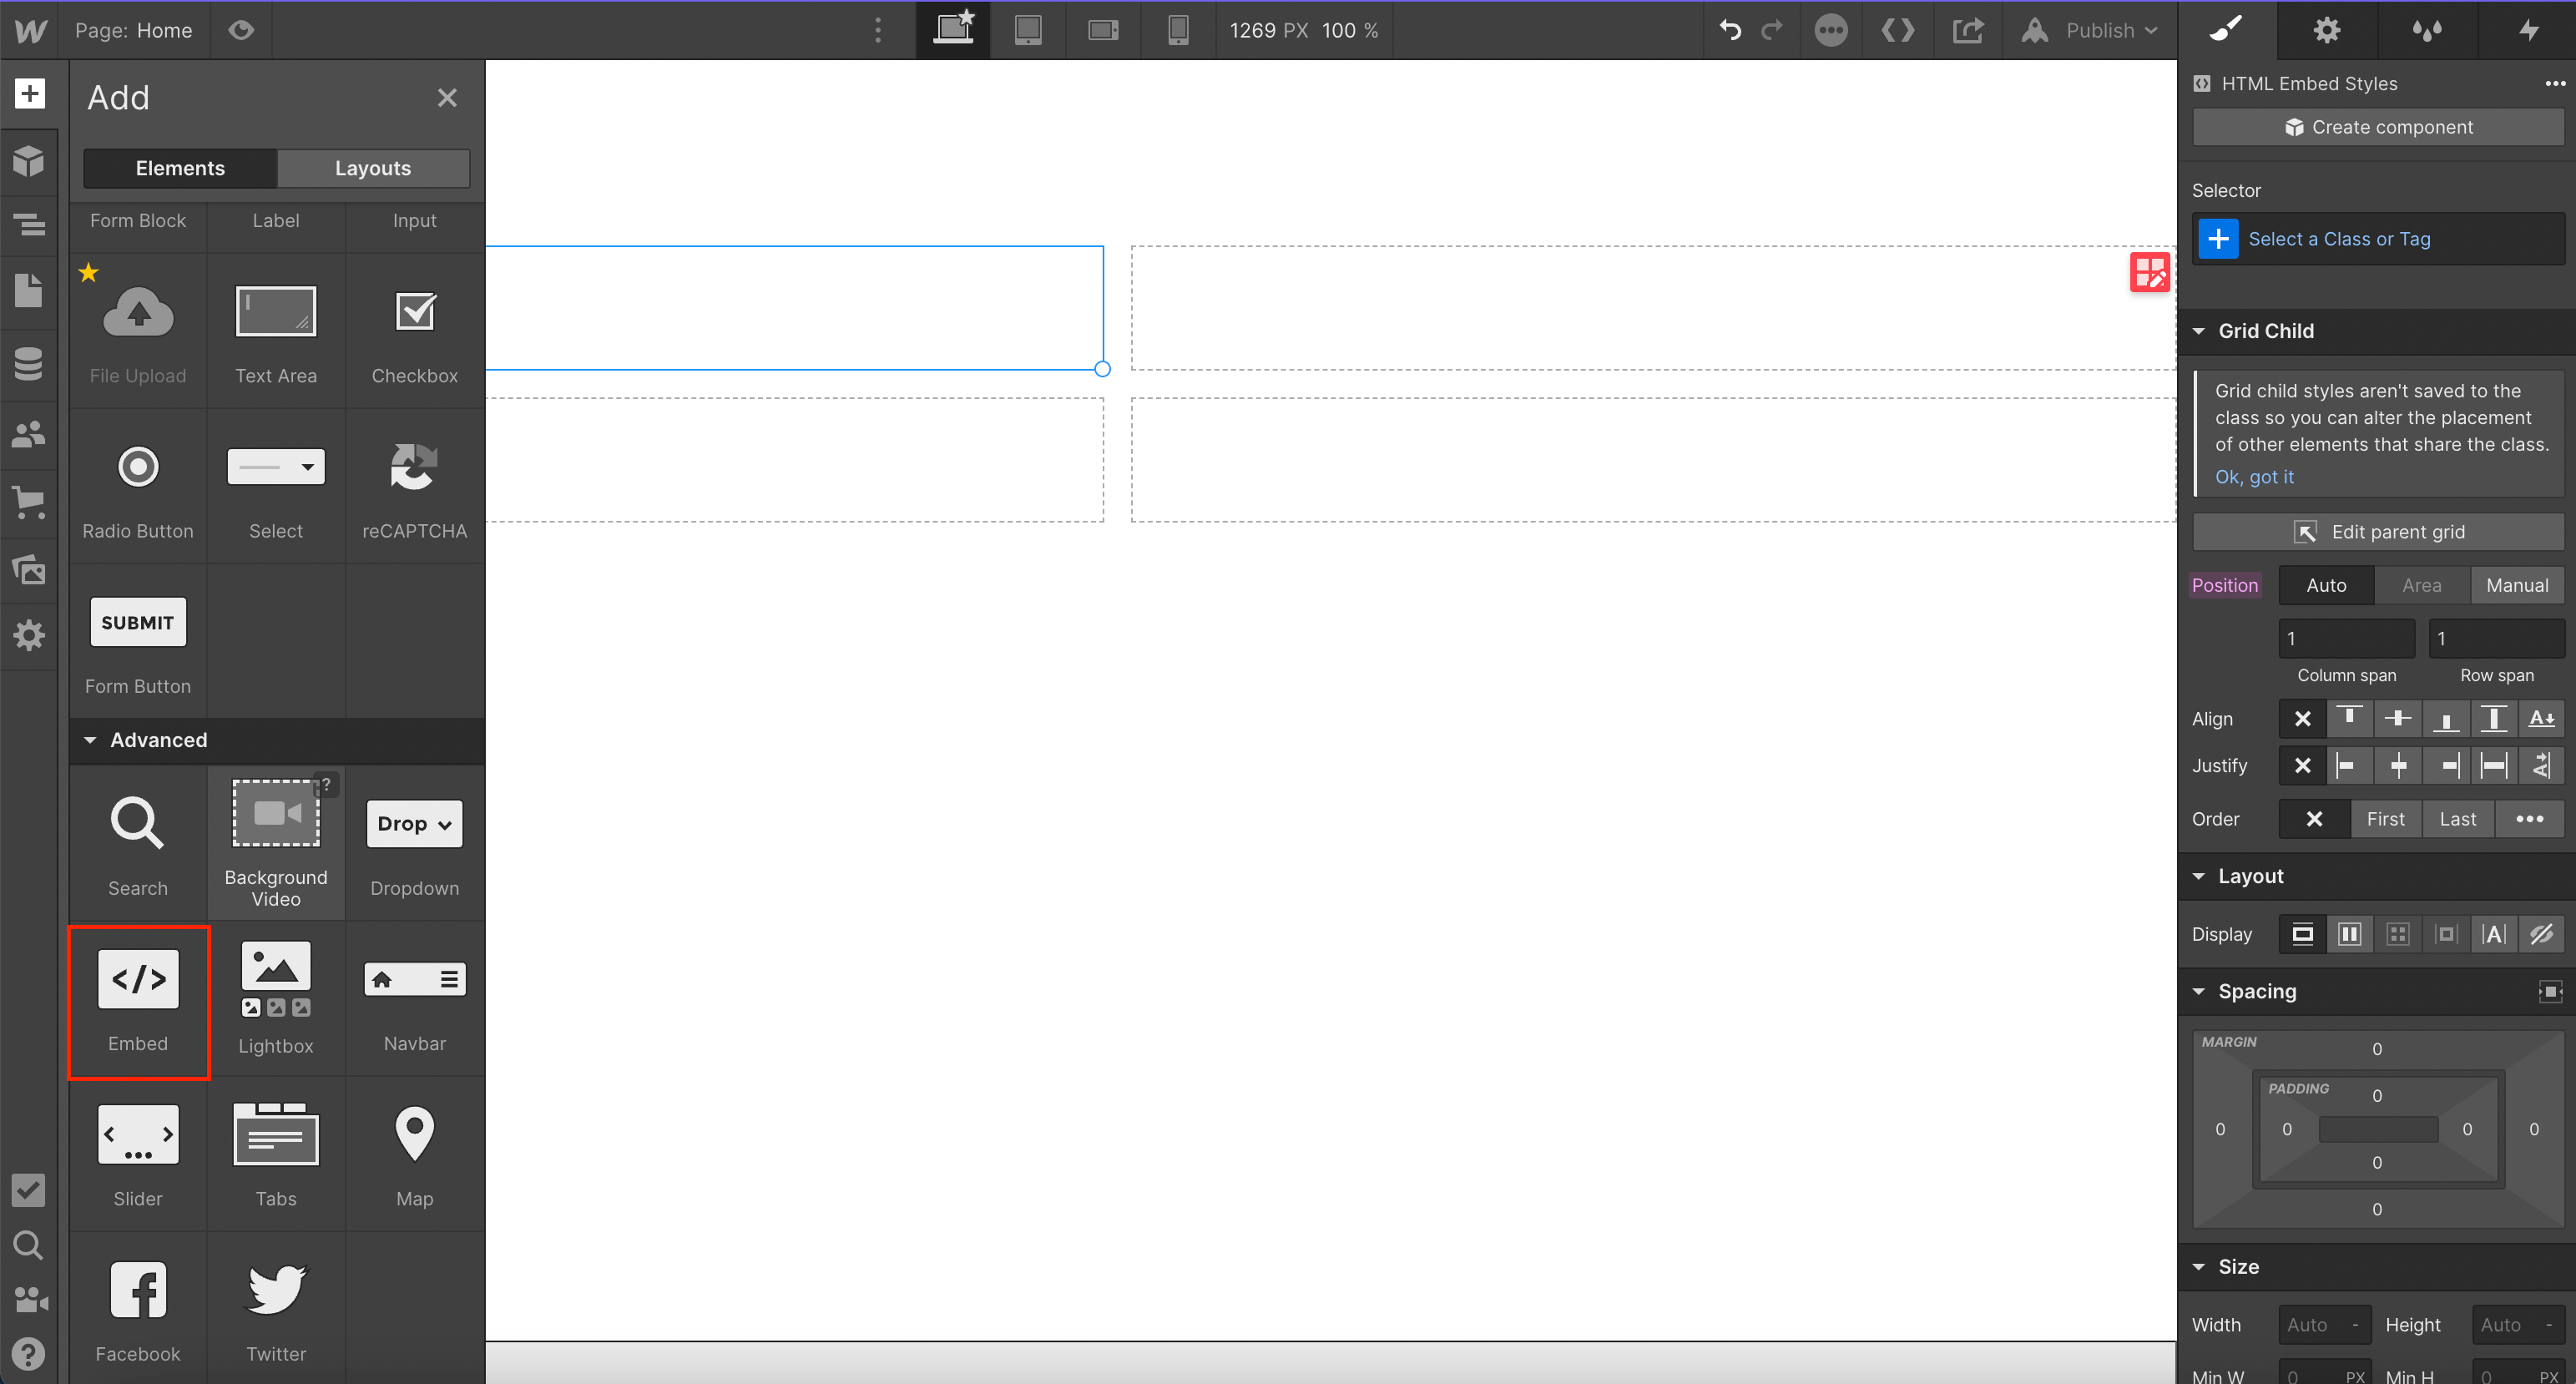
Log into Webflow, and then go into your Webflow editor. Click on the Add button (with a + icon) in the left panel, and scroll down to find the "Embed" block. Drag this block to anywhwere on your site.
-
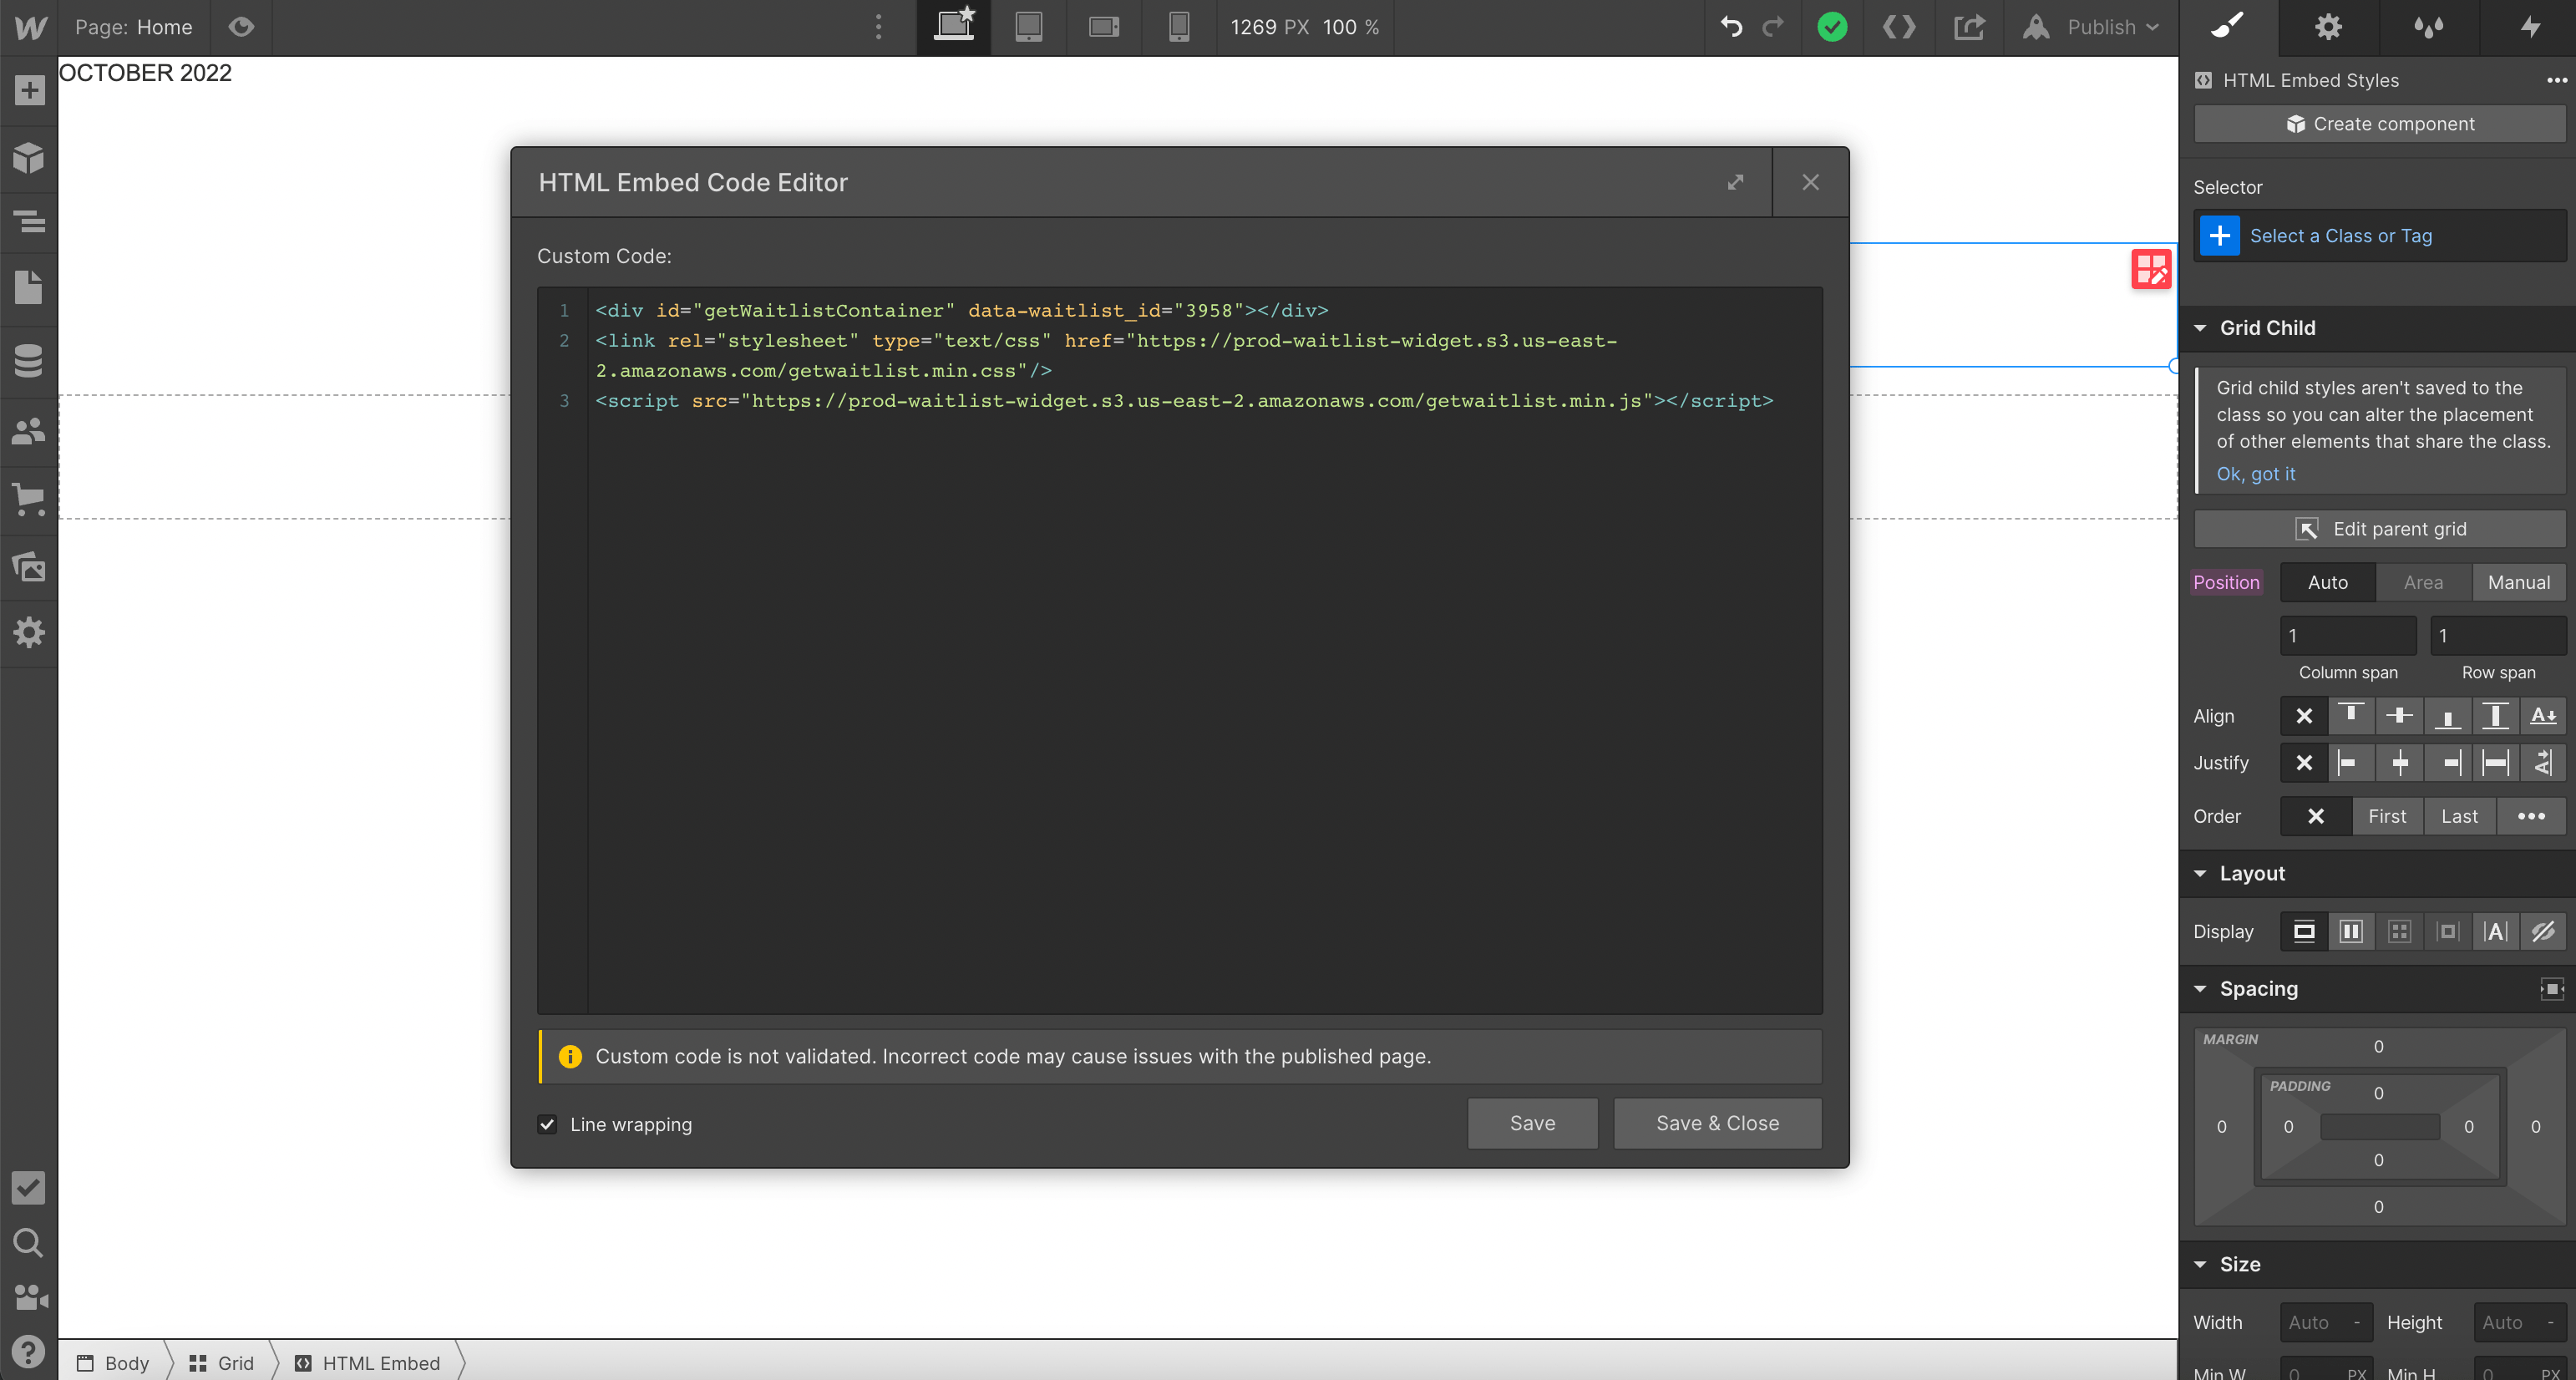
An HTML code editor should pop up. Paste the snippet from getwaitlist.com into your code editor. Importantly, you need to paste the three lines exactly in the same order.
-
You should see a gray block with the text "This
<script>embed will only appear on the published/exported site."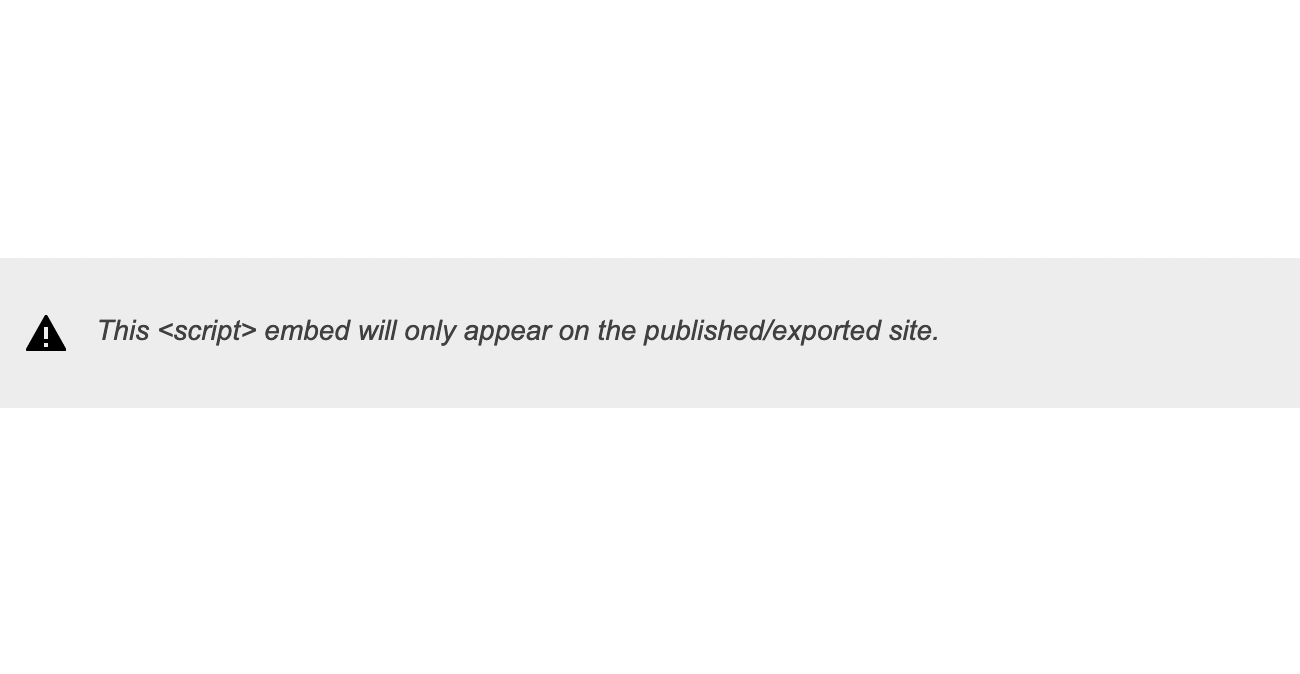
-
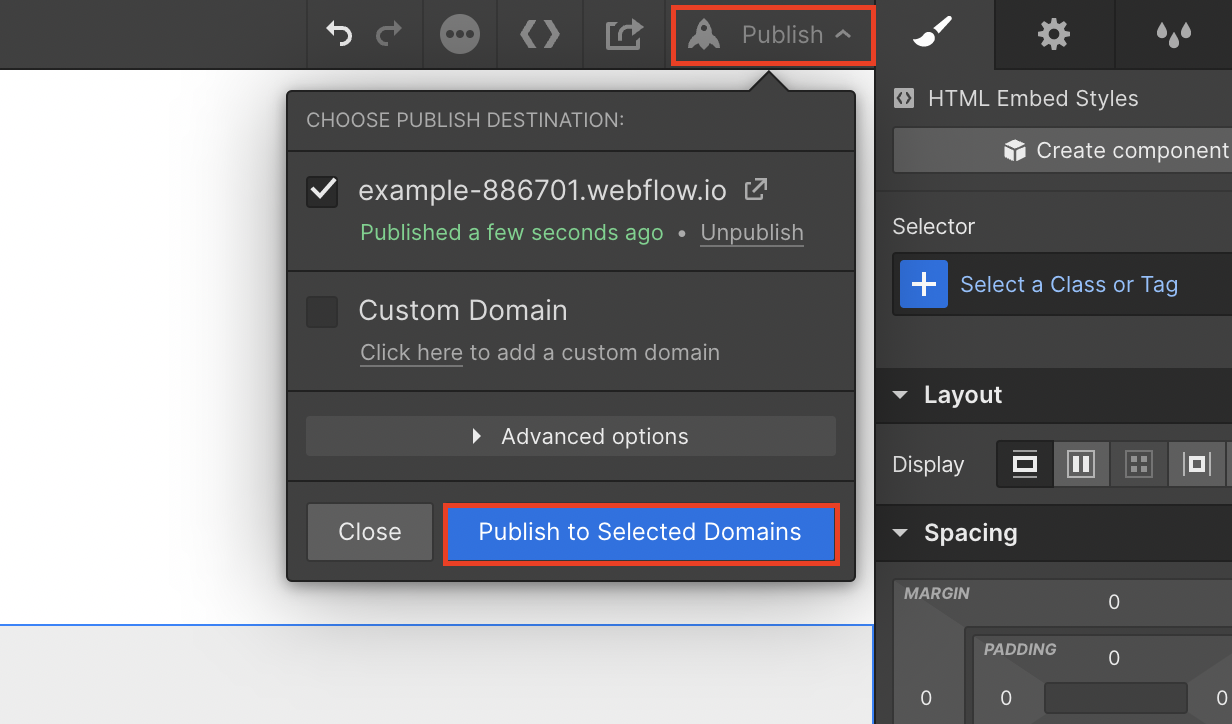
To see the live widget we need to publish the site in Webflow. To do that, click "Publish" on the top right, select your site and click "Publish to Selected Domains".
-
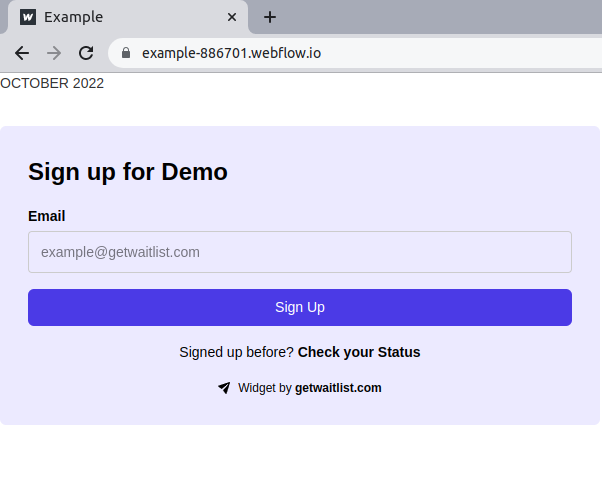
Now you can open your Webflow site in a new page and see the live widget!
-
Once you've got the widget live on your webflow page, put in a test signup to make sure everything works correctly.
Custom Script
Using the custom script allows you to build your desired form UI using and still have GetWaitlist on the backend to handle form submissions. Here's how:
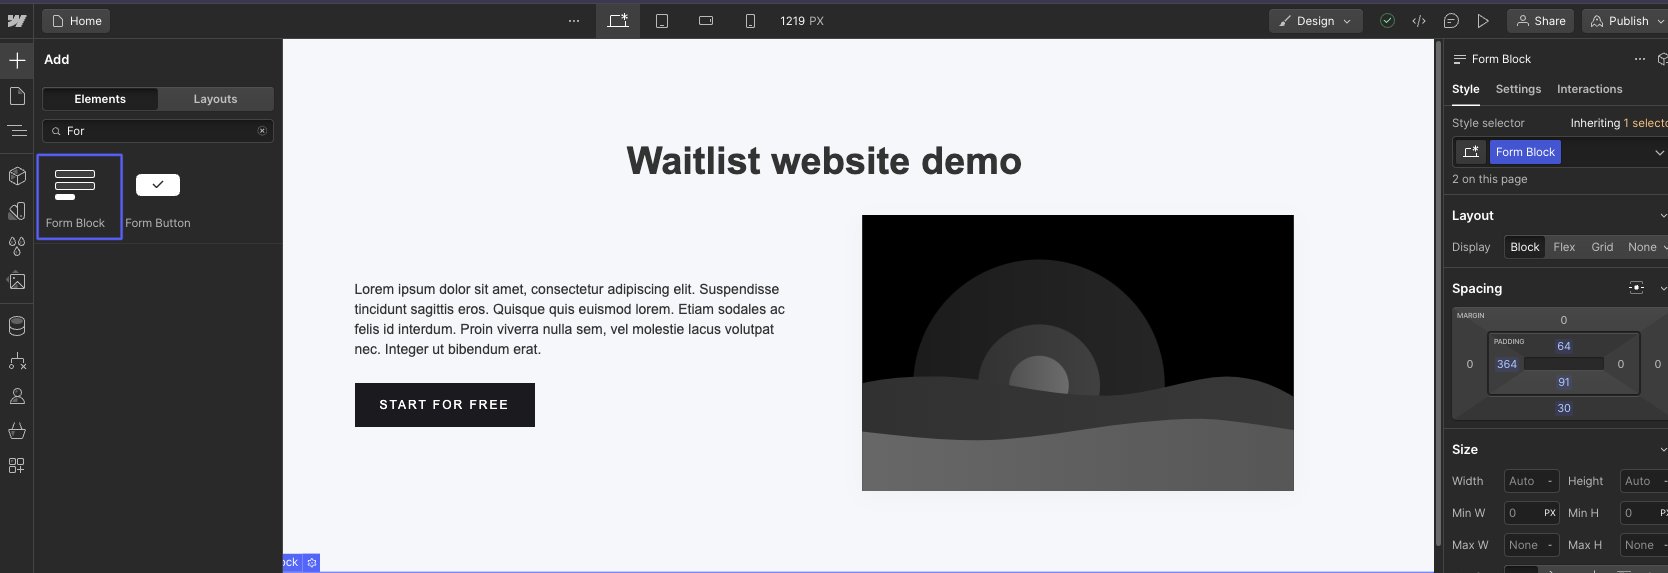
- Log into Webflow, and then go to your Webflow editor. Click on the Add button (with a + icon) in the left panel, and scroll down to find the
"Form block" (you can also search for this). Drag this block to anywhere on your site.
- After this, go to the form block settings and make three important changes;
- Set the Name of the form to
waitlist-custom-form. - Set the form action to
https://api.getwaitlist.com/api/v1/waitlists/<YOUR_WAITLIST_ID>. - Set the Form method to
POST. Make sure that you have done this correctly, as this step is crucial for your form to function properly.
- Set the Name of the form to
- Next, you can add text fields to this form block to receive data. For example, to collect the email of the user on Sign Up, you can
set the
namefield of the text input toemail. Supported field names arefirst_name,last_name,email, andphone.
- Finally, you'll need to add a custom script to your editor. Click on the Add button (with a + icon) in the left panel, and scroll down to find the "Code Embed" (you can also search for this). Click on this, and a Code Embed Editor should pop-up.
- Inside of the Embed editor, you'll need to add
<script src="https://prod-waitlist-widget.s3.us-east-2.amazonaws.com/getwaitlist.min.js" data-waitlist-mode="CUSTOM"></script>, then click on the "Save & Close" button.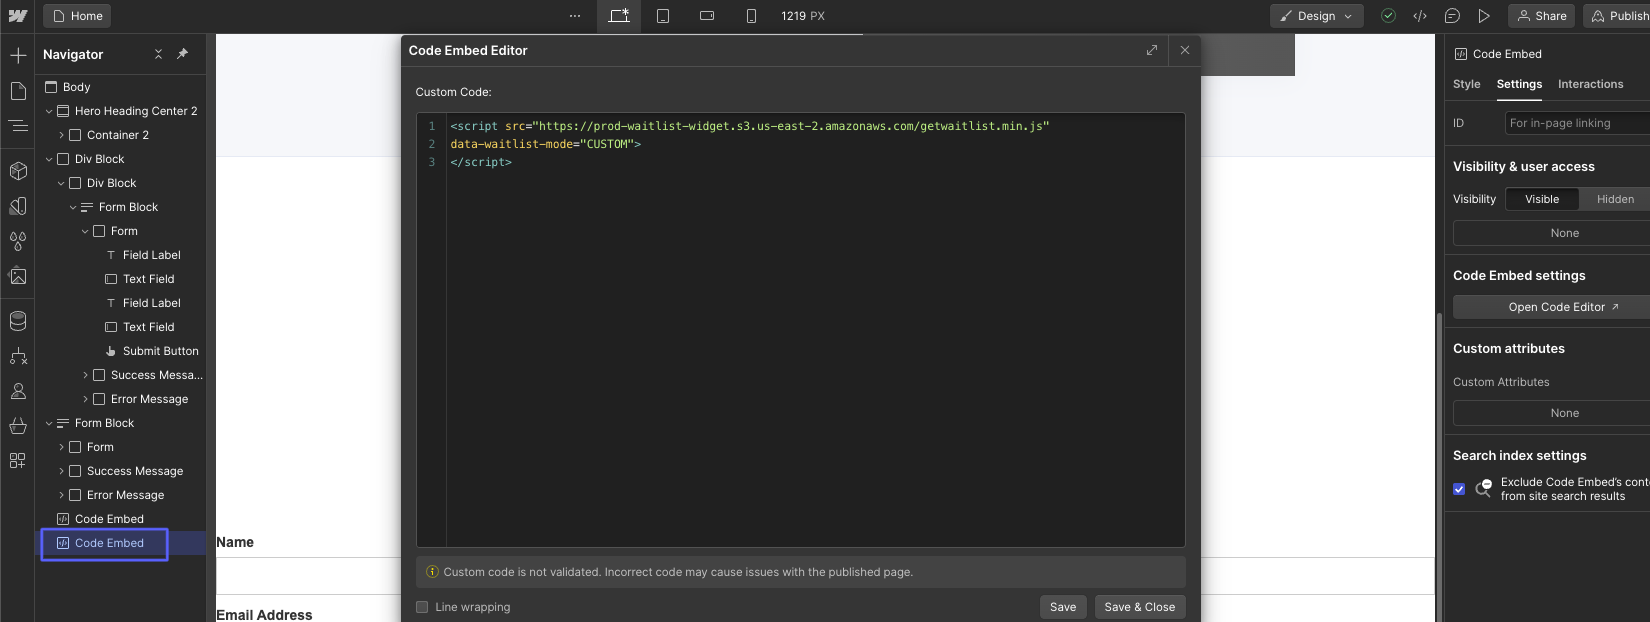
- Publish your site, and test your form. Everything should be working smoothly now!
Troubleshooting
If you need any help integrating your Waitlist Widget into your Webflow page, please reach out to us at any time at [email protected]. Advisory warning: compared to most other website builders (Squarespace, Typedream, etc.) we see issues most often with Webflow. If you have the option to build your website on another service like Framer or Wix, we tend to recommend that instead.
Customization
For more waitlist form customization, check out the Widget Embed Options.